You know that moment on Thanksgiving when you’re juggling turkey timers, scrambling for oven space, and realizing you forgot dessert? Yeah, me too—until I discovered the magic of make-ahead Thanksgiving desserts. One year, mid-potato-peeling panic, I pulled a gorgeous chilled cheesecake from the fridge that I’d made three days prior. The compliments poured in, and nobody guessed it was my secret stress-saver! That’s when I became a convert. These beauties not only taste better after resting (hello, flavor melding!), but they’ll free up your holiday for what matters—sneaking stuffing samples and debating pie vs. cake with your cousins.
Why You’ll Love These Make-Ahead Thanksgiving Desserts
Oh honey, let me count the ways these desserts will become your new Thanksgiving superheroes! First off, they’re sanity-savers—imagine not having to bake while simultaneously wrestling with turkey and entertaining Aunt Edna. The stress relief alone is worth it. Plus, they actually taste better after chilling overnight—the flavors get all cozy and melded together. And here’s my favorite part: you get to be that smug host who casually says « Oh this? I just pulled it from the fridge » while everyone thinks you’re a kitchen wizard. Win-win!
Ingredients for Make-Ahead Thanksgiving Desserts
Gathering your ingredients is the first step to stress-free holiday baking, and I always lay everything out like I’m preparing for a delicious science experiment. The beauty of this recipe? You probably have most items in your pantry already! Just two simple components—but oh, how they come together to create magic. Pro tip from someone who’s learned the hard way: check your cream cheese expiration date before you start mixing. Nothing ruins Thanksgiving prep like an emergency grocery run!
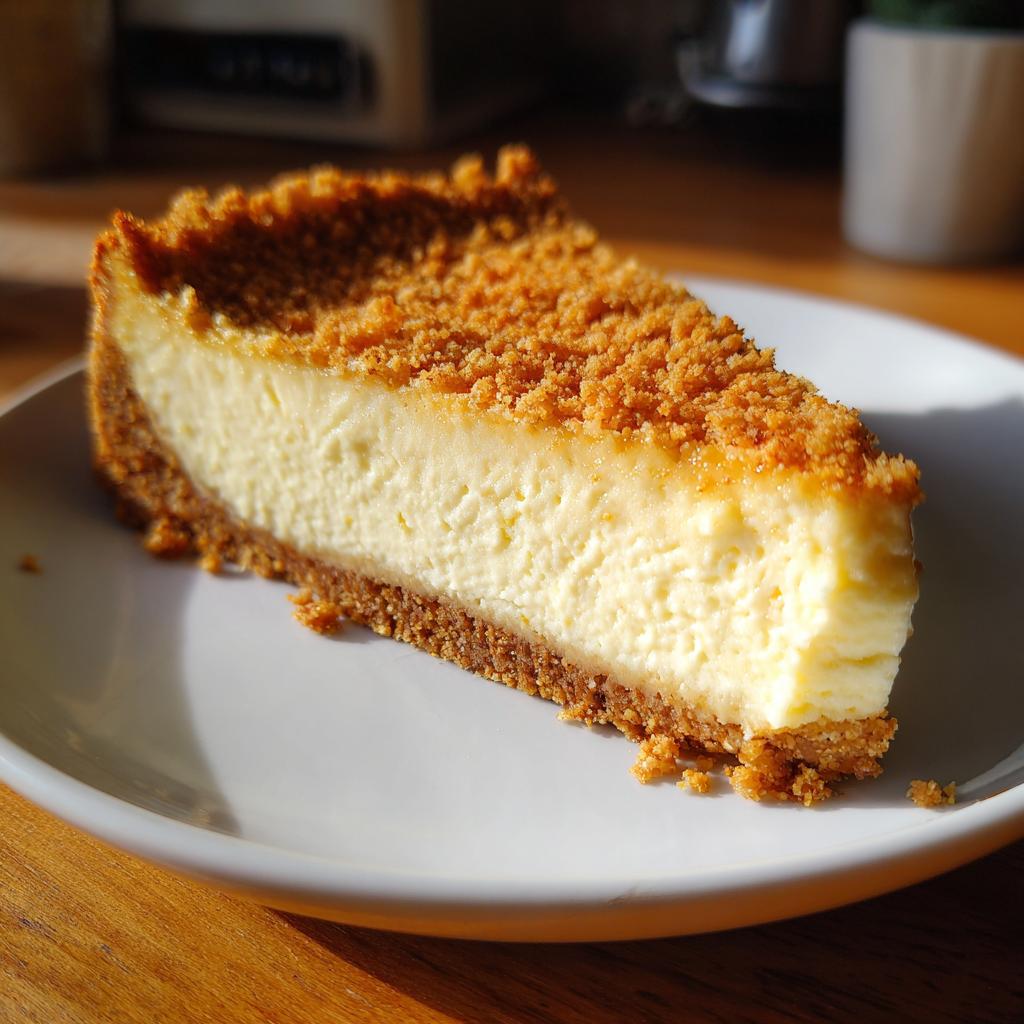
For the Crust
This buttery graham cracker base is so simple, my 8-year-old niece could make it (and actually did last year!). You’ll need:
- 1.5 cups graham cracker crumbs (about 10 full sheets crushed—but the pre-crumb kind works in a pinch!)
- ½ cup melted butter (unsalted is my go-to, but salted gives a nice sweet-savory twist)
- ¼ cup sugar (regular granulated works perfectly—no fancy stuff needed here)
Psst—if you’re feeling adventurous, swap half the graham crackers for gingersnaps. The spicy kick is amazing with the creamy filling!
For the Filling
This silky-smooth center is where the real decadence happens. Gather:
- 16 oz cream cheese (yes, the full blocks—and please let them soften for at least an hour! Cold cream cheese = lumpy sadness)
- ¾ cup sugar
- 1 tsp vanilla extract (the real stuff, not imitation—this is a holiday dessert, after all)
- 2 large eggs (room temperature blends smoother, but I’ve used cold eggs in a pinch without disaster)
See? Nothing complicated—just quality ingredients that transform into something spectacular after a night in the fridge.
How to Make Make-Ahead Thanksgiving Desserts
Alright, let’s get to the good part—turning those simple ingredients into a dessert that’ll have your guests begging for the recipe! I’ve made this more times than I can count (my waistline can confirm), so trust me when I say these steps are foolproof. The secret? Take your time and don’t rush—your future self will thank you when that perfect slice slides onto the plate come Thanksgiving.
Preparing the Crust
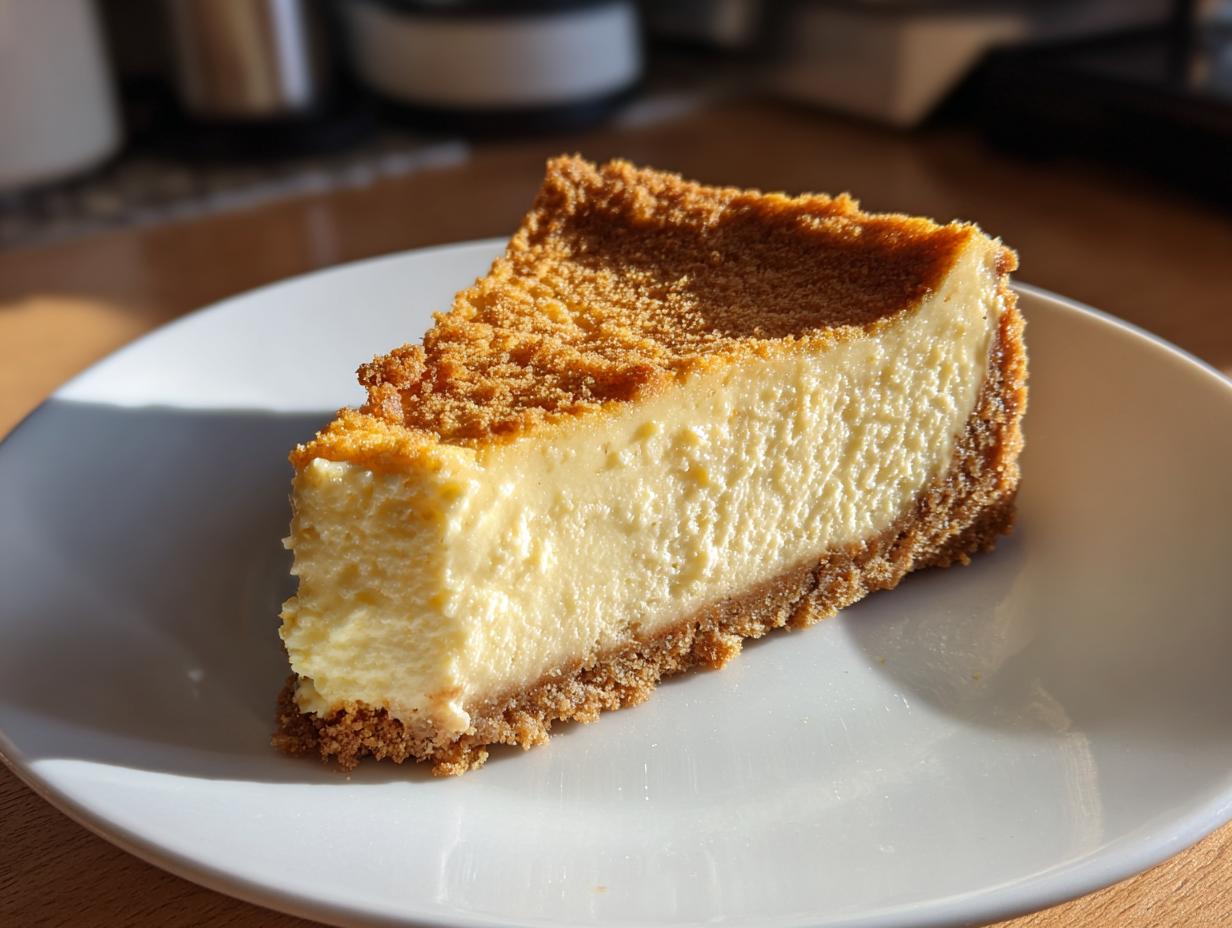
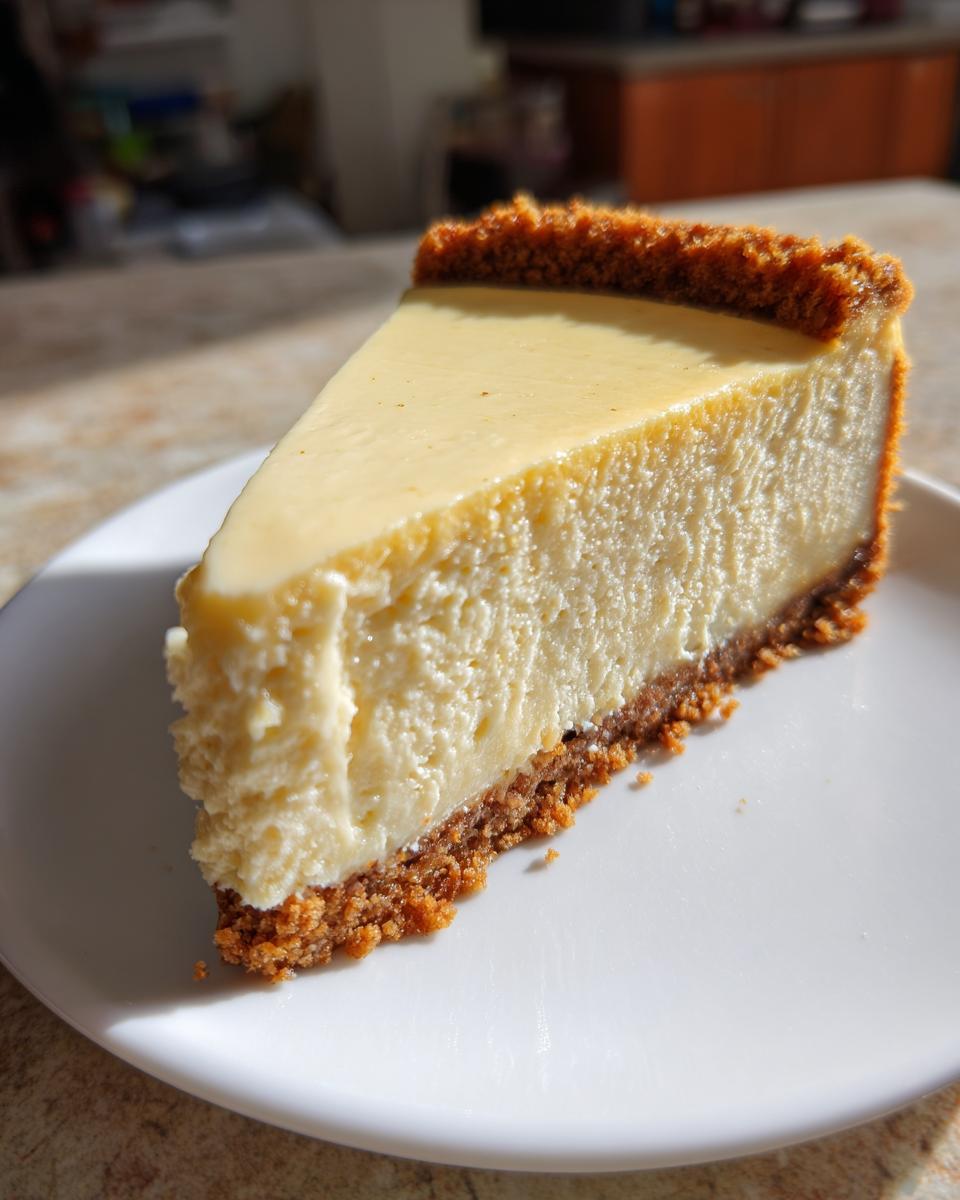
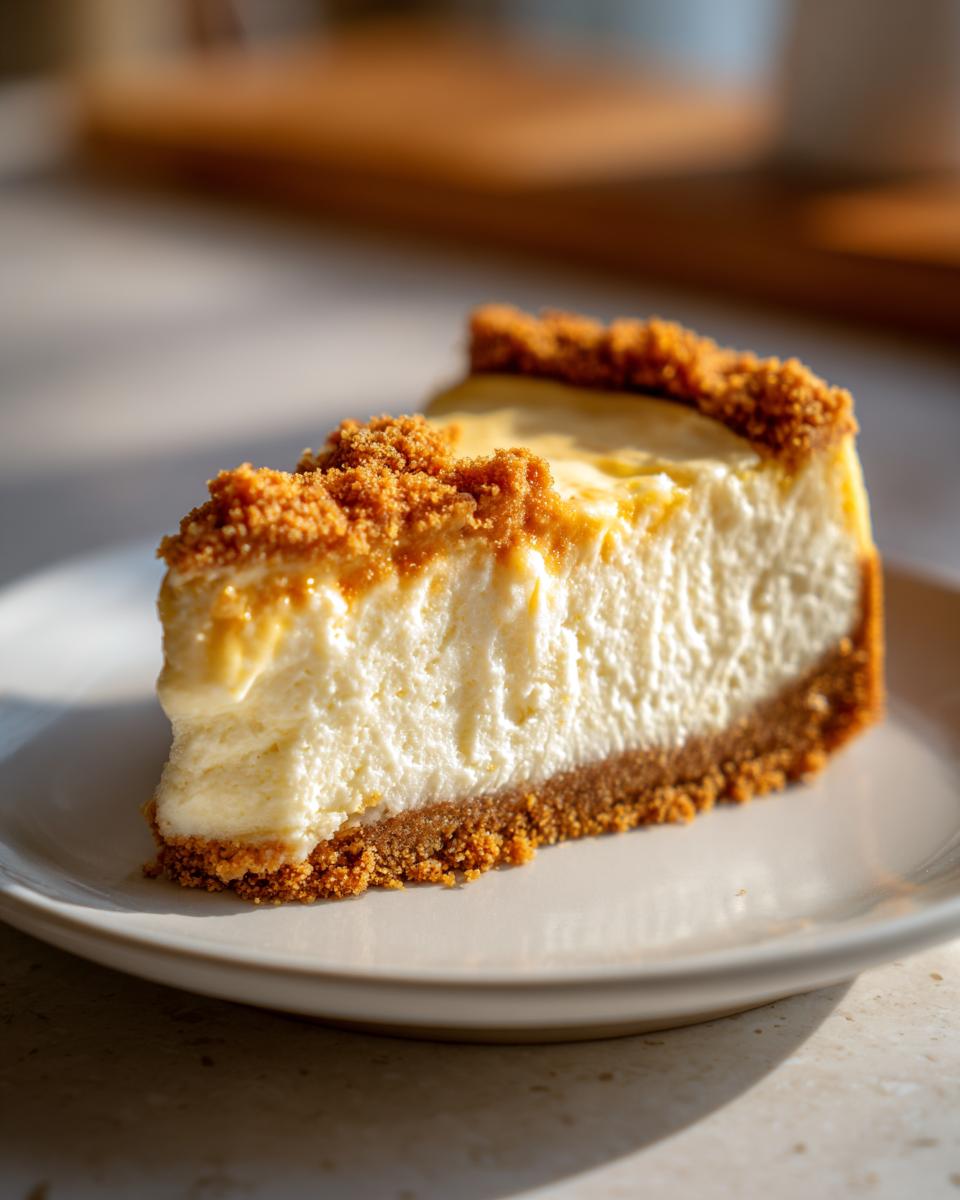
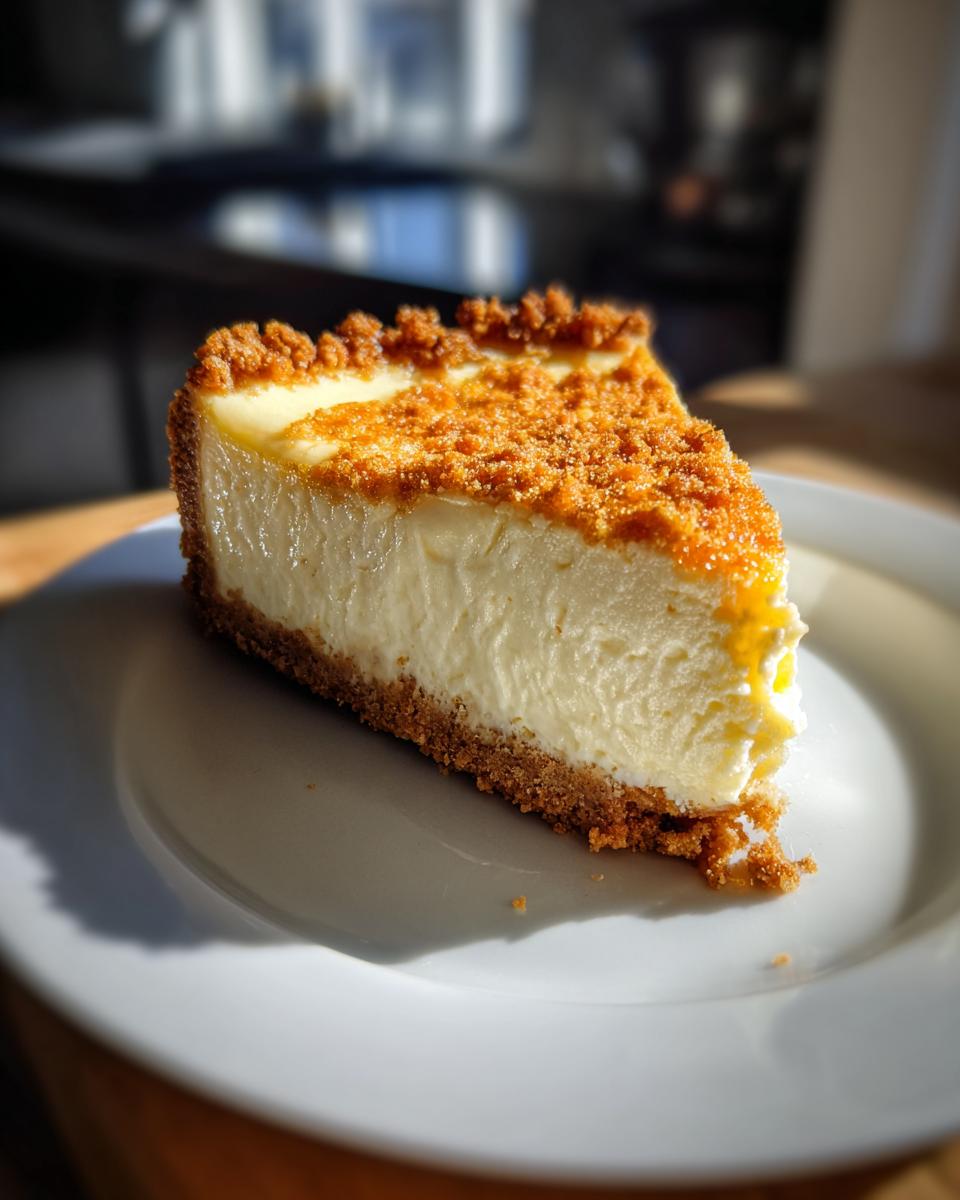
First things first—that buttery, crumbly base that makes this dessert so darn addictive! Grab a mixing bowl and toss in your graham cracker crumbs, melted butter, and sugar. Now, here’s my trick: stir it with a fork first to prevent clumps, then get in there with your hands to really feel the mix. You want it to hold together when squeezed—like damp sand at the beach. Press it firmly into your dish using the bottom of a measuring cup for an even layer. Pro tip: go slightly up the sides to prevent the filling from sticking—it makes serving way easier!
Making the Filling
Time for the star of the show! Whip your softened cream cheese first—this is crucial for that silky texture. I use my stand mixer on medium, but a hand mixer works great too. Beat in the sugar and vanilla until it’s completely smooth—no lumps allowed! Then add eggs one at a time, mixing just until blended after each. Overbeating incorporates too much air and can cause cracks (not pretty but still tasty!). The filling should look like melted ice cream—thick but pourable. Pour it gently over your crust, then give the pan a little shake to level it out.
Baking and Chilling
Pop your masterpiece into a preheated 350°F oven—middle rack, please! Bake for about 45 minutes until the edges are set but the center still jiggles slightly when nudged. This isn’t a cake—we want custardy perfection, not firm. Let it cool completely on the counter (about an hour), then refrigerate for at least 2 hours, though overnight is magic. The waiting is tough, I know! But this chill time lets everything set properly so you get those picture-perfect slices. Cover loosely with foil in the fridge if you’re prepping more than a day ahead.

Tips for Perfect Make-Ahead Thanksgiving Desserts
After fifteen years of Thanksgiving baking disasters (oh, the horror!), I’ve collected some golden rules that’ll make your make-ahead desserts foolproof. First—and I cannot stress this enough—that cream cheese must be properly softened. I leave mine out overnight, but if you forget like I did last November, microwave it at 20% power in 15-second bursts. You’ll thank me when your filling is silky instead of lumpy!
Here’s my confession: I used to overmix like a DJ at a dance party. Now I stop the mixer the moment everything combines—just until no streaks remain. Overbeating lets too much air in, causing cracks when cooling. Speaking of cooling, resist the urge to peek at your dessert early! The center should jiggle like Jell-O when you nudge the pan—not ripple like a wave pool. Let it chill undisturbed overnight; the flavors will deepen beautifully while you sleep. Last tip? Run a thin knife around the edge before cutting—it keeps those first slices from sticking to the pan. Genius, right?
Variations for Make-Ahead Thanksgiving Desserts
Oh, the fun we can have with this recipe! Once you’ve mastered the basic version (which is heavenly on its own), try these easy twists to keep things exciting. My personal favorite? Swapping half the graham crackers for crushed ginger snaps—the spicy warmth plays so nicely with the creamy filling. Feeling fancy? Drizzle melted chocolate over the top before chilling, or swirl in some pumpkin puree for autumnal vibes. Last Thanksgiving, I layered fresh cranberry sauce between the crust and filling—tart perfection! The best part? All these variations still work beautifully when made ahead, because stress-free holidays are the real goal here.
Serving Suggestions
Now for the best part—making your make-ahead dessert look as gorgeous as it tastes! I love dolloping freshly whipped cream on top right before serving – it adds that perfect cloud-like contrast to the creamy filling. Fresh berries are a must too—raspberries or strawberries arranged artfully will have your guests swooning. Drizzle with caramel or chocolate sauce for extra holiday pizzazz (my kids call it « fancy dessert mode »). And here’s my secret weapon: a dusting of cinnamon or nutmeg right on top—it smells like Thanksgiving in a spoonful!
Storage and Reheating Instructions
Here’s the beautiful thing about make-ahead desserts—they actually improve with time in the fridge! Once cooled, cover your dish tightly with plastic wrap or aluminum foil (I press it directly on the surface to prevent that weird skin from forming). It’ll stay delicious for up to 5 days, though let’s be real—it’ll disappear way before then! If you must freeze it (hello, January treat!), wrap individual slices in parchment first, then foil, and they’ll keep for about 2 months. Thaw overnight in the fridge when cravings strike. No reheating needed—this beauty is meant to be enjoyed cold, straight from the fridge to your happy belly!
Nutritional Information
Now, I’m no nutritionist—just a dessert enthusiast who believes in balance (and second helpings)! These numbers are estimates based on standard ingredients, but your mileage may vary depending on brands and substitutions. Remember, it’s Thanksgiving—calories don’t count when it’s shared with loved ones! That said, this dessert packs plenty of creamy richness while still being manageable for holiday indulgence. As my grandma used to say while slicing thirds: « A little joy is good for the soul! »
Frequently Asked Questions
Can I freeze this make-ahead Thanksgiving dessert?
Absolutely! In fact, I always stash an extra one in the freezer for those post-holiday cravings. Just wrap it tightly in plastic wrap, then foil—it’ll keep beautifully for up to 2 months. Thaw overnight in the fridge when you’re ready to indulge. The texture might be slightly denser after freezing, but the flavor stays just as delicious!
How far in advance can I make this dessert?
Here’s the magic—you can make this up to 5 days before Thanksgiving! The flavors actually improve as they meld together in the fridge. I usually bake mine on Monday for Thursday’s feast. Just keep it covered in the refrigerator, and resist the urge to sneak too many « taste tests » before the big day.
Can I use a different crust?
Oh honey, get creative! I’ve used everything from crushed Oreos to shortbread cookies—they all work wonderfully. My Thanksgiving favorite? Pecan sandies for that extra festive touch. Just keep the same butter-to-crumb ratio (about ½ cup melted butter per 1.5 cups crumbs), and you’re golden. The filling plays nicely with almost any crunchy base!
Why does my filling have cracks?
Don’t panic—I’ve been there! Cracks usually mean we got a bit overzealous with mixing (guilty!) or cooled it too quickly. Next time, mix just until combined and let it cool gradually on the counter before refrigerating. But here’s my little secret: a dollop of whipped cream covers a multitude of sins—and nobody will ever know!
Make-Ahead Thanksgiving Desserts
Ingrédients
Equipment
Method
- Preheat the oven to 350°F (175°C).
- Mix graham cracker crumbs, melted butter, and sugar in a bowl. Press the mixture into a baking dish to form the crust.
- Beat cream cheese, sugar, and vanilla extract until smooth. Add eggs one at a time, mixing well after each addition.
- Pour the filling over the crust. Bake for 45 minutes or until set.
- Let the dessert cool, then chill in the refrigerator for at least 2 hours before serving.