There’s something magical about holiday treats that makes the season feel complete. I still remember the first time my niece and I made these together – flour everywhere, sprinkles stuck to our fingers, and that warm, buttery smell filling the kitchen. These simple little bites aren’t just delicious; they’re memory-makers. Whether it’s Christmas morning or a cozy winter gathering, these festive snacks have a way of bringing everyone together around the table. I love how something so easy to make can spark so much joy. Trust me, once you try this recipe, it’ll become your go-to for holiday cheer.

Why You’ll Love These Holiday Treats
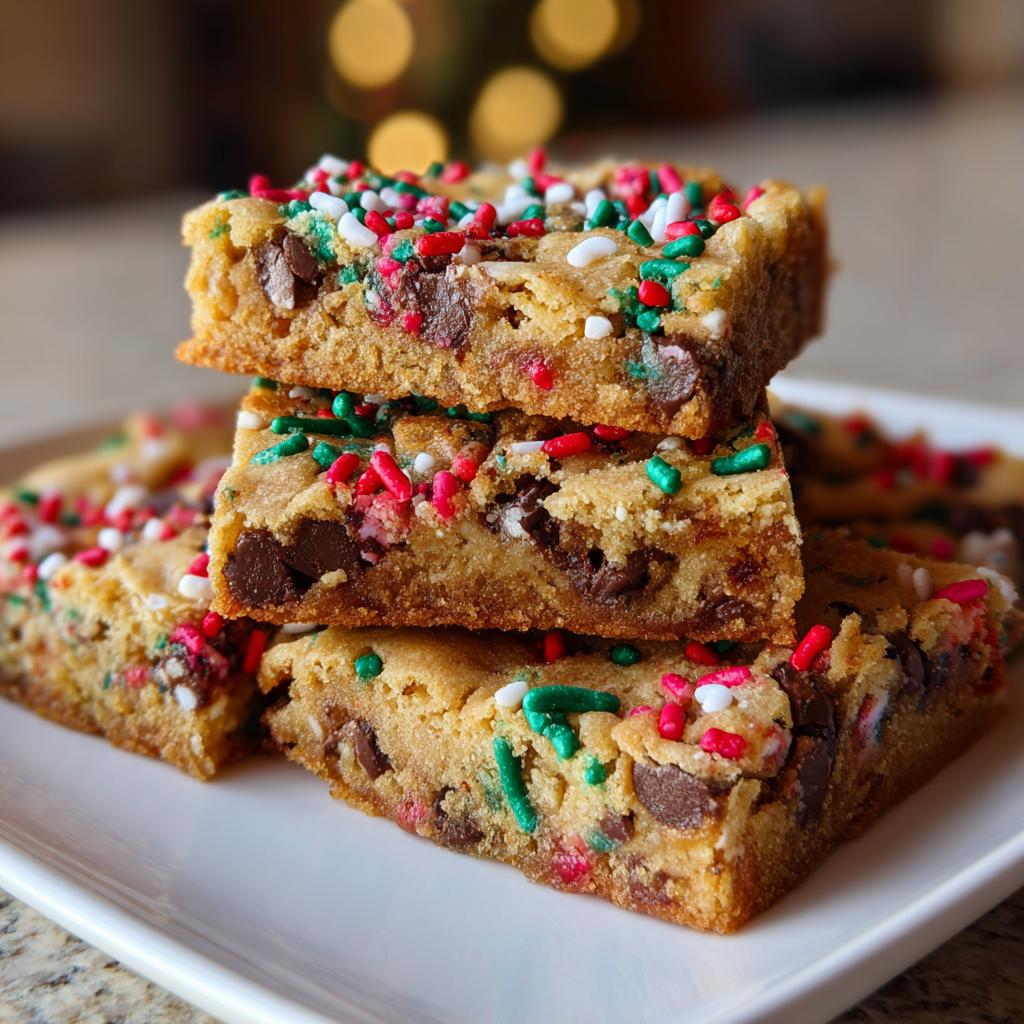
Oh my gosh, these little bites are absolute perfection for the holidays! Here’s why they never last long in my house:
- So easy even Santa could make them – Just mix, press, bake and decorate. No fancy skills needed!
- Festive as can be – Those holiday sprinkles make them look like you spent hours decorating when really it took seconds.
- Crowd-pleasing magic – The buttery base with melty chocolate? I’ve never met anyone who could resist just one more piece.
- Perfect for little helpers – Kids go wild sprinkling the toppings on. It’s our favorite messy holiday tradition.
Seriously, these treats disappear faster than cookies left out for Santa at our house every year!
Ingredients for Holiday Treats
Okay, let’s talk ingredients! The magic of these holiday treats comes from simple pantry staples that somehow transform into something magical. I’ve made these so many times I could probably do it in my sleep, but I still measure everything carefully – that’s the secret to perfect results every time.
For the Base
This is where the buttery magic happens. You’ll need:
- 2 cups all-purpose flour – Spoon it into the measuring cup and level it off, don’t scoop!
- 1/2 cup butter, softened – This means leave it out until it gives slightly when pressed (about 30 minutes). No microwave shortcuts here!
- 1/4 cup sugar – Just regular granulated sugar works perfectly.
See? Simple stuff you probably already have. That’s why I love this recipe so much!
For the Topping
Now for the fun part – the decorations!
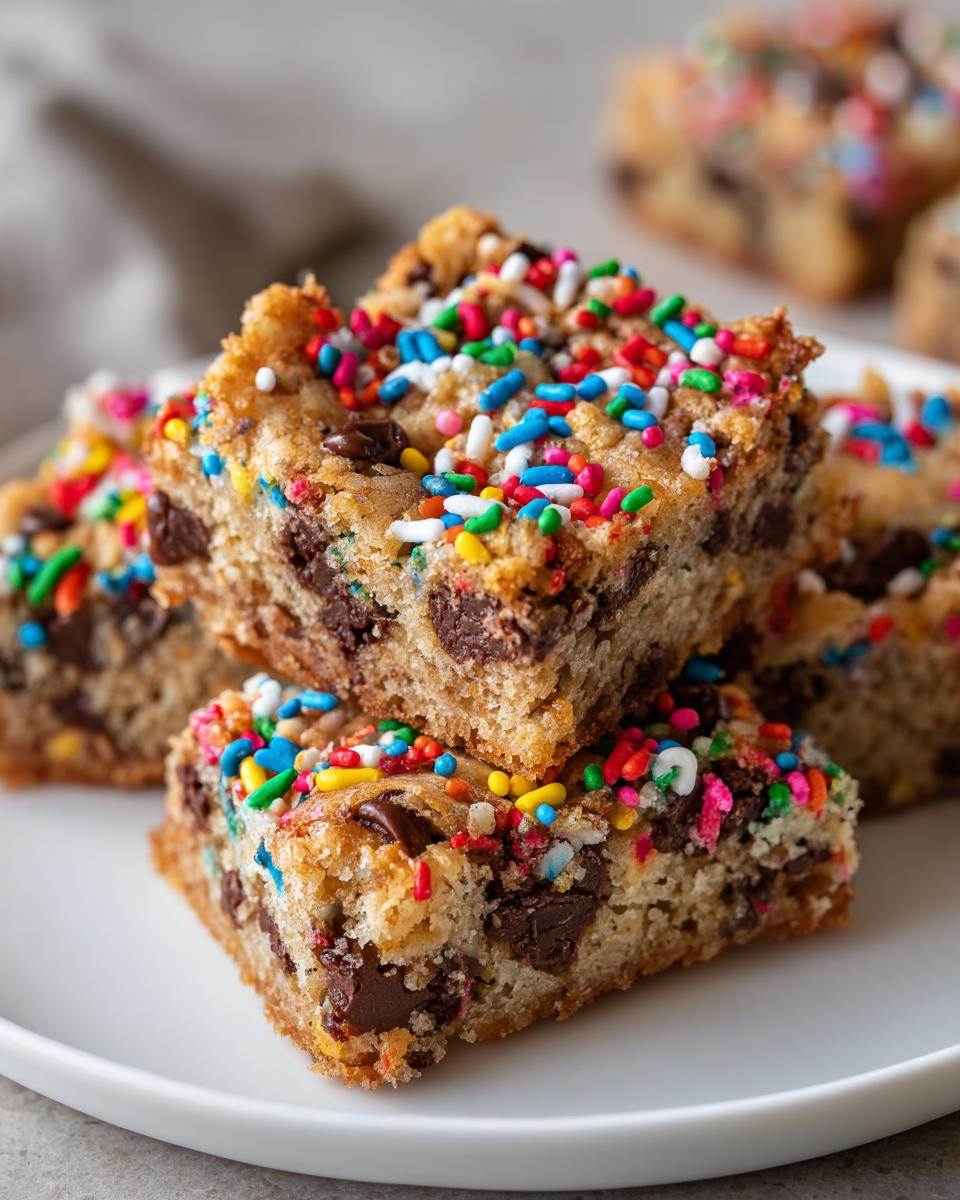
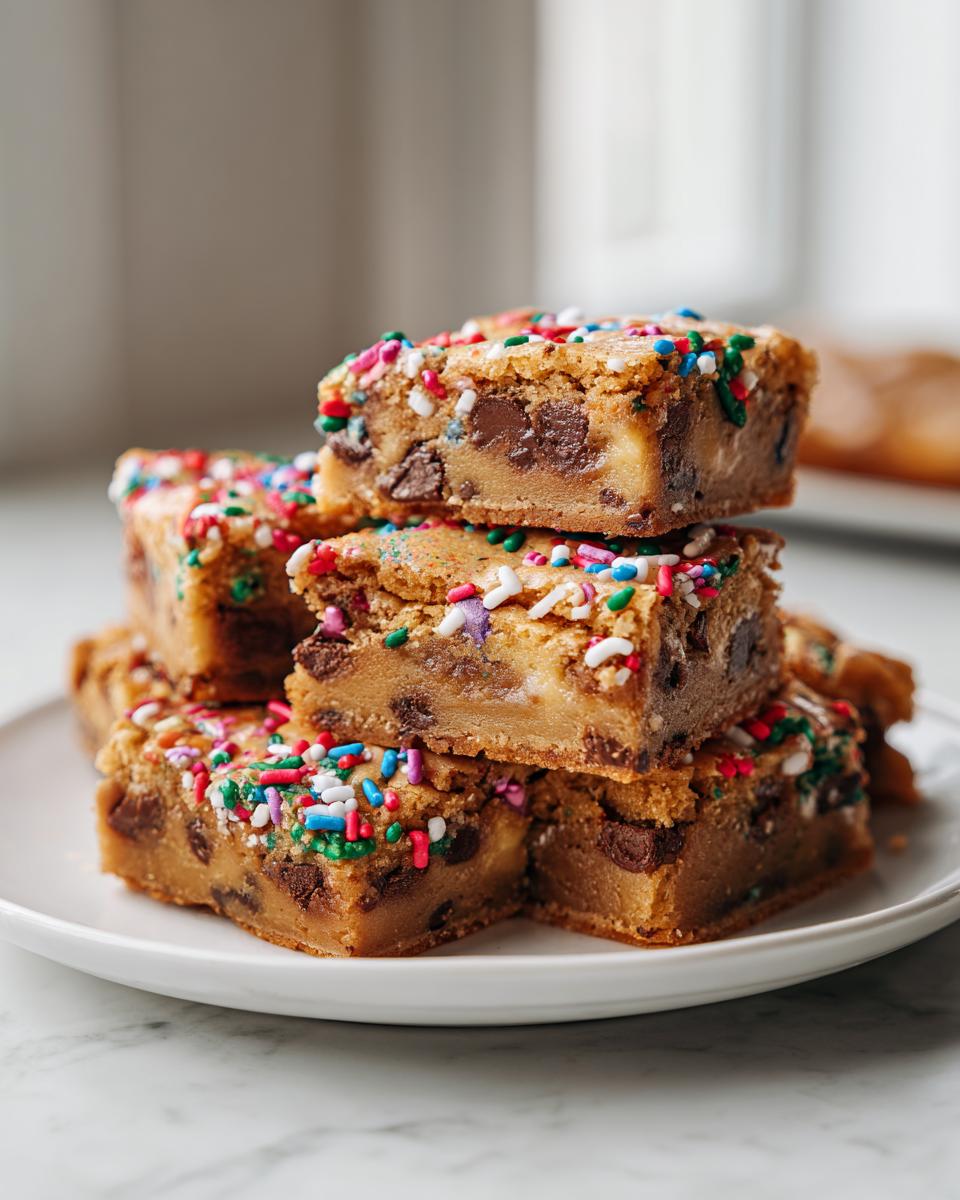
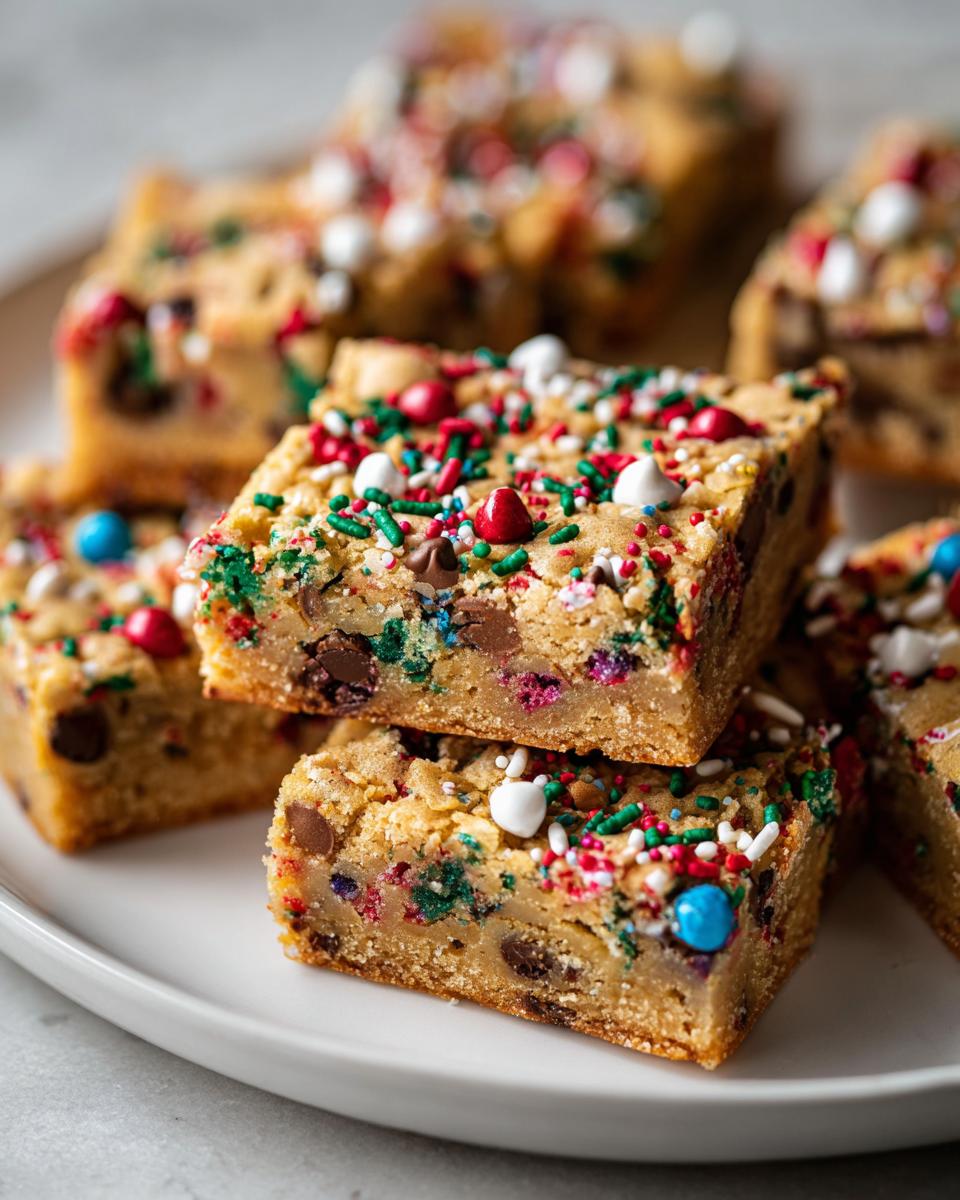
- 1 cup chocolate chips – I use semi-sweet, but milk chocolate works great too if you prefer sweeter.
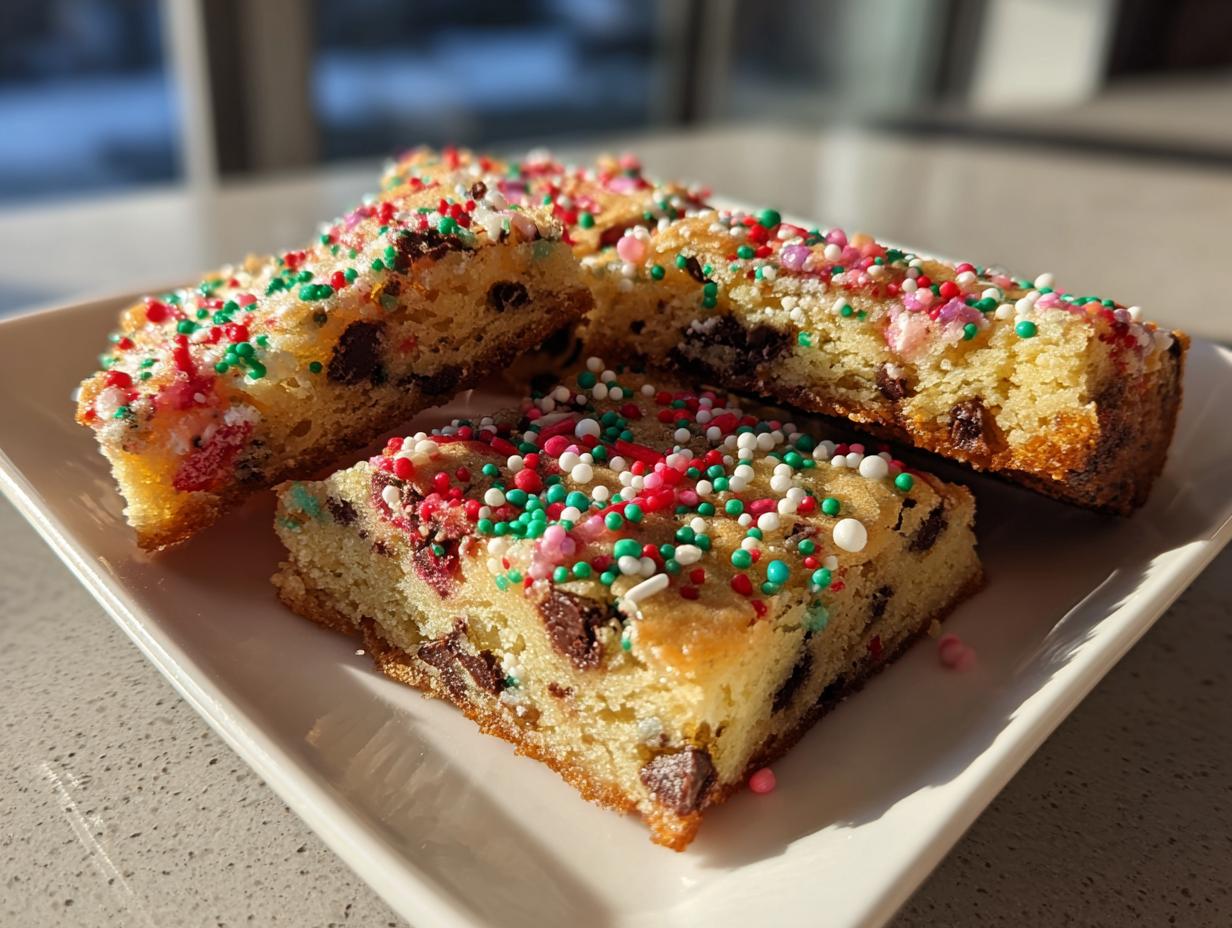
- 1/2 cup holiday-themed sprinkles – The red and green ones make them extra festive, but any sprinkles will do in a pinch.
Pro tip: Let the kids pick out the sprinkles – it makes them even more excited to help decorate!
How to Make Holiday Treats
Alright, let’s get baking! I’ve made these holiday treats so many times I could probably do it with my eyes closed, but I’ll walk you through each step carefully. The secret is in the timing – don’t rush the process and you’ll get perfect results every time.
1. Preheat that oven! First things first – turn your oven to 350°F (175°C). This gives it time to reach the perfect temperature while you prepare everything else. Trust me, starting with a properly heated oven makes all the difference.
2. Mix the dough Grab your mixing bowl and combine the flour, softened butter, and sugar. I like to use my hands (washed, of course!) to really work everything together until it forms a soft, slightly crumbly dough. If it seems too dry, add a teaspoon of water at a time until it comes together.
3. Press it in Take that beautiful dough and press it evenly into your baking sheet. I use my fingers to make sure it’s nice and compact – about 1/4 inch thick works perfectly. Pro tip: If the dough sticks to your fingers, dust them lightly with flour.
4. Bake to perfection Pop that baking sheet in the oven for exactly 10 minutes. Set a timer! You want the edges to just barely start turning golden. The magic happens in these last few minutes, so don’t walk away.
5. The fun part – toppings! As soon as you pull the baking sheet out, sprinkle those chocolate chips all over the hot surface. Watch them melt almost instantly – that’s when you add the sprinkles so they stick perfectly. The heat helps everything set up beautifully.
6. The hardest step – waiting Let the treats cool completely before cutting them into pieces. I know it’s tempting, but if you try to cut them while warm, they’ll crumble. I usually wait about 30 minutes – just enough time to clean up and make some hot cocoa to enjoy with your creations!
See? Simple as can be! In less time than it takes to watch a holiday special, you’ll have a batch of festive treats ready to share (or not share – no judgment here!).
Tips for Perfect Holiday Treats
After making these holiday treats more times than I can count, I’ve picked up some tricks that’ll guarantee perfect results every time. Here’s what I’ve learned through trial and (sometimes hilarious) error:
- Check your dough like a pro – It should hold together when squeezed but still crumble slightly. Too dry? Add a teaspoon of water. Too sticky? A dusting of flour fixes everything.
- Watch that baking time! Set a timer for 9 minutes and check – the edges should just start turning golden. They’ll continue cooking slightly after you pull them out.
- Get the kids involved – My niece loves being in charge of sprinkles (though we usually end up with more on the floor than the treats!). Give them their own little bowl to decorate from – it keeps the mess contained and makes them feel special.
- Cool completely before cutting – I know it’s hard to wait, but rushing this step leads to crumbly disasters. Use a pizza cutter for clean lines once they’re fully cooled.
Remember, even if they’re not picture-perfect, they’ll still taste amazing – that’s the real holiday magic!
Storage and Serving Suggestions
Here’s the best part about these holiday treats – they stay fresh and delicious for days! I always stash them in an airtight container at room temperature (if they last that long). The buttery base stays perfectly crisp while the chocolate stays just melty enough. For the ultimate holiday moment, serve them with steaming mugs of hot cocoa – the chocolate-on-chocolate combo is pure magic. They also make adorable edible gifts when stacked in little holiday tins with parchment paper between layers. Just don’t be surprised when everyone asks for the recipe!
Nutritional Information
Now, I’m no nutritionist, but I can tell you these holiday treats are all about joy, not counting calories! The nutritional values will vary depending on your specific ingredients – like whether you use milk or dark chocolate chips, or go heavy on those festive sprinkles (no judgment here!). Just know that each bite is packed with holiday happiness, and that’s what really matters this time of year, right?
FAQs About Holiday Treats
Can I use margarine instead of butter?
Oh honey, I get this question all the time! While margarine will work in a pinch, butter is my absolute must for these holiday treats. That rich, creamy flavor just can’t be beat. Margarine tends to make them a bit softer and less flavorful – and we want that perfect buttery crunch! My grandma would roll over in her grave if she caught me using anything but real butter. Trust me, it’s worth the splurge for that authentic holiday taste.
How long do they stay fresh?
They’ve never lasted more than two days in my house (seriously, they disappear like magic!), but properly stored in an airtight container at room temperature, these treats stay fresh for about a week. The chocolate might lose its shine after a few days, but they’ll still taste amazing. I like to make a double batch and hide half for later – though my niece always seems to find my hiding spots!
Can I freeze these treats?
Absolutely! These freeze like a dream – just cut them first before freezing so you can grab a few at a time. Layer them between parchment paper in an airtight container and they’ll keep for up to 2 months. When you’re ready, let them thaw at room temperature for about 30 minutes. The sprinkles might bleed a tiny bit when thawing, but they’ll still taste perfect with your holiday coffee!
Holiday Treats
Ingrédients
Equipment
Method
- Preheat the oven to 350°F (175°C).
- In a mixing bowl, combine flour, butter, and sugar to form a dough.
- Press the dough into a baking sheet and bake for 10 minutes.
- Remove from the oven and sprinkle chocolate chips and sprinkles on top.
- Let cool before cutting into pieces.