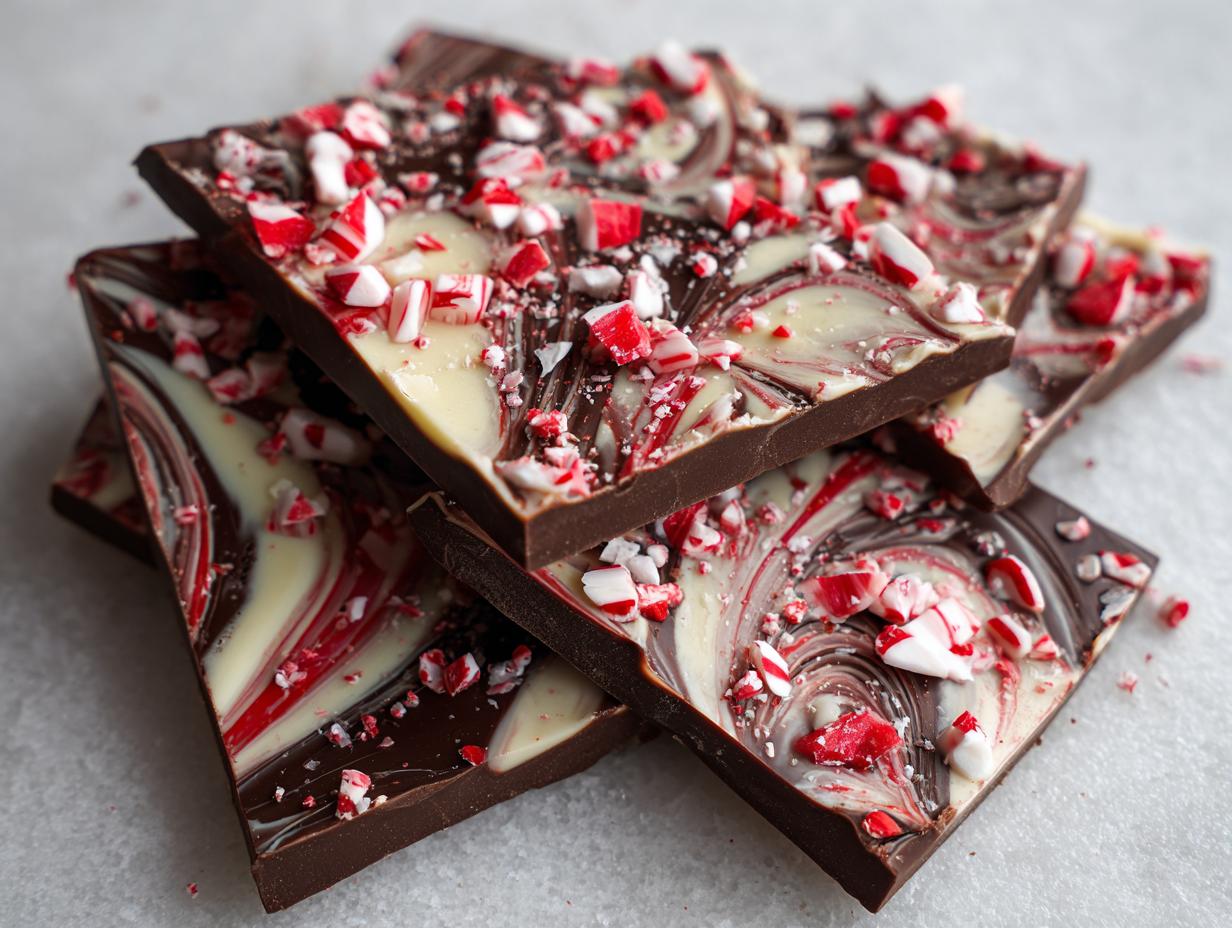
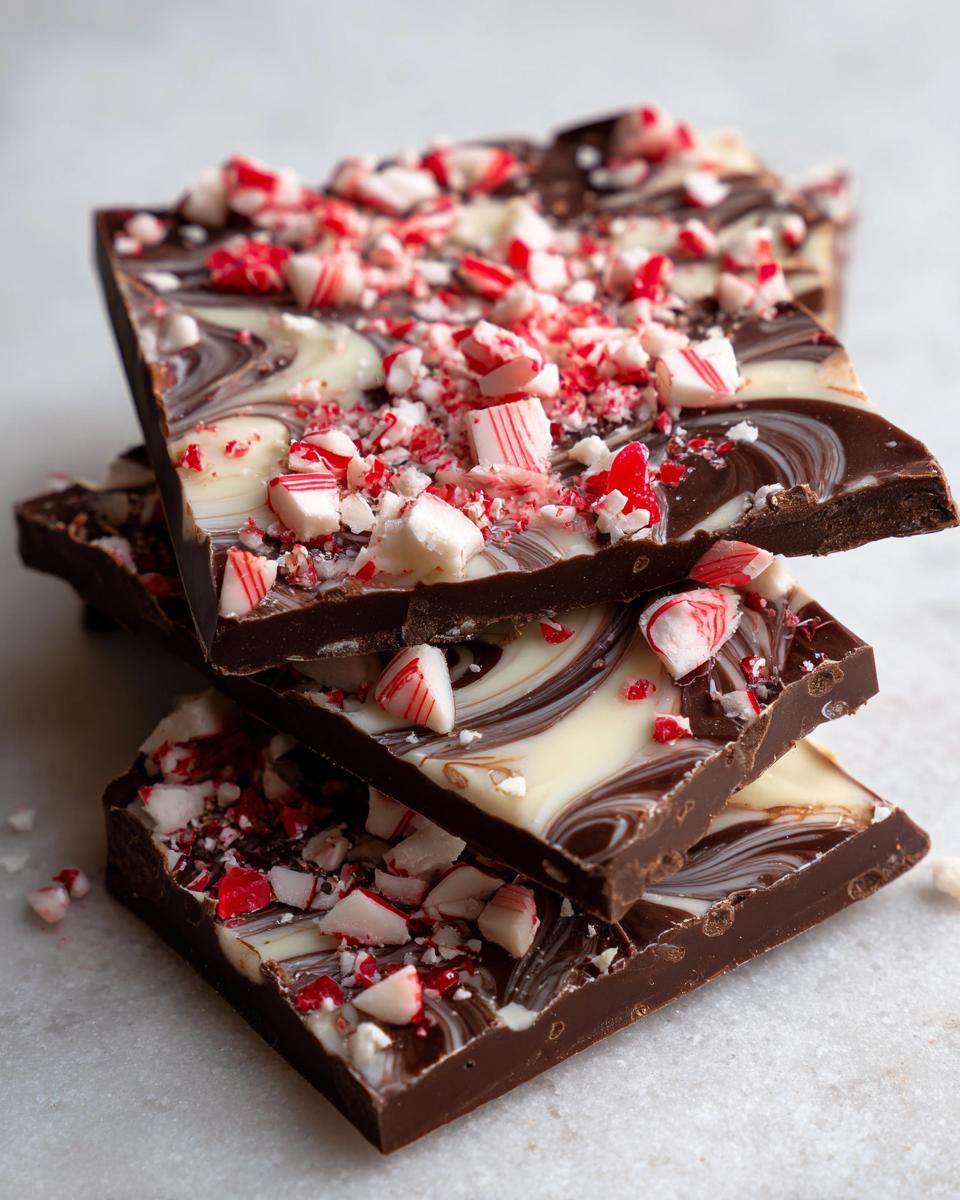
Okay, you know how the holidays just *smell* like magic? That cozy mix of pine, cinnamon, and something sweet wafting through the air? Well, for me, it’s never quite right until I have my hands on some seriously festive candy. And honestly, nothing screams holiday cheer quite like my homemade Peppermint Mocha Chocolate Bark. It’s got everything: that super rich chocolate, a hint of wake-me-up coffee, and that unmistakable cool tingle of peppermint. I remember making this for the first time a few years ago, totally on a whim, and my family pretty much inhaled it in an hour flat. Since then, it’s become a total staple for gift-giving and, let’s be real, for keeping a stash all to myself!
Why You’ll Love This Peppermint Mocha Chocolate Bark
Trust me, this bark is a total winner for so many reasons!
- Super Easy to Make: Seriously, it’s practically foolproof. Melt, pour, sprinkle, chill. That’s it!
- Festive Flavors: It’s like a gourmet coffee shop treat right in your kitchen – rich chocolate, bold espresso, and that cheerful peppermint hug.
- Perfect for Gifting: Wrap it up in little cellophane bags with ribbon, and you’ve got instant, homemade holiday gifts that people will rave about.
- Quick Cleanup: Minimal fuss means more time for sipping hot cocoa and watching holiday movies.
Gather Your Ingredients for Peppermint Mocha Chocolate Bark
Alright, let’s get our ingredients lined up! This is the fun part where you actually see all the yummy goodness that’s going into your Peppermint Mocha Chocolate Bark. You don’t need a ton of fancy stuff, just good quality basics:
- 12 ounces semi-sweet chocolate chips: Or you can totally go for dark chocolate if that’s more your jam. Just make sure they’re good quality – it makes a difference! You can also chop up a chocolate bar if you prefer.
- 4 ounces white chocolate chips: These will be our pretty drizzle on top. Same idea here – good quality makes for a smoother melt.
- 1 teaspoon instant espresso powder: This is optional, but oh my goodness, it really boosts that mocha flavor and gives it a little kick. If you don’t have it, no worries, it’ll still be delicious!
- 1/2 teaspoon peppermint extract: This is where the magic happens! Start with half a teaspoon; you can always add a tiny bit more if you like it extra minty, but be careful not to overdo it.
- 1/4 cup crushed candy canes: For that festive sparkle and extra peppermint crunch. I usually just pop them in a zip-top bag and bash them with a rolling pin – easy peasy!
Essential Equipment for Making Peppermint Mocha Chocolate Bark
Alright, you’ve got your groceries, now let’s talk tools! Having the right gear makes this whole process so much smoother. For our Peppermint Mocha Chocolate Bark, you’ll need just a few basics:
- Baking Sheet: This is pretty standard for almost any cookie or candy project, right? It gives us a nice flat surface to spread our chocolate out onto.
- Parchment Paper: Oh, the magic of parchment paper! Seriously, this is your best friend for candy making. It stops the chocolate from sticking like glue to the pan, and cleanup is a breeze. Just lift the paper, and your perfect bark is ready to go.
- Microwave-Safe Bowls: You’ll need at least two. One for the dark chocolate and one for the white chocolate. This is the quickest way to melt chocolate without messing around with double boilers.
- Spatula: A good offset spatula or even just a regular silicone spatula is perfect for spreading the melted chocolate into a nice, even layer. It helps you get a smooth surface, which is key for pretty bark.
Step-by-Step Guide to Perfect Peppermint Mocha Chocolate Bark
Alright, let’s get down to business and make this delicious Peppermint Mocha Chocolate Bark! It’s honestly so straightforward, you’ll wonder why you ever bought candy from the store. Just follow these simple steps, and you’ll have a beautiful, tasty treat in no time.
Preparing Your Surface for Peppermint Mocha Chocolate Bark
First things first, grab your baking sheet. You want to lay down a sheet of parchment paper. This is like magic for easy cleanup! It means your gorgeous chocolate bark won’t stick and tear when you try to break it apart. Seriously, parchment paper is a lifesaver for anyone making candy or cookies.
Melting the Base Chocolate for Your Peppermint Mocha Chocolate Bark
In a microwave-safe bowl, toss in your semi-sweet chocolate chips and that optional instant espresso powder. Now, here’s the trick to melting chocolate without it seizing up or burning: go slow! Microwave it in 30-second bursts, stirring really well between each one. Keep doing this until it’s all smooth and glossy. If it looks a little thick, you can add a tiny splash of neutral oil, but usually, the espresso powder helps thin it out just enough.
Infusing Flavor: Adding Peppermint to the Chocolate
Once that chocolate is perfectly melted and dreamy, it’s time for the peppermint kick! Stir in the peppermint extract. Start with the half teaspoon, give it a good mix, and maybe taste a tiny bit on a spoon. You want that festive minty flavor, but not so much that it’s like brushing your teeth!
Creating the Base Layer of Peppermint Mocha Chocolate Bark
Now, carefully pour all that melted chocolatey goodness onto your parchment-lined baking sheet. Grab your spatula and gently spread it out into a nice, even layer. You want it fairly thin, but not so thin that it’s see-through. A smooth, even base is what we’re aiming for here!
Melting and Drizzling the White Chocolate
While that first layer is still wet, we’ll melt our white chocolate. Use a separate microwave-safe bowl and the same slow-and-steady microwave method we used before. Once it’s smooth, you can use a spoon or a piping bag (or even just snip a tiny corner off a zip-top bag) to drizzle it all over the dark chocolate. You can make zig-zags, swirls, whatever looks pretty!
Adding the Festive Topping to Your Peppermint Mocha Chocolate Bark
This is the showstopper part! Before the white chocolate has a chance to set, go ahead and sprinkle those crushed candy canes all over the top. Get them evenly distributed for that perfect festive look and crunch in every bite. It’s best to do this right away while the chocolate is still soft and sticky so they adhere nicely.
Chilling and Setting Your Peppermint Mocha Chocolate Bark
Now, pop that whole baking sheet into the refrigerator. You’ll want to let it chill for at least 15 minutes, maybe a bit longer, until the chocolate is completely firm to the touch. You can test it by giving it a gentle poke. It should be solid and hard.
Breaking the Peppermint Mocha Chocolate Bark into Pieces
Once it’s totally set, it’s time for the fun part – breaking it up! Just pick up the parchment paper with the bark on it and give it a little flex. It should crack into all sorts of beautiful, irregular pieces. If some pieces are too big, you can always just give them a gentle tap with your spatula or a knife for smaller bits.
Ingredient Notes and Substitutions for Peppermint Mocha Chocolate Bark
Okay, so you’ve got the basic idea, but let’s chat for a sec about these ingredients, ‘cause sometimes you need to get creative in the kitchen! For this Peppermint Mocha Chocolate Bark, the quality of your chocolate really makes a difference. I usually grab semi-sweet chips because they’re easy and have a nice balance, but honestly, good quality dark chocolate (60-70% cacao) is *chef’s kiss* here, giving it a richer flavor that really stands up to the peppermint. If you’re not a fan of dark, milk chocolate can work, but just be aware it’s a lot sweeter, so you might want to go easy on the candy canes!
That espresso powder? Totally optional, sweetie! But oh, if you *can* add it, do! It just deepens that mocha vibe without making it taste like coffee, all while making the chocolate flavor pop. If you don’t have instant espresso powder, you can sometimes use very finely ground coffee, but just a tiny pinch, or skip it – your Peppermint Mocha Chocolate Bark will still be delicious. And for the candy canes? If you can’t find them or want something different, crushed peppermint candies work just as beautifully, or for a totally different twist, try some freeze-dried raspberries for a pop of color and tartness!
Tips for Success with Peppermint Mocha Chocolate Bark
Alright, let’s make this Peppermint Mocha Chocolate Bark absolutely perfect! While it’s super easy, a few little tricks can make all the difference. First off, chocolate hates water, so make sure your bowls and spatula are bone dry when you’re melting it. Water can make chocolate seize up, and nobody wants that! Also, when you’re melting, go low and slow in the microwave. Seriously, those 30-second bursts and stirring in between are key. It prevents burning and ensures you get that super smooth, glossy finish. I once tried to rush it, and let’s just say my bark looked more like a crumbly mess than a treat!
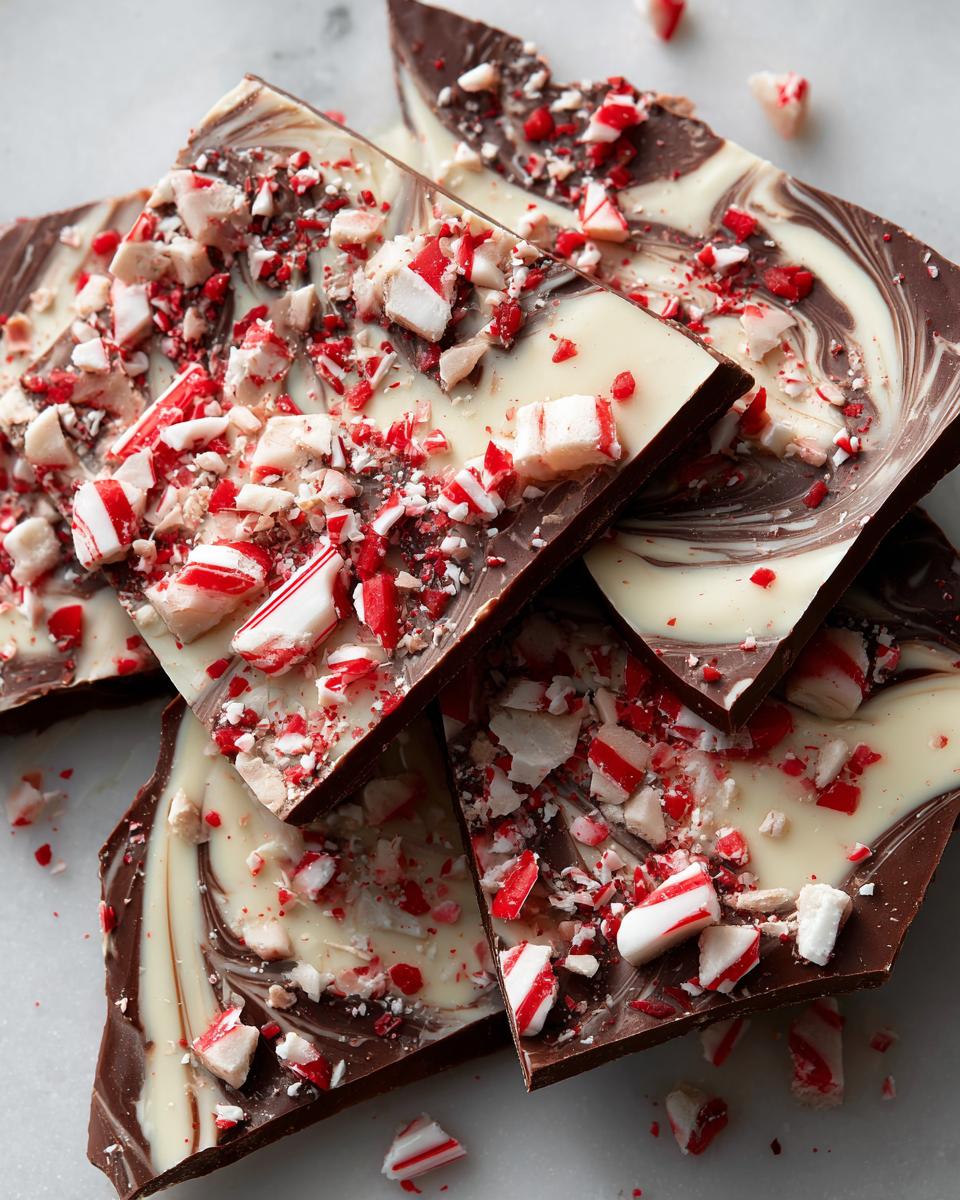
For that gorgeous swirled effect with the white chocolate drizzle, don’t wait too long after spreading the dark chocolate. Get that white chocolate on while the base is still soft so it makes pretty patterns. And when you’re breaking it up, don’t be afraid to get a little rough! If a piece is being stubborn, a sharp knife can help you score it, or just give it a good whack – the more rustic, the better, right?
Storage and Serving Suggestions for Peppermint Mocha Chocolate Bark
Once your amazing Peppermint Mocha Chocolate Bark is all broken into pretty pieces, you’ve gotta store it right! The best way is in an airtight container. You can layer the pieces between sheets of parchment paper if you’re worried about them sticking together. Keep it at room temperature if your house isn’t too warm, or pop it in the fridge if it’s a bit toasty. Honestly, it stays good for a good week or two like that, but my family usually devours it way faster!
Serving it up is just as easy! It’s the perfect little treat to have with a steaming mug of hot chocolate or a warm cup of coffee. It also makes the MOST adorable homemade gift. Just pile it into cute little cellophane bags, tie them up with a festive ribbon, maybe add a cute tag, and voilà! Instant holiday cheer for teachers, neighbors, or anyone you want to spread some sweetness to.
Frequently Asked Questions About Peppermint Mocha Chocolate Bark
Got questions about my famous Peppermint Mocha Chocolate Bark? I totally get it! It’s always good to have a few tips up your sleeve.
Can I use milk chocolate instead of semi-sweet for this bark?
You sure can! If you’re more of a milk chocolate fan, go for it. Just remember that milk chocolate is sweeter, so you might want to dial back on the crushed candy canes or use slightly less peppermint extract if you want to keep the flavors balanced. It’ll still be delicious, just a little different!
How should I store my Peppermint Mocha Chocolate Bark?
Storing this yummy Peppermint Mocha Chocolate Bark is super simple. Keep it in an airtight container at room temperature, ideally somewhere cool and dry. If your kitchen tends to get a little warm, the fridge is your best bet to keep it from getting melty. It usually stays fresh and tasty for about a week or two!
Can I make this bark ahead of time for holiday gifts?
Oh, absolutely! That’s one of the best things about this Peppermint Mocha Chocolate Bark – it’s a total make-ahead champion. You can easily whip up a big batch a week or even two before you plan to give it away or serve it. Just store it properly as I mentioned, and it’ll be ready to go whenever you need it. Perfect for those busy holiday times!
What if I don’t have espresso powder?
No espresso powder? No problem! That little bit of espresso powder just really wakes up the chocolate and adds a hint of that mocha depth. If you don’t have it, your Peppermint Mocha Chocolate Bark will still be wonderfully minty and chocolatey. You could try adding a tiny pinch of instant coffee granules if you happen to have them, but honestly, it’s a delicious treat even without it.
Share Your Peppermint Mocha Chocolate Bark Creations!
Okay, now it’s your turn! I would LOVE to see what you create with this Peppermint Mocha Chocolate Bark. Did you go with dark chocolate? Did you add extra candy canes? Snap a pic and tag me on Insta, or leave a comment below telling me all about it! Your creations totally make my day and inspire me.
Peppermint Mocha Chocolate Bark
Ingrédients
Equipment
Method
- Line a baking sheet with parchment paper.
- In a microwave-safe bowl, combine the semi-sweet chocolate chips and espresso powder (if using). Microwave in 30-second intervals, stirring between each, until smooth and melted.
- Stir in the peppermint extract.
- Pour the melted semi-sweet chocolate onto the prepared baking sheet and spread it into an even layer using a spatula.
- In a separate microwave-safe bowl, melt the white chocolate chips according to the same method used for the semi-sweet chocolate.
- Drizzle the melted white chocolate over the semi-sweet chocolate layer.
- Immediately sprinkle the crushed candy canes over the chocolate before it sets.
- Place the baking sheet in the refrigerator for at least 15 minutes, or until the chocolate is firm.
- Once firm, break the bark into pieces.