If there’s one thing I’ve learned from years of throwing parties, it’s that a dessert charcuterie platter never fails to steal the show. I still remember the time I whipped one up for my niece’s birthday – I thought the kids would dive into the cake first, but nope, they swarmed that platter like bees to honey! What makes these sweet spreads so magical is how they bring people together. Everyone loves customizing their perfect bite, whether they’re grabbing a juicy strawberry, a rich chocolate chip, or a fluffy cheesecake square. The best part? You’re not locked into any one flavor or theme. I’ve made them for bridal showers with delicate macarons and elegant fruit displays, and for game nights piled high with brownie bites and cookies. No matter the occasion, a well-crafted dessert charcuterie platter always becomes the edible centerpiece that gets people talking (and reaching for just one more bite).
Why You’ll Love This Dessert Charcuterie Platter
Okay, I’ll be honest – dessert charcuterie platters are my secret weapon for stress-free entertaining. Here’s why they’ve become my go-to dessert solution every time:
- 5 minutes is all you need – Unlike baking a cake that takes hours, you can throw this together while the coffee brews. Last weekend, I assembled one while chatting with guests and it looked like I’d spent all day on it!
- Every platter tells a different story – I love how you can make it fancy with French macarons one day, then kid-friendly with gummy bears and Oreos the next. What’s in my fridge and pantry decides the theme.
- It’s the ultimate crowd-pleaser – Picky eaters? Diet restrictions? No problem. With so many options, everyone finds something they love. At my book club, Susan (the gluten-free friend) and Mark (the chocoholic) both raved about the same platter.
- Leftovers? What leftovers? In ten years of making these, I’ve never had to toss anything. Those last few berries and cookies always disappear by the end of the night.
The best part? Seeing people’s faces light up when you bring out this colorful, edible masterpiece. It’s like edible art that tastes incredible too!
Ingredients for Your Dessert Charcuterie Platter
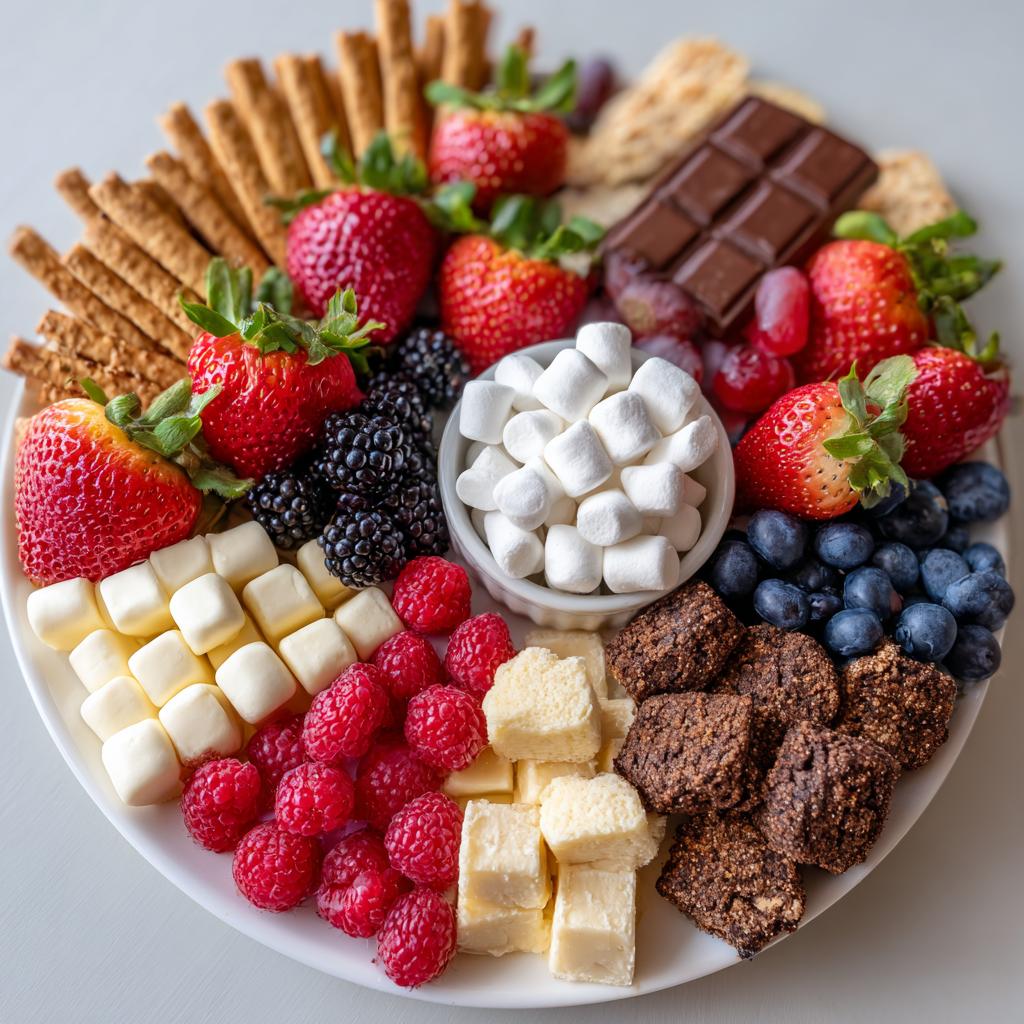
Here’s the beauty of a dessert charcuterie platter – you probably already have most of these ingredients in your kitchen right now! I like to keep things balanced with fresh fruit, chocolatey bites, and some creamy elements. Here’s what I always include:
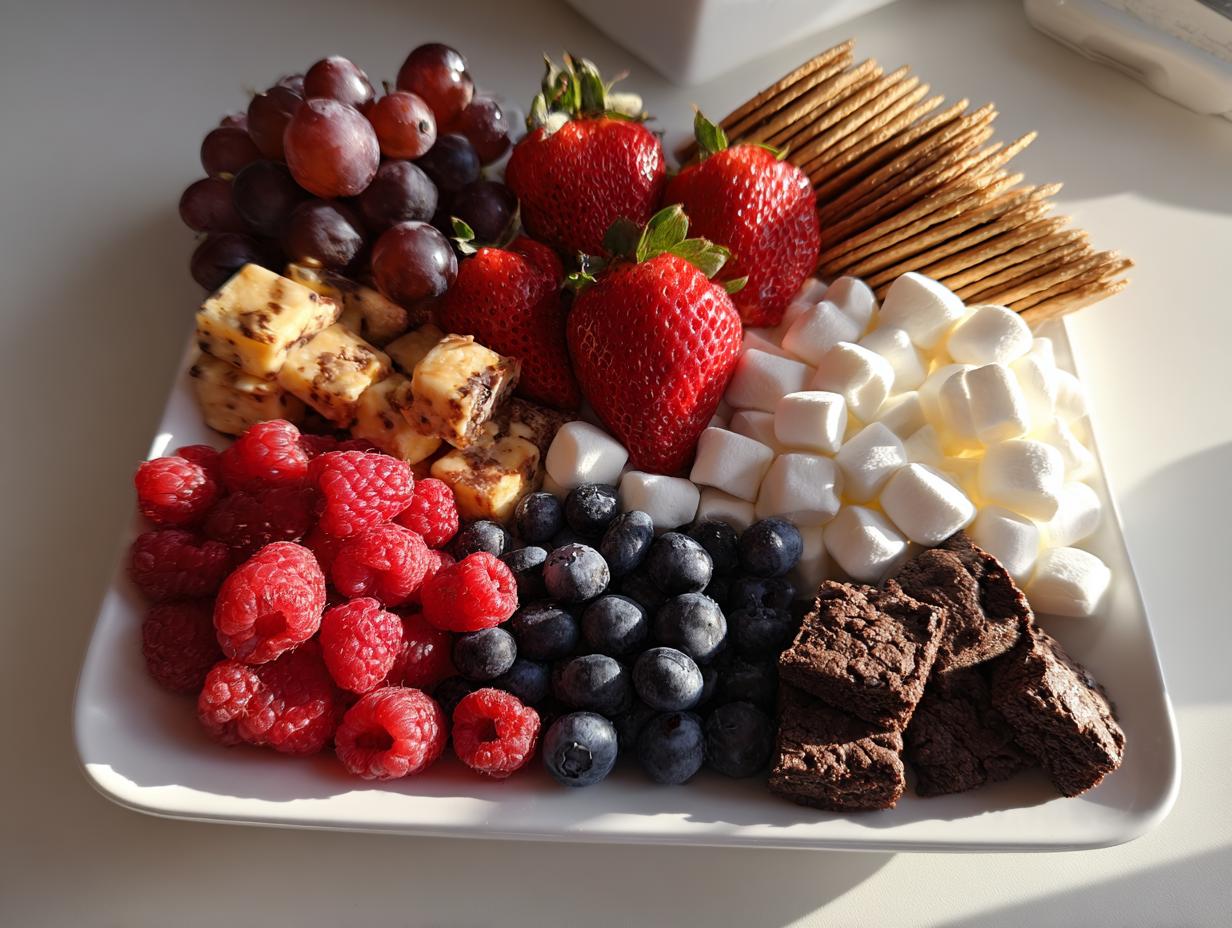
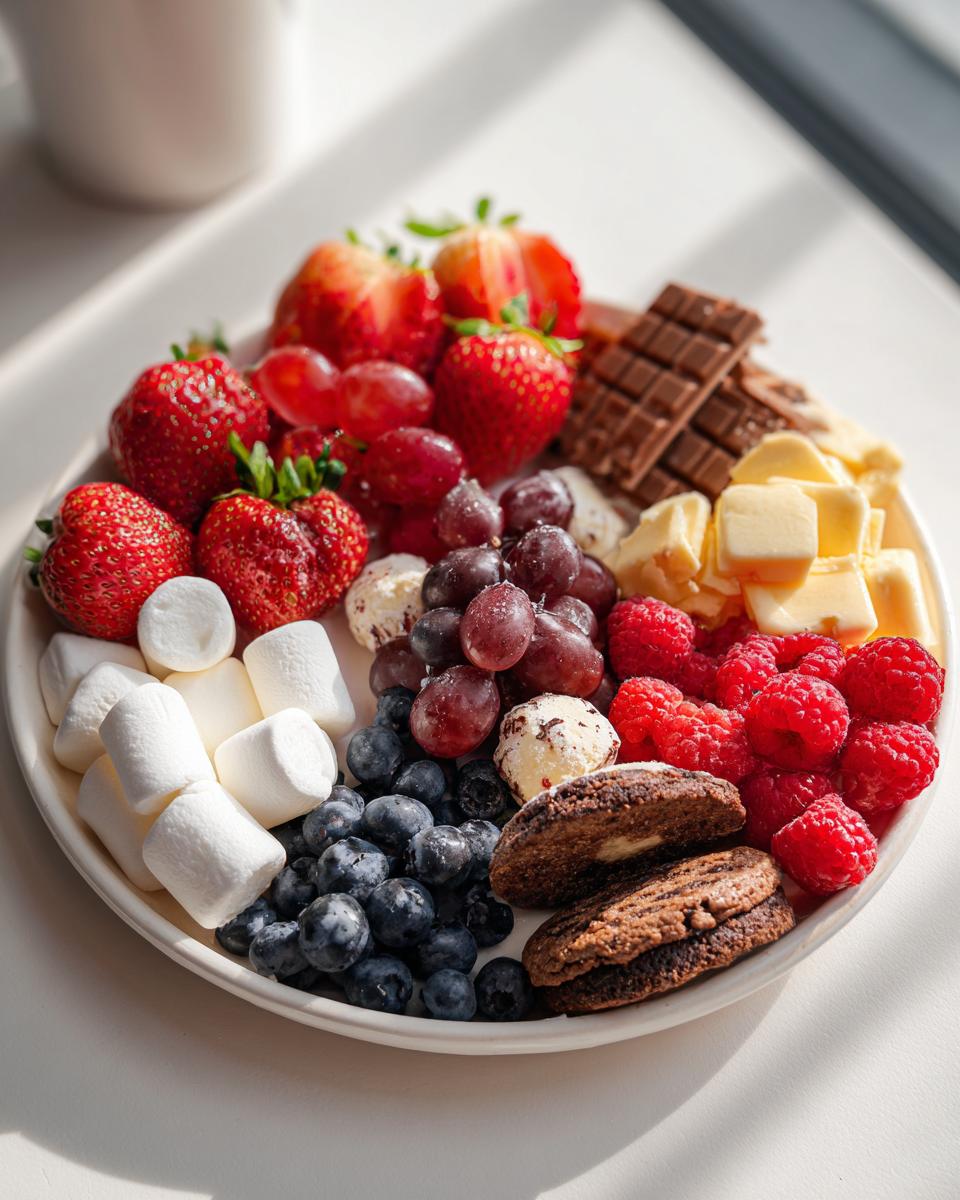
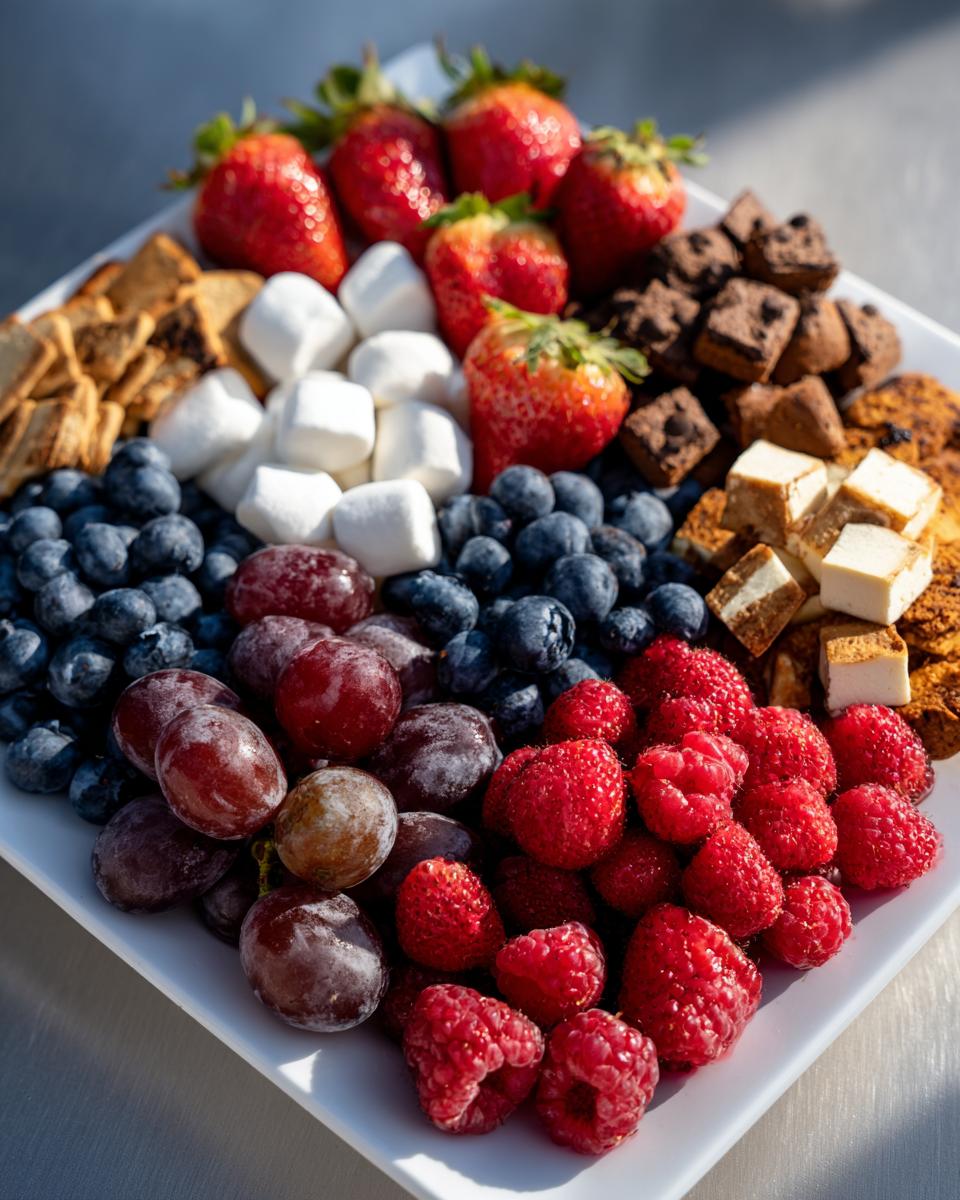
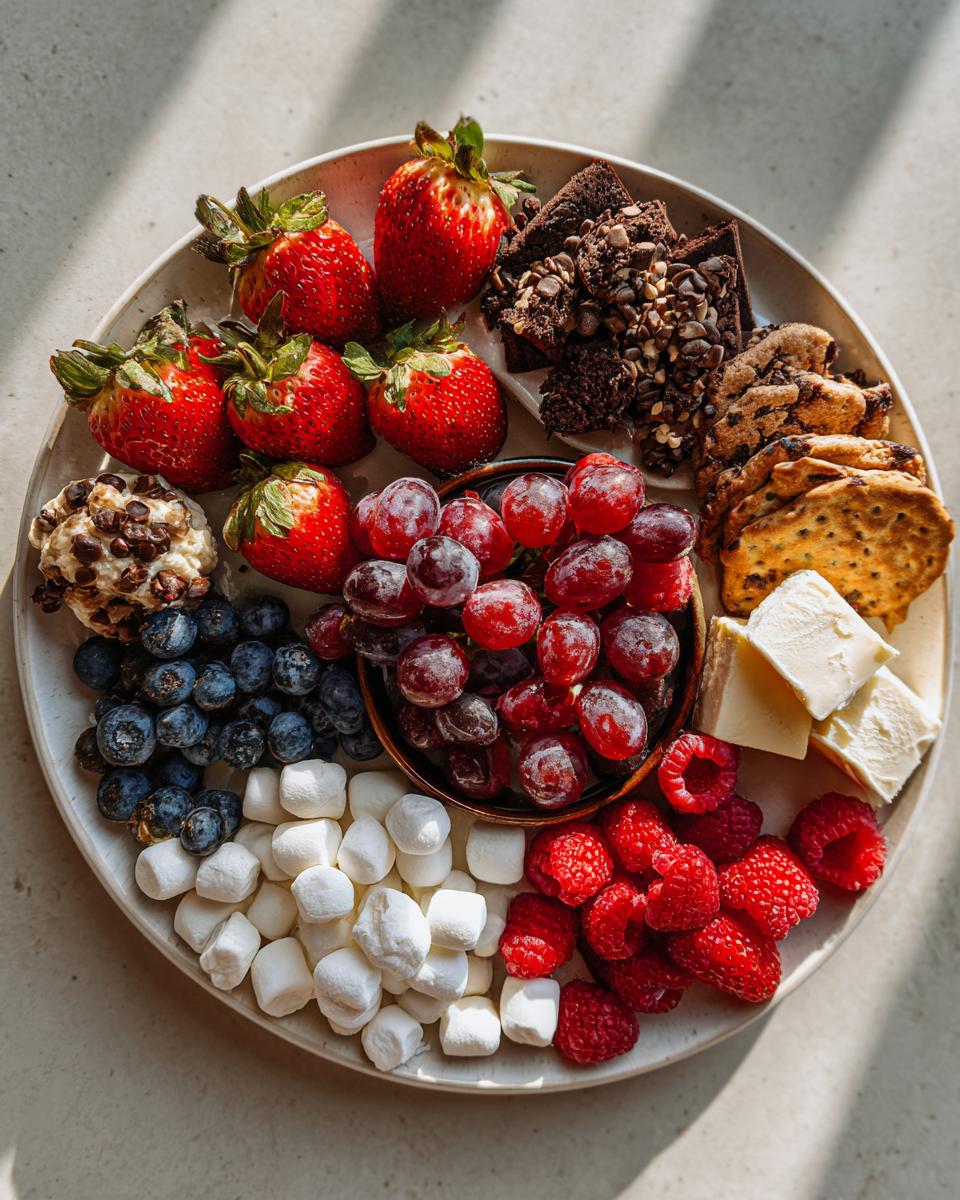
- Fresh fruits: 1 cup fresh strawberries (sliced), 1 cup grapes, 1/2 cup blueberries, and 1/2 cup raspberries – but honestly, any seasonal fruit works!
- Sweet bites: 1/2 cup mini marshmallows (the multicolored ones are so fun for parties), 1/2 cup chocolate chips (I prefer dark chocolate but milk chocolate works too)
- Baked goods: 1/2 cup mini cookies (shortbread or chocolate chip), 1/2 cup brownie bites (homemade or store-bought – no judgment here!), 1/2 cup cheesecake squares (cut into bite-sized pieces)
See? Nothing fussy here. The key is having a mix of colors, textures, and flavors that’ll make every bite exciting. I often raid my pantry for whatever looks good – sometimes adding nuts, dried fruit, or even some fancy chocolates if I’m feeling extra.
How to Assemble Your Dessert Charcuterie Platter
Putting together this dessert charcuterie platter is my favorite kind of kitchen project – it’s more fun than work! I’ve learned a few tricks over the years that make assembly foolproof. First things first – grab the biggest platter or wooden board you have. Trust me, it’ll fill up faster than you think! I like to work in sections: fruits on one side, sweet treats on another, with little bridges of chocolate or cookies connecting everything. The key is to start with your largest items first, then fill in the gaps with smaller goodies. Don’t stress about perfection – the beauty of this platter is its casual, abundant look. I usually let mine sit for about 10 minutes after assembling just to admire my delicious artwork before everyone digs in!
Preparing the Fruits
Fresh, vibrant fruit is the star of any dessert charcuterie platter. I wash everything under cool water (a little vinegar bath for berries if they’re extra dirty) and pat them completely dry with paper towels – soggy fruit is a no-go! For strawberries, I slice them lengthwise to show off their pretty shape, leaving the stems on a few for decoration. Grapes stay whole in small clusters, blueberries get a quick roll in a towel to remove any lingering water, and raspberries… well, those delicate guys go straight from the container to the platter! Pro tip: prep your fruits right before assembling to keep them looking their best.
Arranging the Dessert Charcuterie Platter
Time to get creative! I start by placing my anchor items – usually the cheesecake squares and brownie bites – in opposite corners to create balance. Next come the fruits in little piles or gentle arcs – I alternate colors so red strawberries might sit near green grapes with blueberries scattered between them. The tiny treats like chocolate chips and mini marshmallows fill in any awkward gaps (I use small bowls or spoons for precise placement). Here’s my golden rule: odd numbers look best! Three cookie stacks here, five berry clusters there – it just works. I’ll often tuck in a few whole strawberries with stems peeking up for height variation. And don’t forget to save some chocolate chips to sprinkle lightly over everything for that final « wow » factor!

Tips for the Perfect Dessert Charcuterie Platter
After making more dessert charcuterie platters than I can count, I’ve picked up some tricks that’ll take yours from nice to « wow, did you make this? » level. First – temperature matters! I always let my cheesecake squares and brownies come to room temperature so they’re soft but not melting. For presentation, grab some fresh mint or edible flowers from the garden – even a few leaves make it look gourmet. And here’s my secret weapon: small spoons or tongs near each section to keep those chocolatey fingers from smudging your beautiful arrangement. The real key though? Have fun with it! My platters always taste best when I’m not overthinking every little berry placement.
Customizing Your Dessert Charcuterie Platter
Here’s where the real magic happens – making this dessert charcuterie platter completely your own! I go wild with themes depending on the season and what’s in my pantry. Summer platters burst with juicy peaches and watermelon cubes, while winter versions shine with dried cranberries and spiced almonds. For Christmas, I arrange everything in the shape of a tree with star-shaped cookies on top. Baby shower? Pastel macarons and pink lemonade bars take center stage. My nephew’s dinosaur birthday got a « fossil dig » version with crushed Oreo « dirt » hiding gummy worms. The secret is to let whatever inspires you guide the treats – I’ve even done an all-chocolate version for Valentine’s Day that disappeared in record time! Don’t be afraid to mix textures too. Crispy wafers next to creamy chocolate mousse cups, or chewy caramels with fresh figs create such fun contrasts. Remember, there are no rules – just delicious possibilities waiting to happen!
Serving and Storing Your Dessert Charcuterie Platter
The moment I bring out my dessert charcuterie platter never fails to create excitement – it’s all about the timing! I’ve learned the hard way that assembling too early can lead to soggy cookies, so I aim to put mine together no more than 30 minutes before guests arrive. If I absolutely need to prep ahead, I’ll arrange everything except the delicate cream-based items (like those cheesecake squares) and add those last-minute. Counter time is about 2 hours max before food safety kicks in – trust me, it’ll disappear long before then! Any leftovers? Just pop those fruits and perishables in airtight containers in the fridge (they’ll keep beautifully overnight), while cookies and brownies stay freshest in separate containers at room temp. Pro tip: make extra chocolate chips and marshmallows – they’re always the first to vanish!
Dessert Charcuterie Platter FAQs
Over the years, I’ve gotten so many questions about my dessert charcuterie platters – here are the ones that pop up most often with my tried-and-true answers!
Can I prepare my dessert charcuterie platter ahead of time?
Absolutely! I often prep components separately the night before – wash and dry fruits, cut brownies into bites, portion cheesecake squares – then do the final assembly about 30 minutes before serving. Just keep the delicate items like fresh berries and cream-based desserts refrigerated until the last minute.
What’s the best platter or board to use?
I’ve used everything from fancy marble slabs to a simple baking sheet in a pinch! My go-to is a large wooden cutting board – it’s rustic, sturdy, and makes everything look artisanal. Just make sure whatever you choose has a slight rim to prevent runaway berries.
How do I keep fruits from browning?
For apples or pears, I give them a quick dip in lemon water (1 tablespoon lemon juice to 1 cup water). Berries hold up fine if you pat them completely dry before arranging. And honestly? A little natural browning never stopped my guests from devouring everything!
What if I’m serving people with dietary restrictions?
That’s the beauty of these platters! I always include gluten-free options (like fresh fruit and certain chocolates), nut-free zones, and dairy-free sections. Just keep similar items grouped together and maybe add little flags labeling « gluten-free cookies » so everyone feels included.
How much should I make per person?
I plan for about 1 cup total per guest – but always make extra! People go crazy for these spreads. At my last gathering, my « just in case » backup platter was the first to disappear. Better to have leftovers (rare!) than disappointed sweet tooths!
Nutritional Information
Now, I’ll be real with you – I’m all about savoring flavors, not counting calories! Since every dessert charcuterie platter is uniquely yours (hello, extra chocolate chips here, light berries there), nutritional info will vary depending on what delights you include. Different brands and seasonal ingredients change things up too. The beauty of this sweet spread? You can make it as indulgent or as balanced as your heart desires – that’s why we love customizable desserts!
Share Your Dessert Charcuterie Platter
I absolutely LIVE for seeing how you make this dessert charcuterie platter your own! Snap a pic before everyone digs in (if you can resist that long!) and tag me – I’ll be the one cheering loudest for your creation. Drop your brilliant twists in the comments too! Did you use cinnamon-dusted apple slices? Add peanut butter cups? Go wild with sprinkles? Spill all your sweet secrets below, and let’s inspire each other to keep making these edible masterpieces. Your version might just end up being my next go-to combo!
Dessert Charcuterie Platter
Ingrédients
Method
- Wash and dry all fresh fruit.
- Slice strawberries and arrange them on a large platter.
- Add grapes, blueberries, and raspberries to the platter.
- Fill in gaps with mini marshmallows, chocolate chips, cookies, brownie bites, and cheesecake squares.
- Serve immediately or refrigerate until ready to serve.