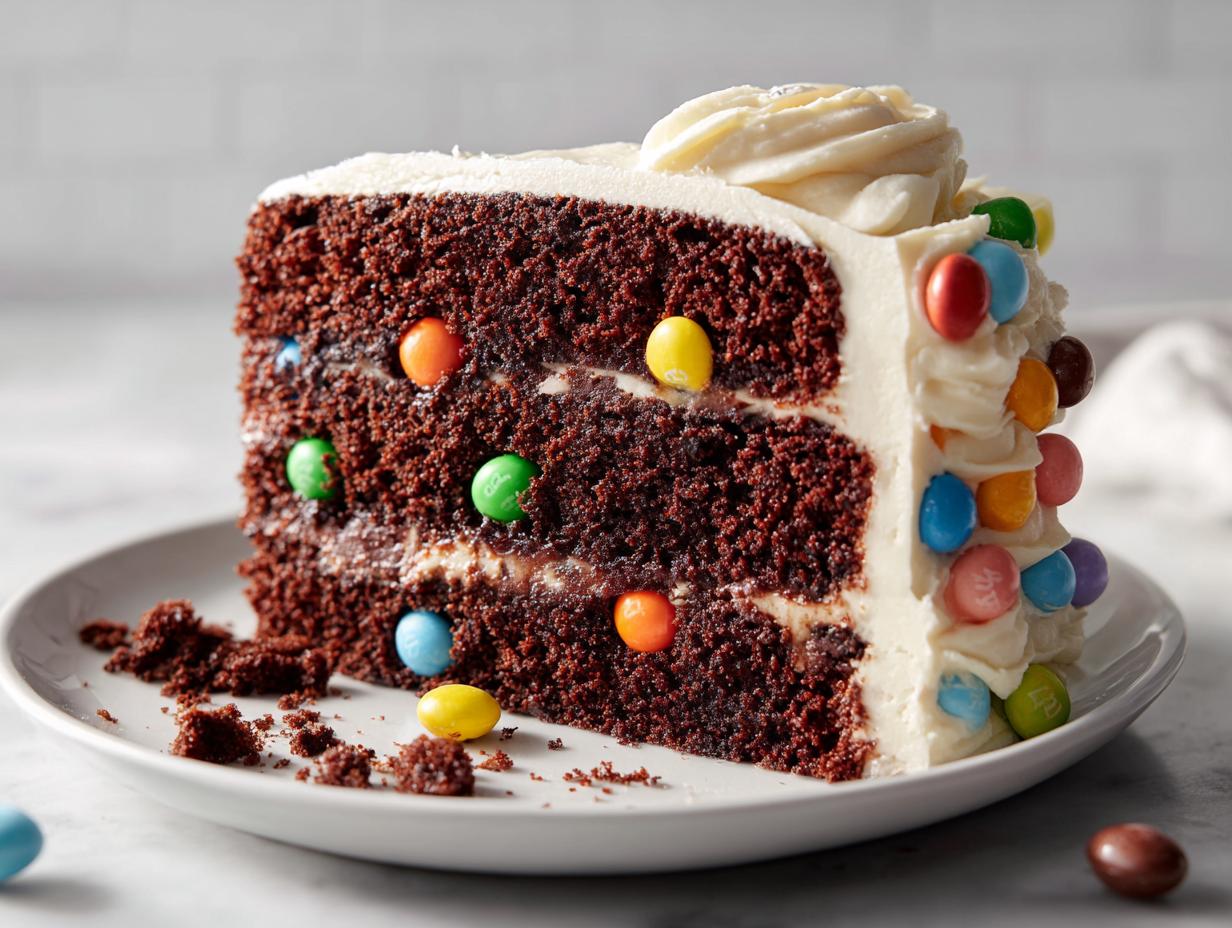
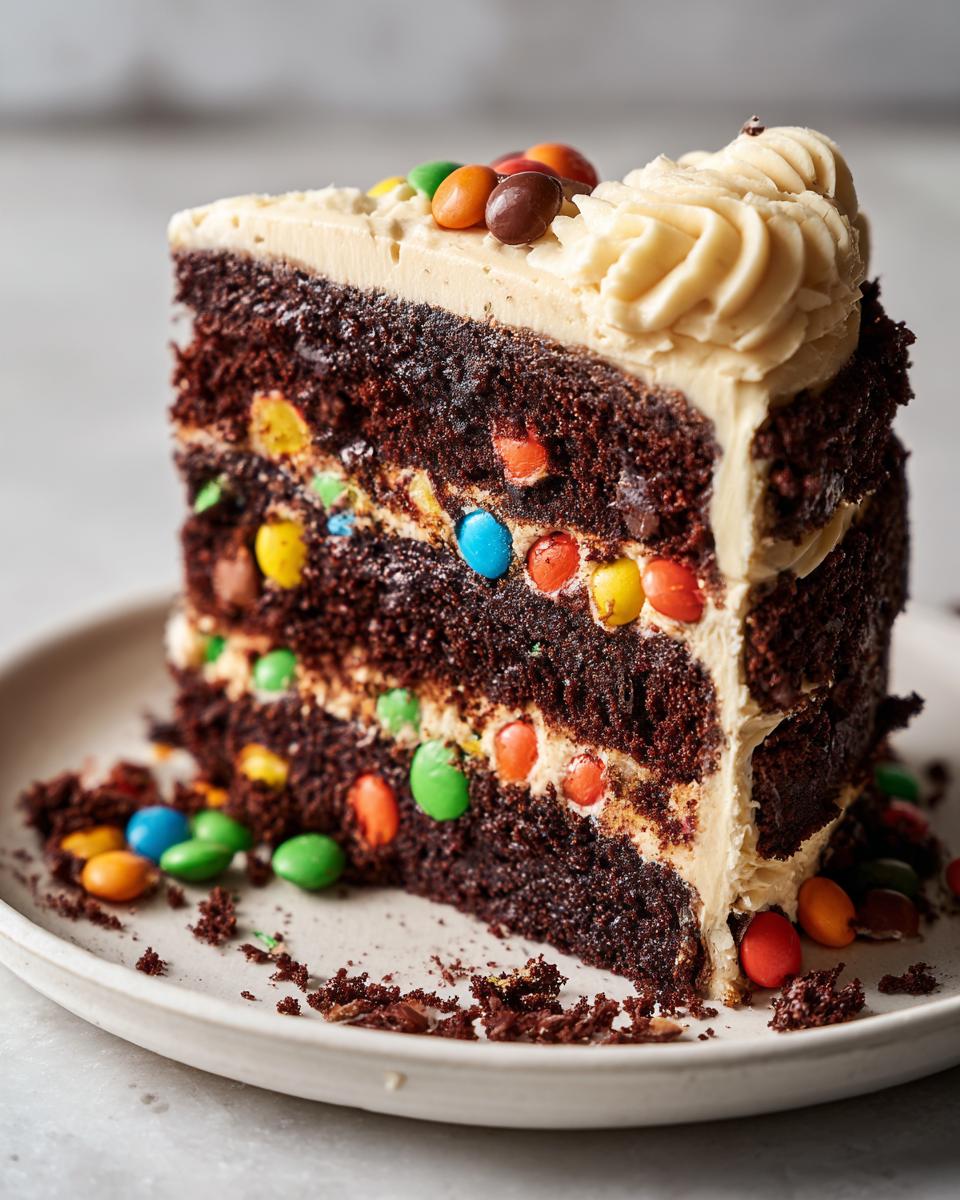
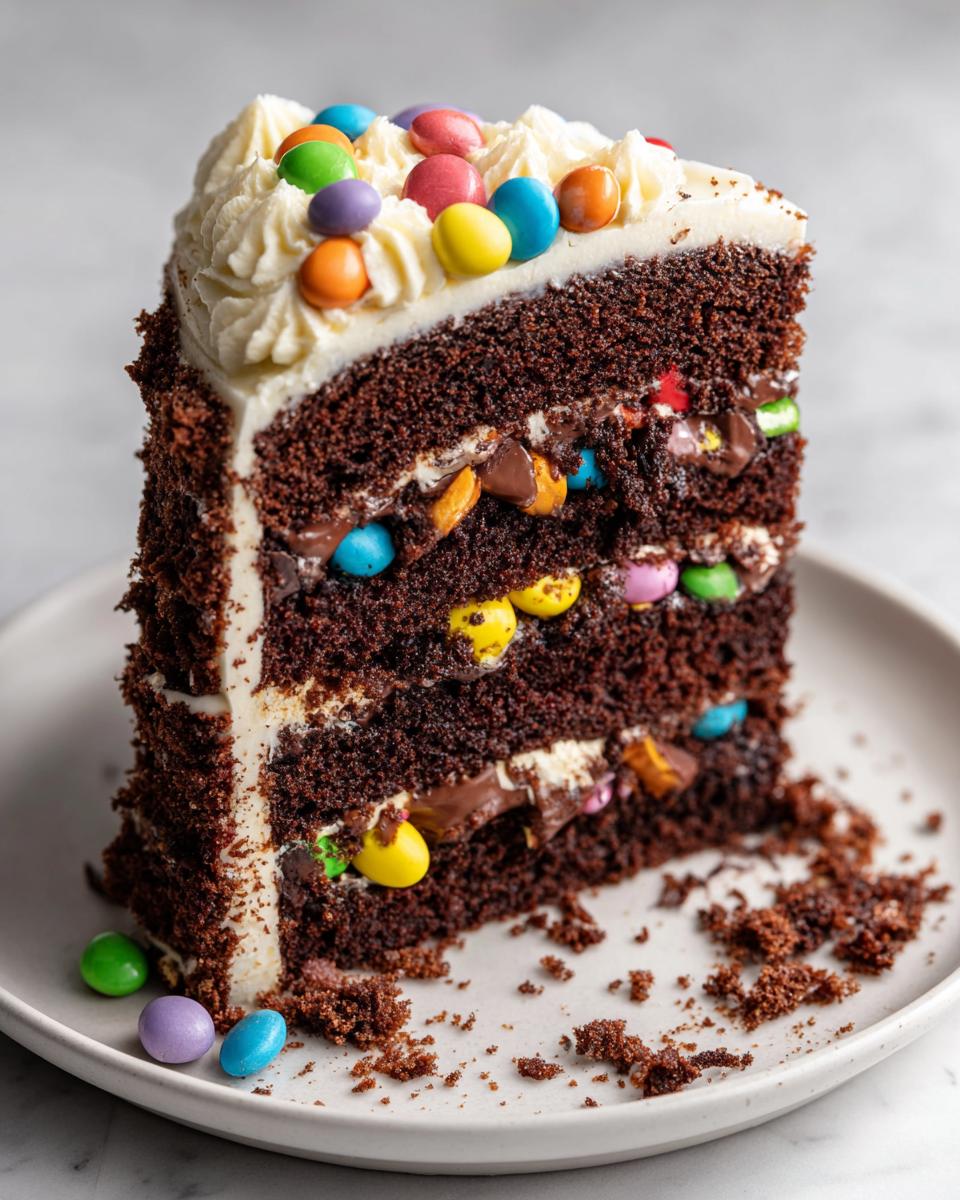
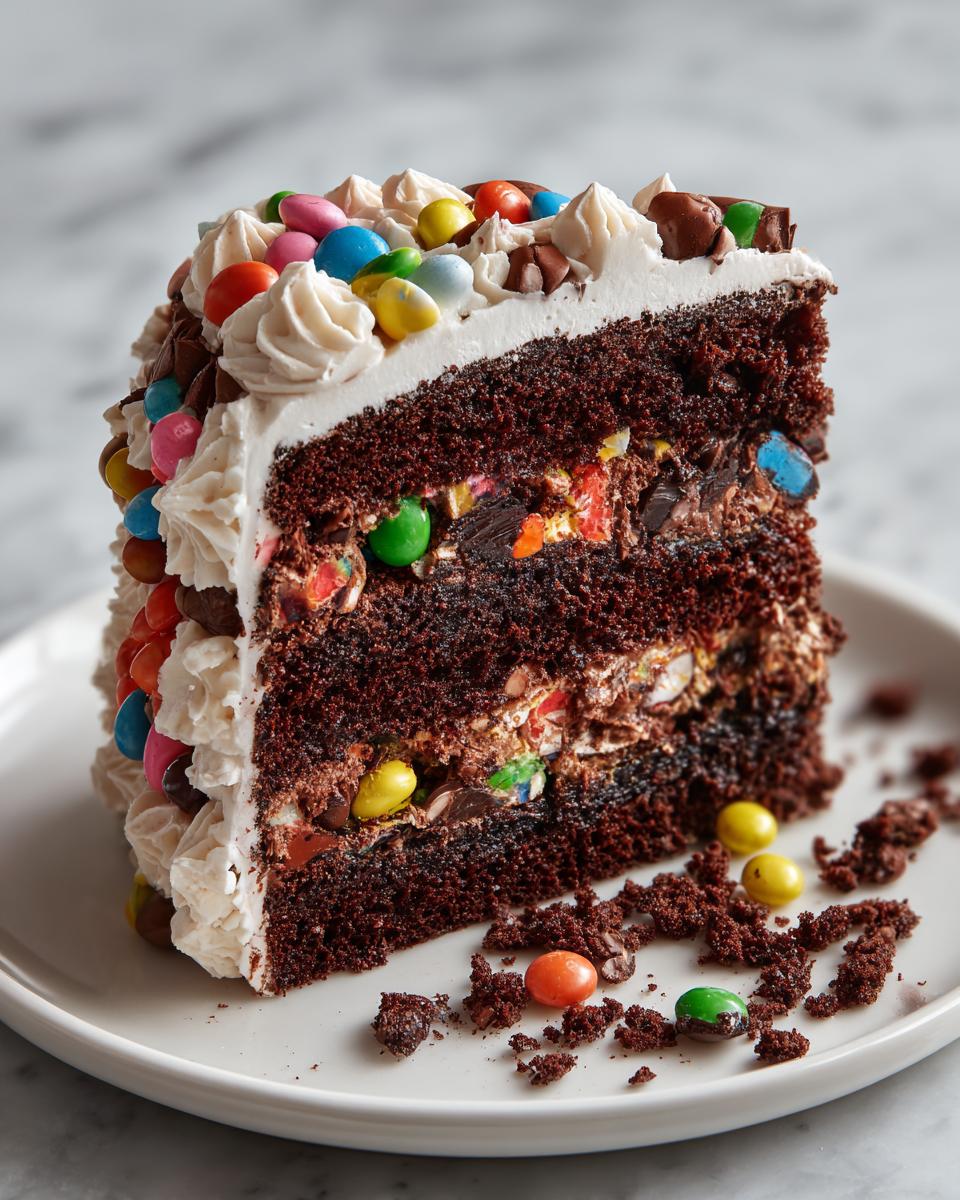
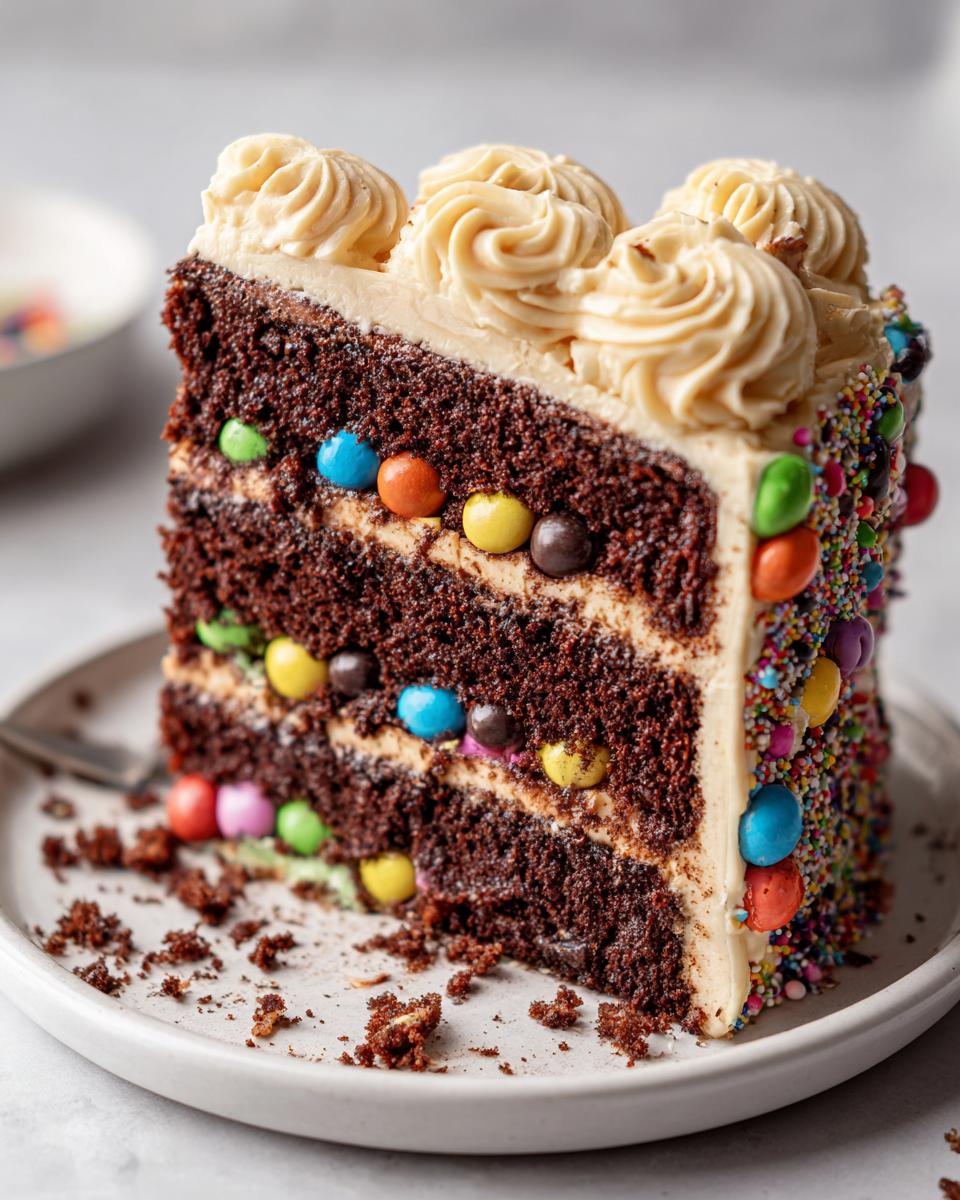
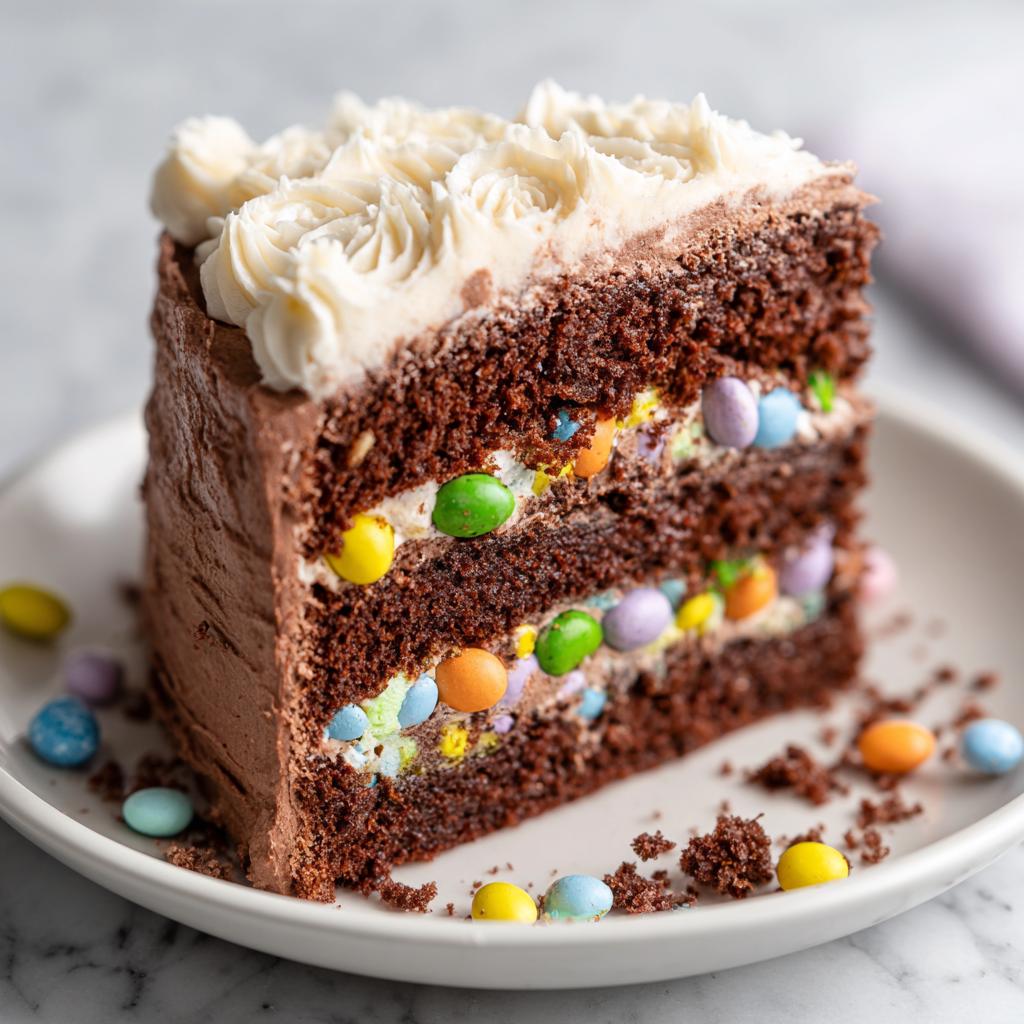
Picture this: you slice into a rich chocolate cake at your Easter gathering, and suddenly – surprise! – a cascade of colorful candies spills out, making everyone at the table gasp with delight. That’s the magic of my Easter chocolate piñata cake, the showstopper that’s become my family’s favorite spring tradition. The first time I made it for my nieces, their squeals when they discovered the hidden candy treasure convinced me this would be our new annual dessert. What really makes it special isn’t just the wow factor (though trust me, that never gets old) – it’s how the super-moist chocolate cake balances perfectly with the sweet crunch of Easter candies. My secret? Adding that cup of boiling water to the batter – sounds weird, but it creates the most tender crumb that holds up beautifully when you carve out the center for all those jelly beans and mini eggs.
Why You’ll Love This Easter Chocolate Piñata Cake
This isn’t just any Easter dessert – it’s the cake that’ll have everyone talking! Here’s why it’s become my go-to for spring celebrations:
- Total showstopper: The candy explosion when you cut into it creates instant excitement – perfect for Easter gatherings or birthday surprises.
- Endless candy options: I love using pastel mini eggs for Easter, but you can toss in jelly beans, M&Ms, or even small marshmallows for different holidays.
- Moist chocolate dream: That boiling water trick gives it the most tender crumb that stays delicious for days (if it lasts that long!).
- Kid-approved magic: The surprise factor makes it a guaranteed hit with little ones (and let’s be honest – adults too!).
Ingredients for Easter Chocolate Piñata Cake
Gathering your ingredients is the first step to creating this magical Easter dessert. I’ve broken everything down by component so you can prep efficiently – trust me, this organization trick has saved me from countless mid-recipe panic moments in my tiny kitchen!
For the Cake
This chocolate cake is my go-to because it’s forgiving and stays moist even after you carve out the center. I prefer natural cocoa powder (that regular grocery store kind) for its bright chocolate flavor, though Dutch-process works too if you like a deeper taste.
- Dry ingredients: 2 cups all-purpose flour, 2 cups granulated sugar, 3/4 cup cocoa powder, 2 tsp baking powder, 1 tsp baking soda, 1 tsp salt (I use kosher)
- Wet ingredients: 1 cup milk (any kind), 1/2 cup vegetable oil, 2 large eggs at room temperature, 2 tsp vanilla extract, 1 cup boiling water (yes, really boiling!)
For the Filling
The fun part! You’ll need about 1 cup of Easter candy – this is where you can get creative. My family prefers:
- Pastel mini eggs (they look so festive peeking through the chocolate)
- Jelly beans (the fruity ones add nice contrast)
- Small chocolate eggs or M&Ms work great too
Pro tip: If using jelly beans, mix colors for maximum visual impact when the cake gets sliced!
For the Frosting
This simple buttercream is the perfect glue for your piñata cake. The key is properly softened butter – it should indent easily when pressed but not feel greasy or melted.
- 1 cup unsalted butter (that’s 2 sticks), softened about 30 minutes at room temp
- 4 cups powdered sugar (no need to sift unless it’s lumpy)
- 1/4 cup milk (any kind)
- 2 tsp vanilla extract
See? Nothing too fancy – just good, reliable ingredients that come together to create pure Easter magic!
How to Make Easter Chocolate Pinata Cake
Let me walk you through creating this showstopper step by step – it’s easier than you might think! The magic happens when you combine a foolproof chocolate cake with clever assembly. I’ve made this enough times to know exactly where beginners might stumble, so I’ll share all my hard-earned tricks along the way.
Preparing the Cake Layers
First things first: preheat that oven to 350°F (175°C) right away! Nothing worse than ready-to-bake batter waiting for a cold oven. Grease your two 9-inch round pans generously – I like using butter and a flour dusting for extra security, since we’ll be carving one layer later.
Here’s my no-fail mixing method: whisk all your dry ingredients together first in a big bowl (flour, sugar, cocoa powder, leaveners, salt). Then add the milk, oil, eggs, and vanilla. Use your mixer on medium for exactly 2 minutes – set a timer! The batter should look smooth and slightly glossy. Now comes the weird-but-wonderful step: slowly pour in that cup of boiling water while mixing on low. The batter will thin out dramatically – that’s perfect! It bakes up super moist.
Divide between pans (they’ll be about half full – trust the process) and bake 25-30 minutes. The cakes are done when they spring back when gently pressed and a toothpick comes out with just a few moist crumbs. Let them cool 10 minutes in the pans, then transfer to wire racks. This is crucial – if you try to carve them warm, they’ll crumble everywhere!
Assembling the Pinata Surprise
Now for the fun part! Once completely cool, take one layer and use a 3-inch round cookie cutter to cut out the center (or trace a drinking glass and use a small knife). Save that removed circle – you can nibble on it as a baker’s treat! This hollowed-out layer will be your piñata pocket.
Place this layer on your serving plate (put strips of parchment underneath first to keep the plate clean). Pile in your candy – I use about 1 cup total, mixing different types for colorful contrast. Leave just enough headroom so the top layer won’t squish them when placed over. Carefully position the second intact cake layer on top, pressing lightly to adhere. See? Now you’ve got a secret candy stash hidden inside!
Frosting and Decorating
For frosting stability, I always do a quick crumb coat first – that’s a thin layer of frosting that seals in any loose crumbs. Chill the cake for 15 minutes after this initial coat firms up. Then go wild with the rest of your buttercream! A simple offset spatula gives the smoothest finish, but I sometimes make « swirls » for a more playful look.
The final Easter touch: decorate the top with whatever candy matches your hidden filling! I love creating a border of mini eggs around the edge or spelling out « HAPPY EASTER » in jelly beans. The key is letting kids (or eager adults) see there’s candy involved – it builds anticipation for the big reveal when you slice into it!
Pro Tips for Perfect Easter Chocolate Pinata Cake
After making this Easter chocolate piñata cake more times than I can count (my nieces demand it every spring now!), I’ve learned a few secrets that make all the difference. First – and I can’t stress this enough – use room temperature eggs and butter! Cold ingredients just don’t blend as smoothly, and your cake won’t rise properly. I leave mine out at least 30 minutes before baking – unless it’s super hot, then maybe just 20.
Here’s my favorite trick for perfect layers: after baking, level those cake tops with a serrated knife before assembly. Those domed tops might look pretty, but they’ll make your piñata cave collapse under the weight of all that candy. And to prevent dry edges? Simple – don’t overbake! I pull mine out when a toothpick shows a few moist crumbs, not completely clean. The carryover heat finishes the job as they cool.
Easter Chocolate Pinata Cake Variations
One of the best things about this Easter chocolate piñata cake is how easily you can mix it up! My kids love when we do a white chocolate version – just swap the cocoa powder for 1 cup of white chocolate chips melted with the butter. For themed parties, match the candy colors to the celebration – think red and green for Christmas or school colors for graduations.
Need dairy-free? No problem! I’ve successfully used almond milk and coconut oil in place of regular milk and butter (just watch your candy choices too). My vegan sister swears by flax eggs in the cake. Honestly, the possibilities are endless – that’s why this cake never gets old in our house!
Nutrition Information
Okay, let’s talk numbers – but remember, these are just estimates based on my standard recipe! Your exact nutrition might vary depending on the brands you use or if you tweak the ingredients (like I sometimes do when I’m feeling adventurous). Here’s the rundown per slice (assuming you cut that beautiful cake into 12 generous portions):
- Calories: Around 450 – hey, it’s a celebration cake!
- Sugar: 55g (mostly from that glorious frosting and candy surprise)
- Protein: 4g (those eggs do some work!)
- Carbs: 75g (worth every delicious bite if you ask me)
Just between us, I never actually count any of this when I’m enjoying a slice – life’s too short! But if you’re keeping track, remember that different candy mixes will change the numbers, and swapping ingredients (like almond milk for regular) will adjust things too. The main thing? This cake brings joy, and that’s the best kind of nutrition there is.
FAQs About Easter Chocolate Pinata Cake
Can I make this Easter chocolate piñata cake ahead?
Absolutely! The cake layers actually taste better when made a day ahead – just wrap them tightly in plastic wrap at room temperature. Assemble with candy and frost up to 6 hours before serving. My trick? The freezer! Baked layers freeze beautifully for up to a month – thaw overnight before assembling your candy surprise.
How should I store leftovers?
Here’s the funny thing – we rarely have leftovers! But if you do, store any remaining cake in an airtight container at room temperature for up to 3 days. The candy might soften slightly, but it’ll still taste delicious. Just keep it away from direct sunlight – trust me, melted frosting is no one’s idea of a good time.
What are the best candy alternatives for the filling?
Oh, I love getting creative here! Mini chocolate eggs are classic, but jelly beans add great color contrast. For nut-free schools, use M&Ms or even small marshmallows. My wildcard pick? Freeze-dried fruit like strawberries for a pop of tartness! Just avoid anything too sticky (looking at you, caramel-filled eggs) or it might glue your cake layers together.
Easter Chocolate Piñata Cake
Ingrédients
Equipment
Method
- Preheat the oven to 350°F (175°C). Grease and flour two 9-inch round cake pans.
- In a large bowl, mix flour, sugar, cocoa powder, baking powder, baking soda, and salt.
- Add milk, vegetable oil, eggs, and vanilla extract. Beat on medium speed for 2 minutes.
- Stir in boiling water. The batter will be thin. Pour evenly into the prepared pans.
- Bake for 25-30 minutes, or until a toothpick inserted comes out clean. Cool for 10 minutes in the pans, then transfer to a wire rack to cool completely.
- While the cakes cool, make the frosting. Beat butter until creamy. Gradually add powdered sugar, milk, and vanilla extract. Beat until smooth.
- Once the cakes are cool, use a round cookie cutter to remove the center of one cake layer. Fill the hole with Easter candy.
- Place the second cake layer on top. Frost the entire cake with the prepared frosting.