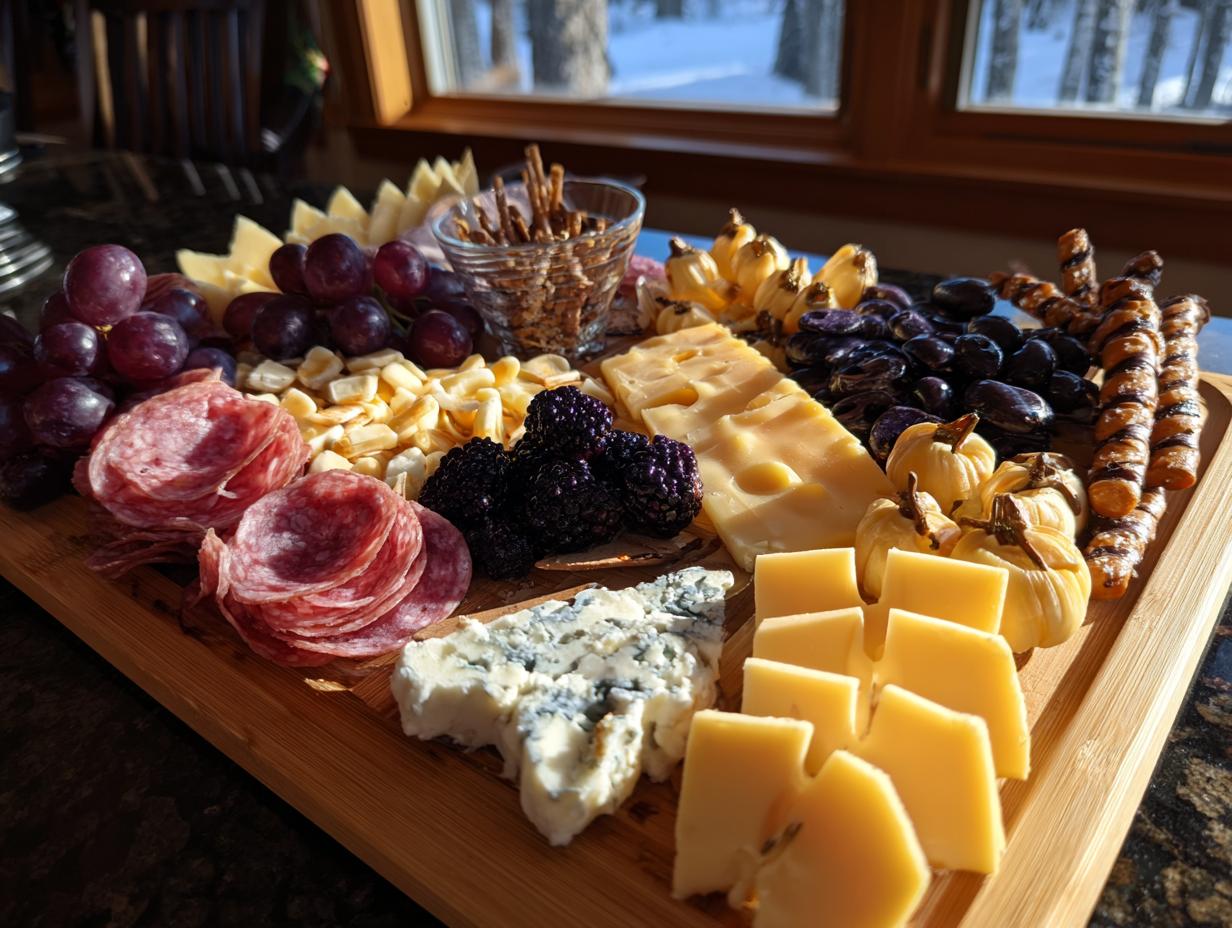
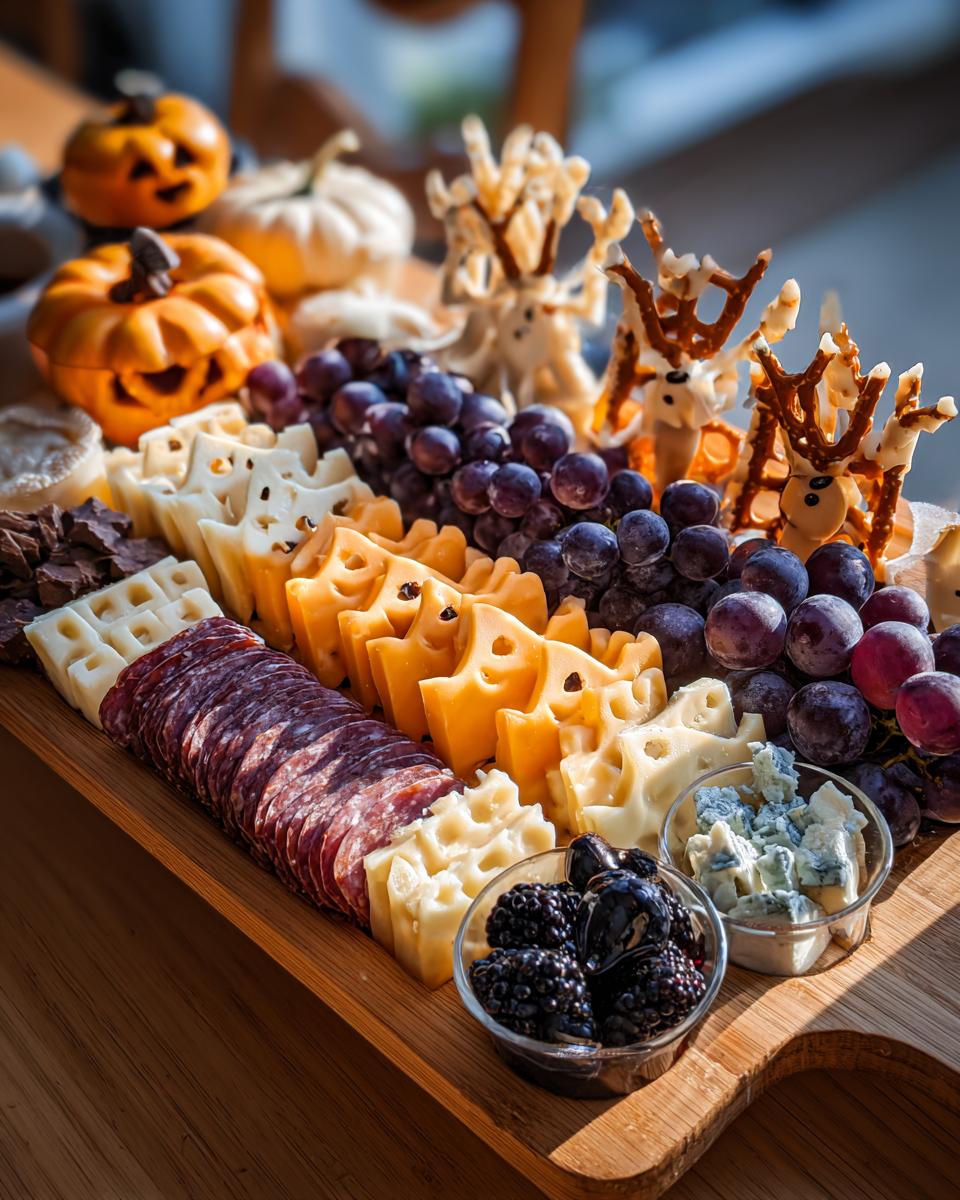
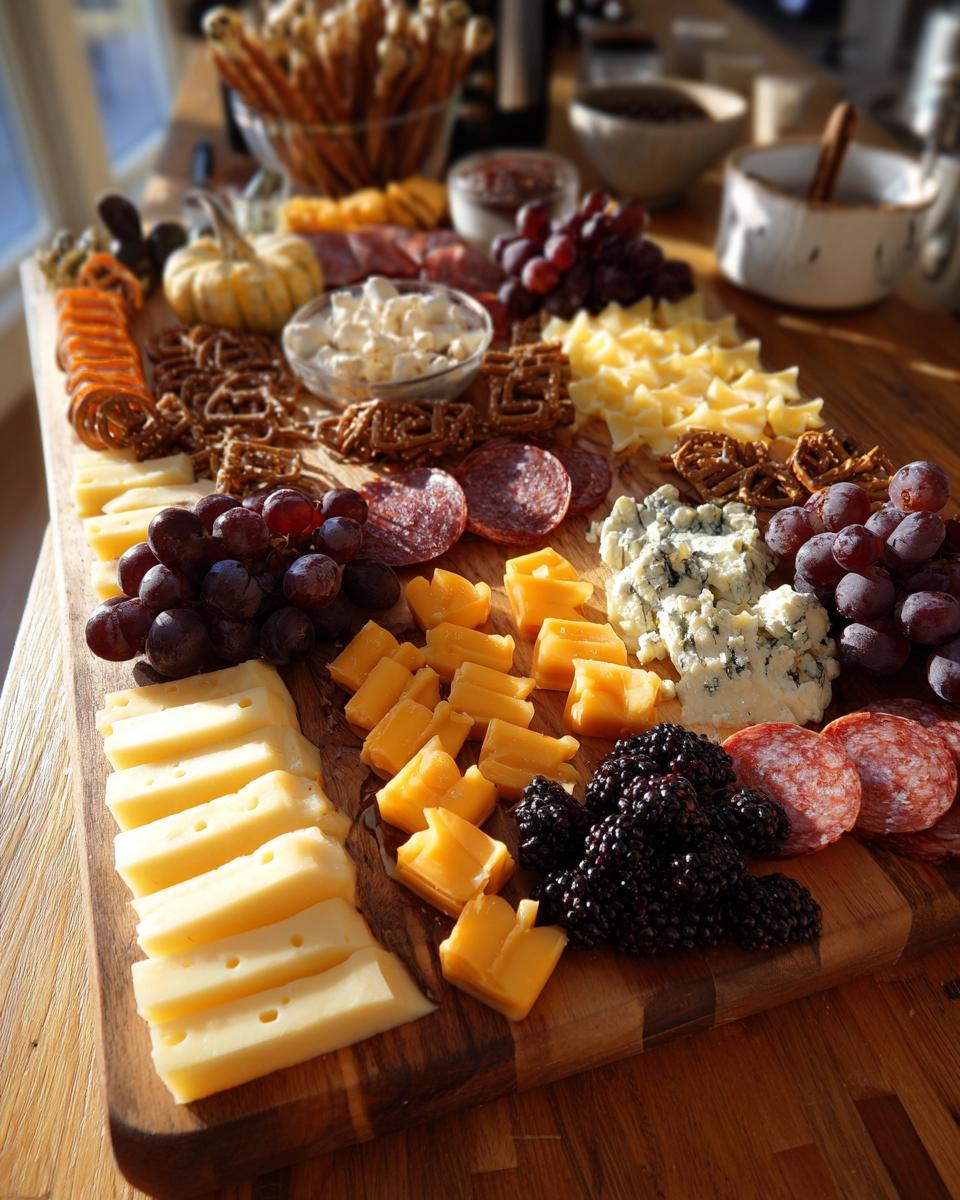
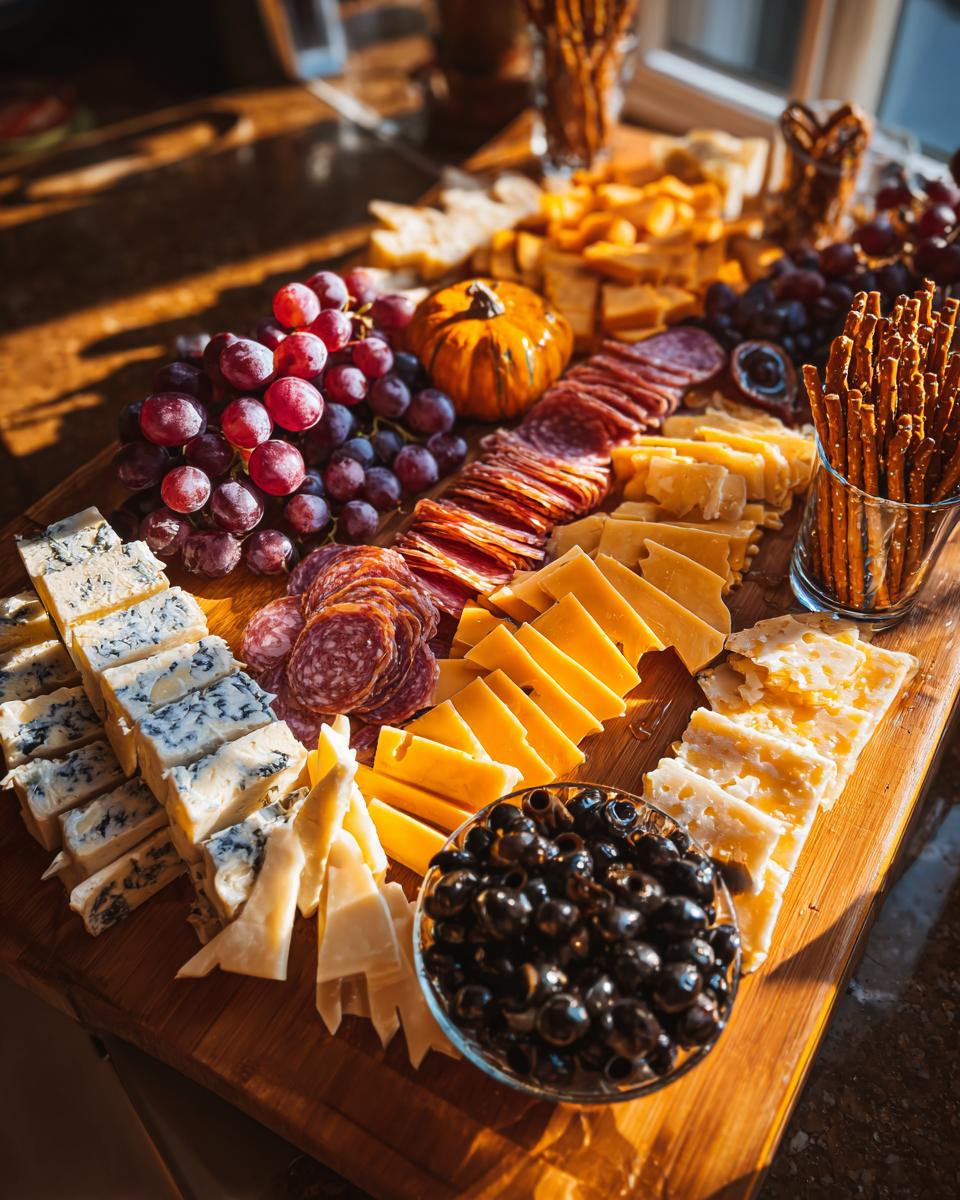
You know that moment when your Halloween party transitions from « cute » to « spooktacular »? That’s exactly when my Spooky Halloween Charcuterie Board steals the show! I discovered this sweet-and-scary trick years ago when my « regular » cheese board got overlooked at our annual monster mash. Now it’s become our must-have tradition – imagine gouda pumpkins chatting with prosciutto ghosts while chocolatey spider webs tempt everyone’s sweet tooth. Last year, my little niece even refused to eat the salami « worms » – until she realized they were delicious! The best part? This hauntingly good spread comes together in just 20 minutes, leaving you plenty of time to perfect your witch cackle.
Why You’ll Love This Spooky Halloween Charcuterie Board
Listen, I know you’re already sold on the whole « edible ghosts » concept, but let me tell you why this board became my Halloween MVP:
- Party superhero: It literally assembles itself while you’re busy perfecting your zombie makeup (I’ve done this mid-contour!)
- No cooking required: Just slice, roll, and arrange – even my candy-fueled nephews could help with the bat cutouts
- Customizable frights: Swap in your favorite cheeses or make it spicier with pepper jack tombstones
- Sweet & savory magic: That honey drizzle over blue cheese? Total « why didn’t I think of that? » moment
- Instagram gold: Last year’s photo got more likes than my actual costume – and lasted longer than the candy bowl
Ingredients for Your Spooky Halloween Charcuterie Board
Here’s exactly what you’ll need to bring this haunted snack board to life – with plenty of room for improvisation (because every good ghost story needs some creative embellishments)! I’ve broken it down into bite-sized categories so you can shop smarter:
The Cheeses – Our Spooky Stars
- 8 oz white cheddar cheese – Aged just enough to hold those perfect bat shapes when you press your cookie cutter in
- 8 oz gouda cheese – Its sunny color makes unbeatable pumpkin slices (the smokier it is, the « rottier » they’ll look – bonus!)
- 8 oz blue cheese – Crumbled like freshly dug grave dirt, waiting for its honey drizzle spiderwebs
The Meats – Crawly Creatures
- 8 oz salami – Thin slices roll effortlessly into those deliciously creepy « worms »
- 8 oz prosciutto – Delicate enough to float into ghostly shapes without tearing
Spooky Supporting Cast
- 1 cup black olives – Whole ones double as creepy eyeballs if you pop a sliver of pimento inside
- 1 cup purple grapes – Their dark hue screams « poisoned » in the most inviting way
- 1/2 cup pumpkin seeds – Adds crunch and doubles as « fingernail » decor
- 1/4 cup honey – The secret weapon for glueing flavors together
- 1 box chocolate-covered pretzels – Break them into spider-leg fragments
See? Nothing too exotic – just clever twists on pantry staples. If your grocery store’s cheese section seems overwhelming, just whisper « Halloween magic » and grab whatever looks tastiest!
Equipment Needed
Okay, let’s talk tools – and don’t worry, you won’t need a cauldron for this one! The beauty of this spooky board is that you probably have most of this stuff already hiding in your kitchen like a shy ghost. Here’s what makes my life easier when creating this Halloween masterpiece:
- Large serving board – That wooden cutting board you use for charcuterie? Perfect. A baking sheet works in a pinch too – just cover it with parchment for instant spooky vibes.
- Bat/pumpkin/ghost cookie cutters – The tiny 1-2 inch ones are my go-to. No Halloween set? Get creative! A knife and steady hand can turn cheese squares into tombstones.

That’s seriously it. No fancy equipment, just a little imagination (and maybe some extra napkins for those honey-dripping ghosts).
How to Assemble Your Spooky Halloween Charcuterie Board
Alright, let’s bring this nightmare snack board to life! I promise it’s way easier than it looks – I’ve done this while half-asleep and still got rave reviews. Just follow these steps, and you’ll have a Halloween masterpiece that’ll make your guests do a double-take before digging in.
- Chill your cheeses first – About 10 minutes in the freezer makes them so much easier to cut without crumbling. Trust me, warm gouda turns into pumpkin mush!
- Press those cookie cutters firmly – Don’t be shy! A quick wiggle helps release the shapes cleanly. Save the scraps for a « cheese graveyard » pile.
- Roll your salami worms tight – Start at one end and spiral inward. If they unfurl, just secure with a toothpick « spine » (remove before serving!).
- Ghost-fold your prosciutto – Drape slices over knife handles or spoons to get those floaty, ethereal shapes. So much easier than trying to hand-fold them!
- Start with your big showstoppers – Place the cheese bats and pumpkins first, then fill in around them. The olives somehow always roll away, so I do those last.
- Web it up with honey – Drizzle over blue cheese crumbles using a fork for wispy « spiderweb » effects. The stickier, the eerier!
- Final creepy touches – Tuck pumpkin seeds between items like scattered teeth, and break chocolate pretzels into jagged pieces.
Preparing the Cheese Shapes
The secret to perfect cheese cutouts? Cold, cold cheese and dry cutters. I learned this the hard way after creating a batch of « mutant bats » with soft cheddar. For ultra-clean edges, dip your cookie cutter in hot water first and pat dry. And if a bat loses a wing? Just press it back on – no one will notice during the midnight snack rush!
Creating the Meat Decorations
Those salami worms look complicated, but they’re actually the easiest part! Just roll from one end to the other – the tighter, the wormier. For my prosciutto ghosts, I drape slices over overturned wine glasses to get those perfect flowing shapes. If they tear (and they will), just layer the pieces – haunted ghosts are supposed to look a little ragged, right?
Pro Tips for the Perfect Spooky Halloween Charcuterie Board
Listen, I’ve made every mistake possible with this board (including the infamous « cheese volcano » incident of 2020), so let me spare you the horror with my hard-won tricks:
Freezer is your friend – I pop my cheeses in for about 15 minutes before cutting. You’d be amazed how beautifully firm gouda holds those pumpkin shapes when it’s properly chilled. Just don’t forget about it like I did last year – frozen cheddar bats are no one’s idea of a good time!
Toothpick magic – Those prosciutto ghosts playing hard to get? Slide in a toothpick where no one will see it. I call them « invisible ghost hands » that hold everything together until serving time.
Color balance matters – Alternate your spooky whites (cheese ghosts) with deep purples (grapes) and blacks (olives) for maximum creepy contrast. My first attempt looked like a zombie graveyard at noon – way too pale!
Honey drizzle hack – Warm your honey slightly before drizzling for perfect web-like strands. Cold honey comes out in blobs that look…well, let’s just say the kids called it « monster drool. »
And my top secret? I always make extra bat cutouts – they mysteriously disappear during assembly (wink).
Creative Variations for Your Spooky Halloween Charcuterie Board
Now here’s where the real fun begins – making this spooky board your own! I play Frankenstein with ingredients every Halloween (« It’s alive! ») and trust me, these variations always get screams of delight:
- Spicy graveyard shift: Swap gouda for pepper jack tombstones – bonus points if you carve « RIP » into them with a toothpick
- Eyeball invasion: Marinate mozzarella balls in beet juice for bloody-looking eyes (pop an olive slice pupil in the center)
- Vegan nightmares: Use nut-based cheeses shaped into ghosts and smoked carrot strips folded like flesh ribbons
- Candy crossover: Add chocolate-covered raisins as « bat droppings » or gummy worms peeking out from cheese caves
- Gluten-free ghouls: Skip the pretzels and make spiderwebs from gluten-free crackers crumbled over blue cheese
The best part? You really can’t mess this up. Last year my « failed » cheese bats became crumbling zombie remains that people fought over!
Serving and Storing Your Spooky Halloween Charcuterie Board
Okay, here’s the terrifying truth – this spooky board is scariest when left out too long! For best results, serve it at room temperature (let cheeses breathe for about 15 minutes after fridge time). But watch the clock like a hawk during your party! Those creamy cheeses and delicate meats should only mingle with guests for 2 hours max if you’re serving indoors. Outdoors with that pumpkin punch bowl? Just 1 hour before they start looking actually haunted!
Storing leftovers is easy-peasy – just carefully wrap the whole board in plastic (try not to smush those adorable ghosts) and refrigerate. It’ll keep its deliciousness for 2-3 days, though the bat shapes might lose some of their edge (much like my energy after Halloween night). A quick trick? Store components separately in airtight containers next time – the salami worms keep their curl better that way.
Food safety PSA from someone who learned the hard way: If you see any suspicious fuzz growing where the honey met the blue cheese? That’s nature’s way of saying « toss it. » Better to sacrifice a few zombie olives than your guests’ stomachs!
Frequently Asked Questions
Can I prepare this spooky charcuterie board ahead?
Absolutely! I actually recommend prepping the cheese shapes and rolled meats a day beforehand. Just store everything separately in airtight containers – the cheese cutouts go in the fridge wrapped in parchment paper (they’ll stick without it!), and those adorable prosciutto ghosts lounge happily between wax paper sheets. Assemble everything right before guests arrive so nothing gets soggy or loses its creepy charm.
What if I don’t have Halloween cookie cutters?
No problem – this happened to me mid-recipe last year! A small knife turns cheese squares into tombstones (carve « RIP » if you’re feeling fancy), while bell pepper stems make perfect pumpkin tops. Or go abstract – random cheese chunks become « monster bites » when paired with raisin « ants ». Honestly, my most complimented board used wine glass rims to make floating ghost circles!
How can I make this board more kid-friendly?
My nieces taught me: less gore, more giggles! Swap blue cheese for cream cheese « ghosts », use rainbow carrots instead of olives (« monster fingers »), and shape salami into happy snails instead of worms. Chocolate chips become « spider eyes » dotting cheese slices, and honey turns into happy-face drizzles. Bonus – kids love helping assemble these sweeter versions!
What’s the best way to transport this spooky board?
Ohhh I’ve mastered this after too many « cheese avalanche » car rides! Place small pieces of masking tape underneath cheeses to secure them. Cover completely with plastic wrap pressed firmly onto the board (pull tight!), then wrap the whole masterpiece upside down in a towel-lined baking sheet. Those ghosts won’t float away!
Can I make a vegetarian version?
Darling, some of my scariest boards have been vegetarian! Swap meats for rolled-up roasted red pepper « blood worms », tofu-skinned ghosts, and cashew-cheese bats. Marinated mushrooms make excellent « severed ears » (dark humor optional!), and beet-pickled eggs transform into haunting eyeballs. The honey drizzle works its magic on veggie versions too!
Nutritional Information
Now, I’m no math witch, but let’s talk numbers – or rather, why we shouldn’t obsess over them here! This spooky spread’s nutritional info varies more than a shapeshifter depending on your cheese choices and how liberally you drizzle that honey. A gouda bat has different stats than a pepper jack tombstone, you know? While I could pretend to calculate precise « serving sizes » (who stops at just one ghost?), it’s way more fun to focus on the vitamin F – for Frightfully Delicious!

Spooky Halloween Charcuterie Board
Ingrédients
Equipment
Method
- Cut the white cheddar cheese into bat shapes using a small bat-shaped cookie cutter.
- Cut the gouda cheese into pumpkin shapes using a small pumpkin-shaped cookie cutter.
- Roll the salami slices into tight spirals to create ‘worm’ shapes.
- Fold the prosciutto slices into loose, flowing shapes to resemble ghosts.
- Arrange all ingredients on a large serving board, grouping similar items together.
- Drizzle honey over the blue cheese crumbles for a sticky, web-like effect.
- Fill any gaps with black olives, grapes, and pumpkin seeds.
- Add chocolate-covered pretzels around the edges for a sweet finishing touch.