You know what’s better than a regular lunch? A Halloween lunch that makes your kids’ eyes light up like jack-o’-lanterns! I still remember the first time I whipped up this spooky spread for my little monsters—they couldn’t stop giggling over their ghost-shaped cucumbers and pumpkin pepper slices. And the best part? It’s ridiculously easy. No fancy skills needed, just a few cookie cutters and a dash of creativity. Whether you’re a busy parent rushing between costumes and candy or just want to add some festive fun to lunchtime, this Halloween lunch is your secret weapon. Trust me, even the pickiest eaters will gobble it up!
Why You’ll Love This Halloween Lunch
Oh my gosh, this Halloween lunch is seriously the easiest way to make ordinary lunchtime feel like a party! Here’s why I’m obsessed with it (and why my kids beg for it every October):
- Super quick – You can throw this together in under 15 minutes while wrangling costumes and candy buckets. No fancy cooking required!
- Kid-approved magic – My little monsters actually eat their veggies when they’re shaped like ghosts and pumpkins. Who knew?
- Pantry staples – Just bread, PB&J, and whatever veggies you’ve got. No last-minute grocery runs needed.
- Instant Halloween vibes – That moment when your kids see their lunchbox? Pure joy. Worth every second of effort.
Seriously, it’s the little things that make Halloween special – and this lunch is one of my favorite traditions now!
Ingredients for Your Halloween Lunch
Okay, let’s raid the kitchen for our spooky lunch supplies! Here’s everything you’ll need – and trust me, it’s all stuff you probably have already. I’ve broken it down into two parts: the sandwich basics (because every monster needs fuel) and the fun decorations that make this lunch scream Halloween!
For the Sandwiches
- 8 slices of bread – Any kind works, but I love using whole wheat for that extra crunch. My kids never notice when it’s healthy!
- 4 tbsp peanut butter – Creamy or chunky, your call. We’re team creamy in our house – less mess when cutting shapes!
- 4 tbsp jelly – Grape is classic, but strawberry makes the cutest “blood” effect if you’re going for creepy-cute.
For the Decorations
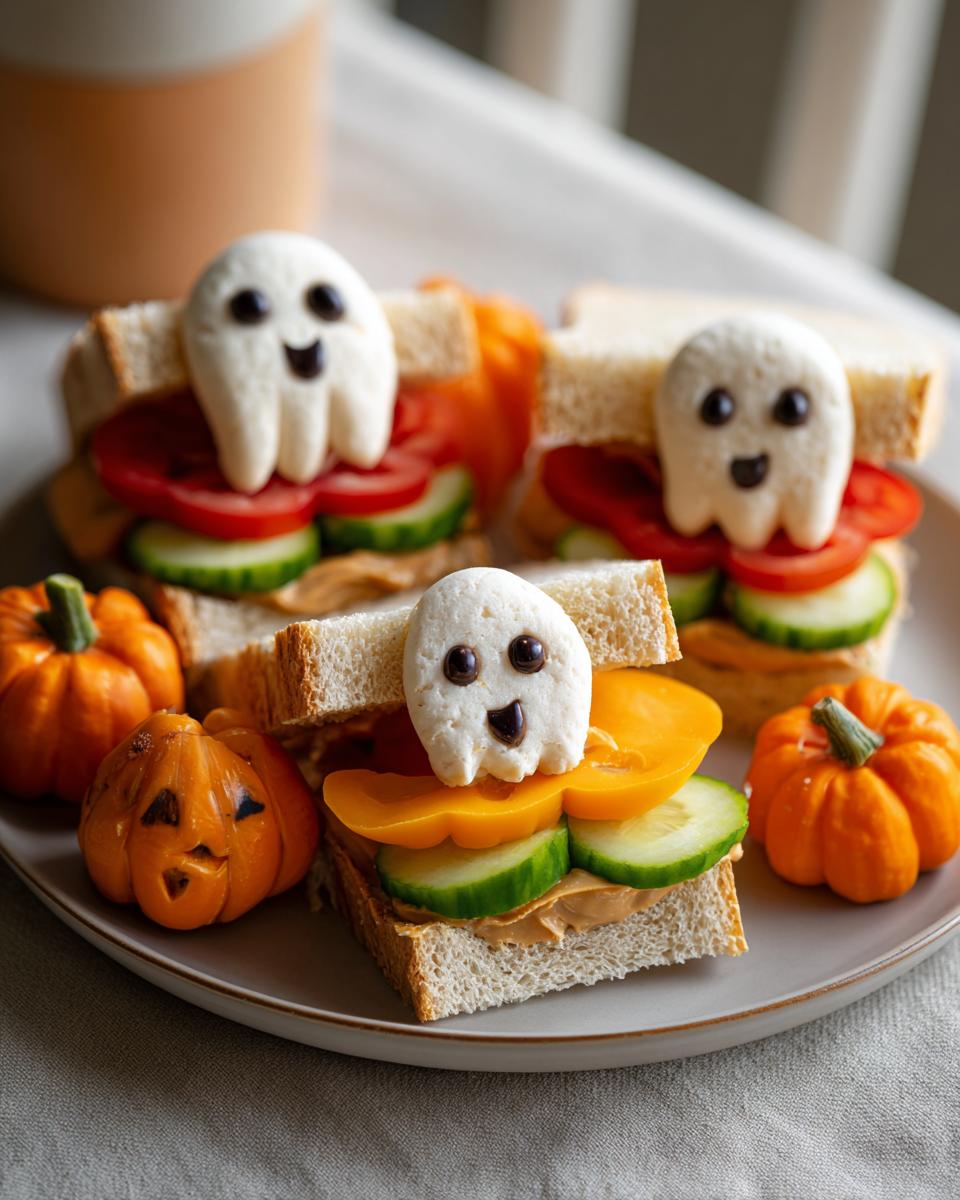
- 1 small orange bell pepper – We’re slicing this into pumpkin shapes. Pro tip: pick one with a flat side so it doesn’t roll while cutting!
- 1 small cucumber – Ghosts incoming! The thinner English cucumbers work best for delicate shapes.
See? Told you it was simple. Now grab those cookie cutters – let’s make some magic!
Equipment Needed for Halloween Lunch
Okay, let’s talk tools – but don’t worry, we’re keeping it simple! Here’s what I grab when making our favorite Halloween lunch (and a few sneaky substitutes if you’re in a pinch):
- Baking sheet – Perfect for laying out all your sandwich shapes before decorating. No baking sheet? Any large plate works too!
- Mixing bowl – Just a small one for holding your veggie decorations. I’ve used cereal bowls in a pinch – whatever’s clean!
- Cookie cutters – The Halloween-shaped ones are obviously perfect, but any shapes will do. Last year we used a star cutter when we couldn’t find our bats – instant « spooky stars »!
That’s seriously it! No fancy gadgets needed – just whatever helps you make the cutest little monster lunch possible.
How to Make Your Halloween Lunch
Alright, let’s get spooky! Making this Halloween lunch is so easy, you’ll be done before you can say « Boo! » I’ve broken it down into three simple steps that even my littlest monster can help with. The best part? No cooking required – just assembly and a little creativity. Let’s turn that ordinary lunch into something magical!
Step 1: Prepare the Sandwiches
First things first – let’s make those sandwiches! Lay out your bread slices and grab your peanut butter. Here’s my secret: spread the peanut butter all the way to the edges – this helps keep the jelly from leaking out when we cut shapes later. Then add your jelly, but don’t go overboard! About a tablespoon per sandwich keeps things neat. Press the slices together gently – we want them snug but not squished flat. Pro tip: if your peanut butter is too thick, microwave it for 5 seconds to make spreading easier!
Step 2: Cut into Halloween Shapes
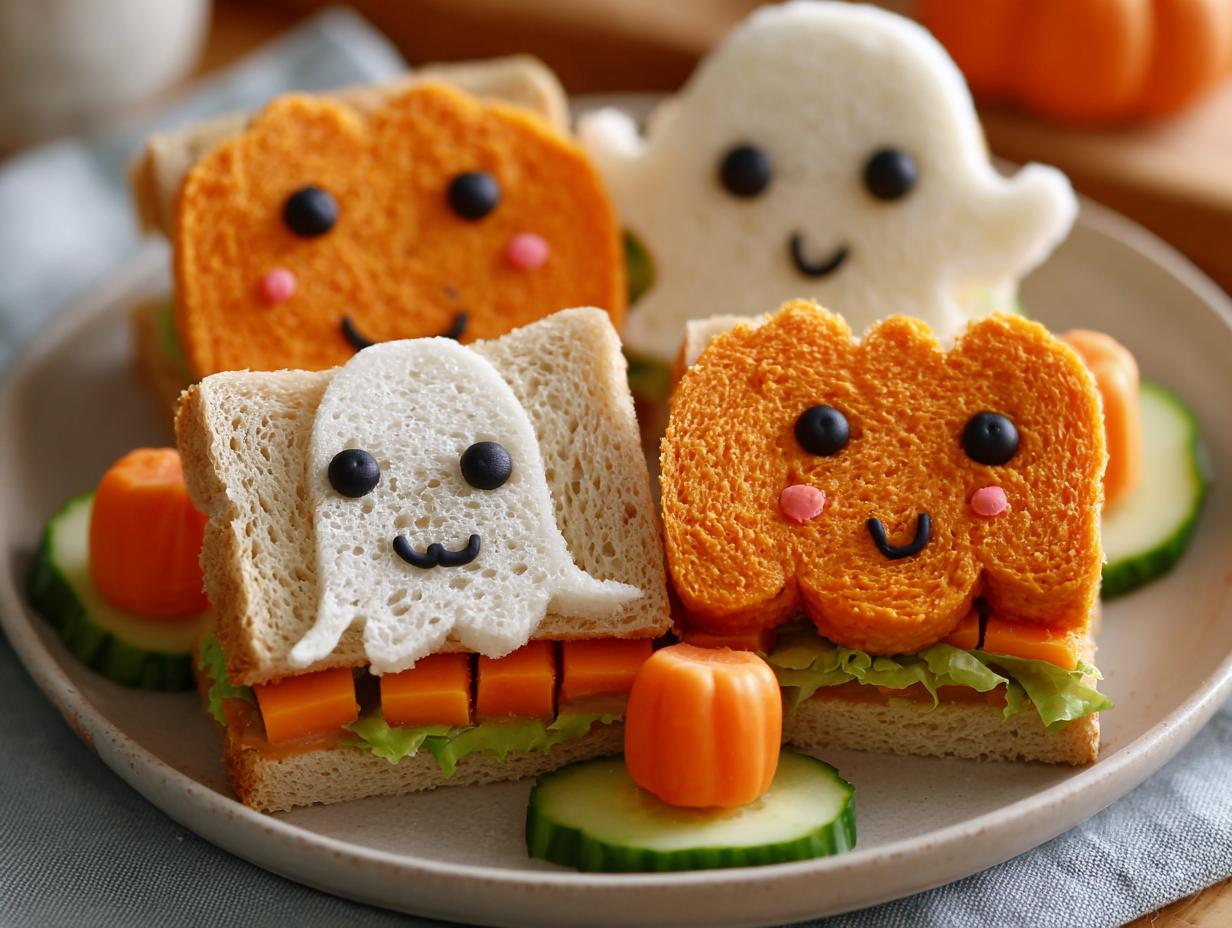
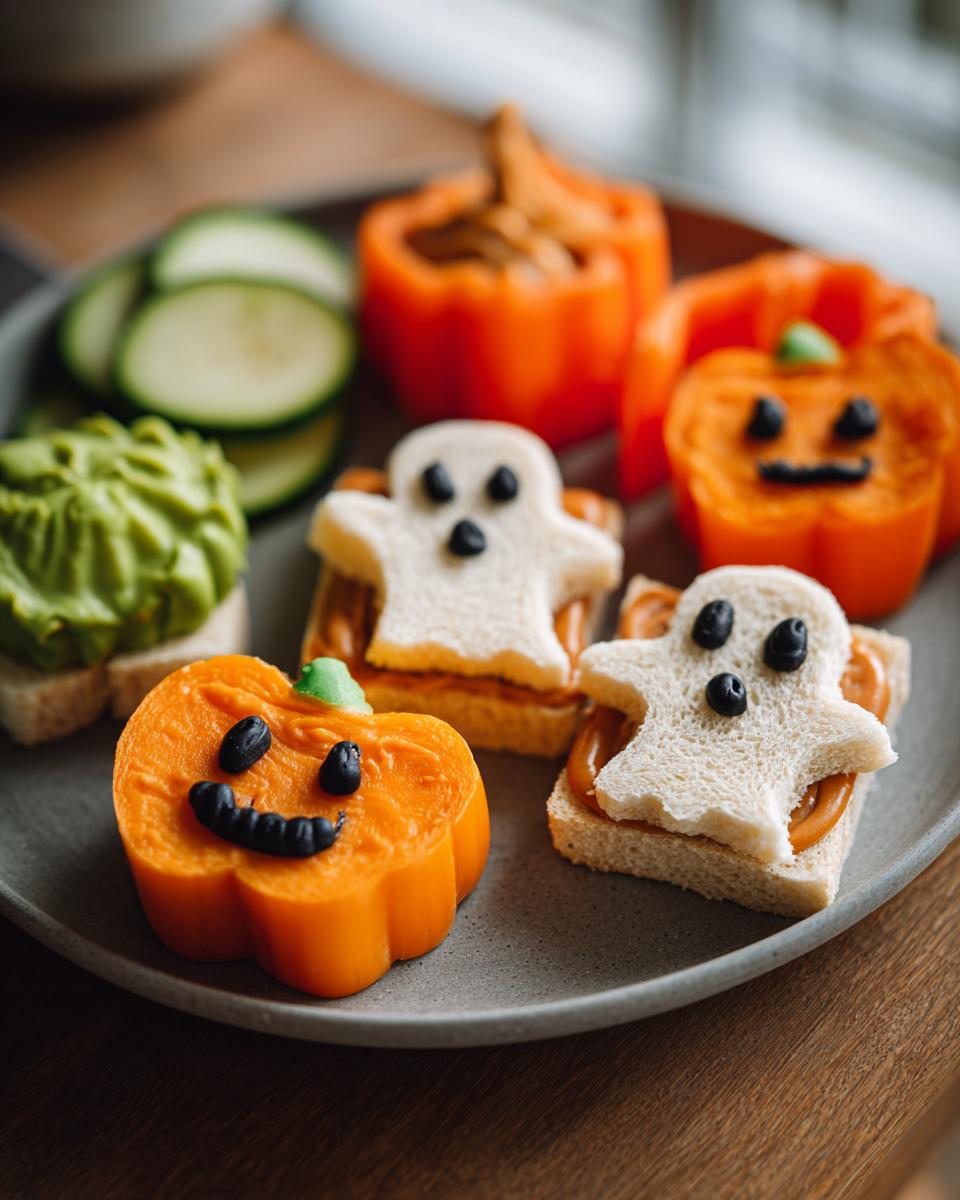
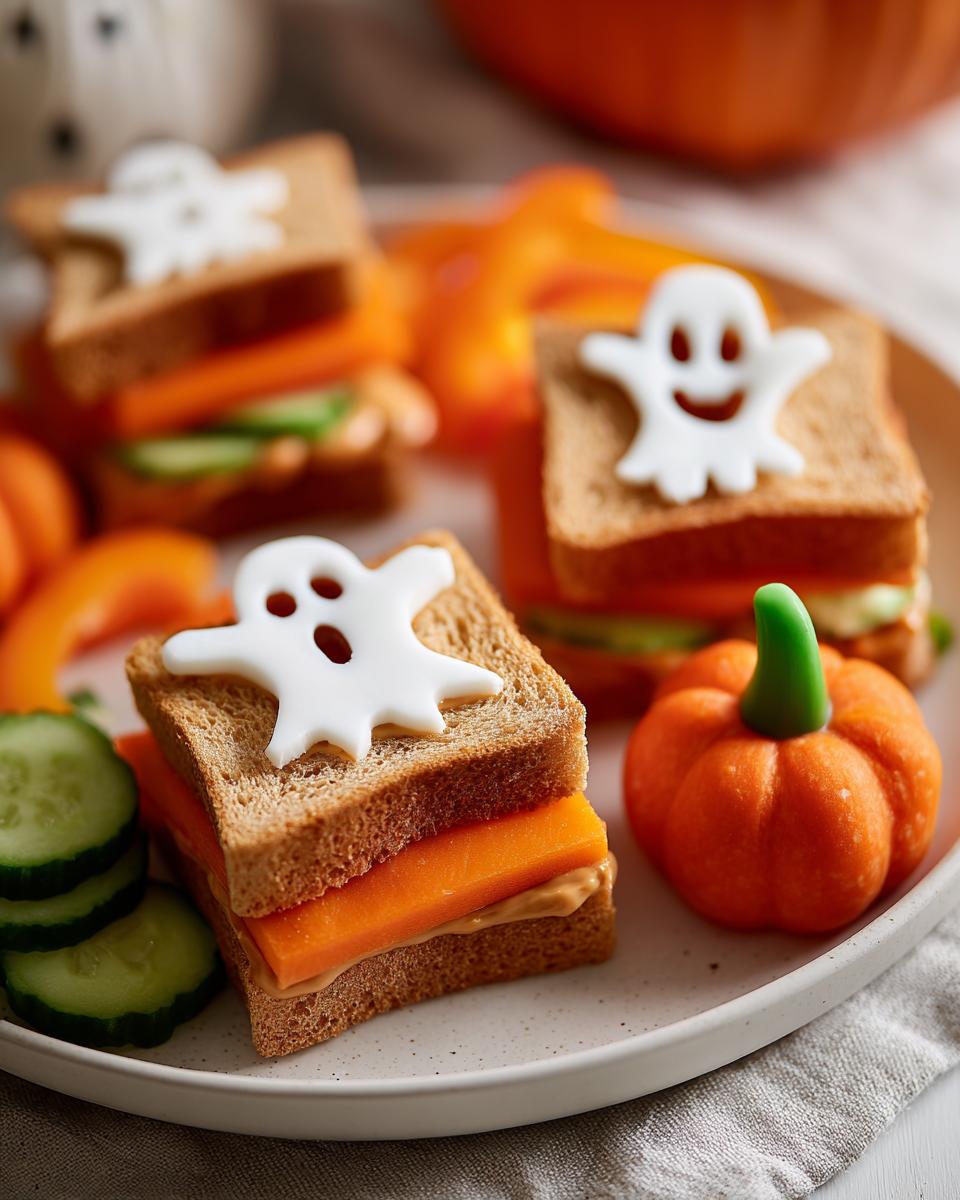
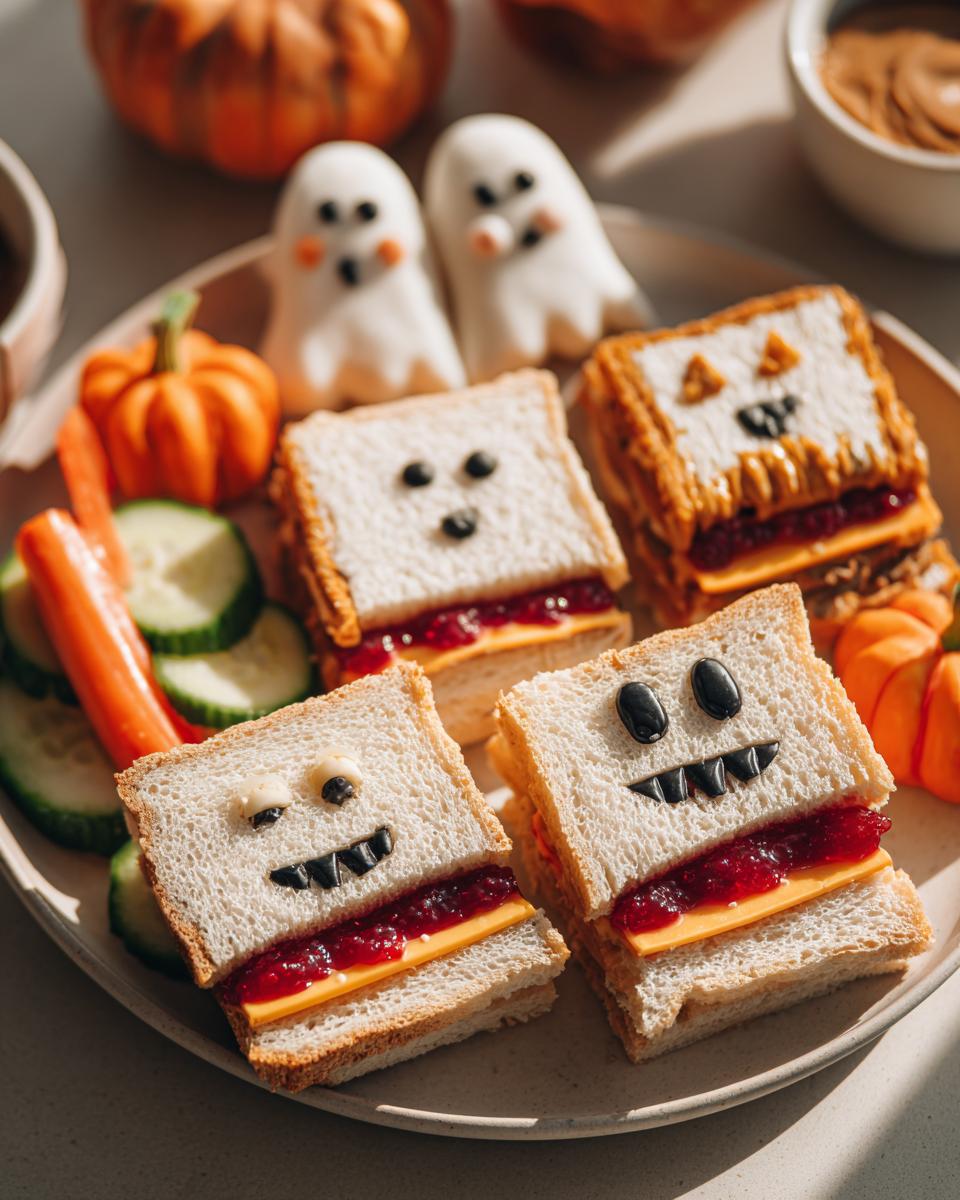
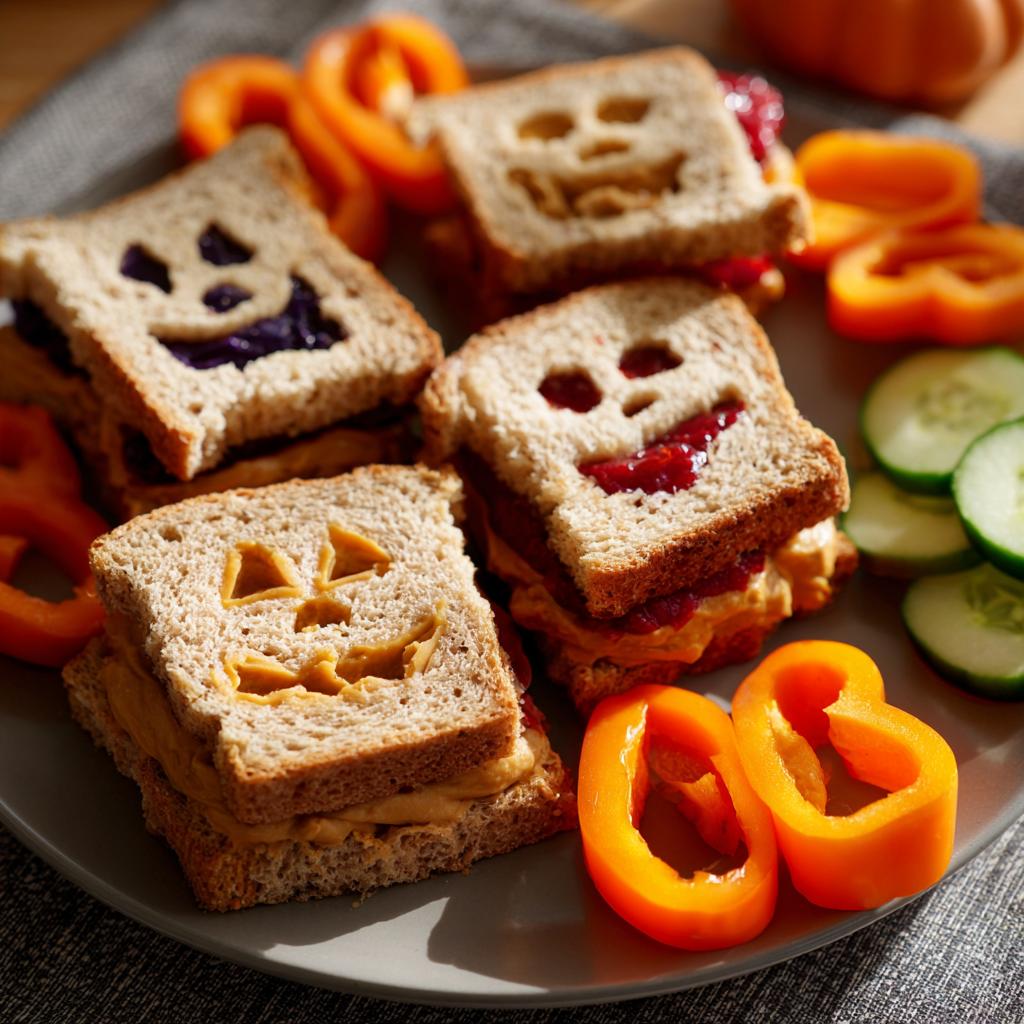
Now for the fun part – transforming those sandwiches into Halloween shapes! Grab your cookie cutters and press firmly straight down through the sandwich. Twist slightly to help release the shape cleanly. No Halloween cutters? No problem! A round glass makes perfect « moons, » and you can cut triangles from squares to make bats or ghosts. Save those crusts – they make great « spooky trees » when stood up on the plate! If your shapes stick to the cutter, just tap them gently on the counter – they’ll pop right out.
Step 3: Decorate Your Halloween Lunch
Time to bring our Halloween scene to life! Arrange your sandwich shapes on the plate first – these are your « main characters. » Then add those adorable pepper pumpkins and cucumber ghosts around them. I like to cluster a few pumpkins together like a little pumpkin patch, and scatter the ghosts like they’re floating by. The empty spaces? That’s your « haunted landscape » – no need to fill every inch! For extra fun, use a toothpick to draw little faces on your ghosts. And voila – lunch is served with a side of Halloween magic!
Tips for the Perfect Halloween Lunch
After making this Halloween lunch more times than I can count, I’ve picked up some tricks that make it even more spook-tacular! First off – dig through your cookie cutter stash (you know you’ve got one!). Mixing bat shapes with pumpkins and ghosts creates the cutest little haunted scene. Get the kids involved too – my little monsters love « painting » faces on cucumber ghosts with cream cheese!
Here’s my golden rule – assemble everything right before serving. PB&J sandwiches stay fresher that way, and your veggies stay crisp. If you must prep ahead, store the cut veggies in ice water – they’ll stay perky for hours. Oh! And save those sandwich scraps – they make perfect monster teeth when stacked randomly!
Variations for Your Halloween Lunch
Oh, the possibilities are endless when it comes to spooky lunchtime fun! Sometimes I swap out the peanut butter for cream cheese – it makes the perfect « ghostly white » base for cucumber bats. And those black olives? Slice them in half for creepy spider bodies, or use thin strips for spider legs. My kids go wild for it!
Here are some of our favorite twists: try hummus instead of PB&J for a savory version, or use cookie cutters on cheese slices to make « haunted house » windows. Carrot sticks become broomsticks when you tie them with chive « ribbons. » The key is to raid your fridge and let your imagination run wild – even ordinary foods become magical with a little Halloween spirit!
Frequently Asked Questions About Halloween Lunch
Oh, I get asked about this Halloween lunch all the time – especially by fellow parents who want to recreate the magic! Here are the questions that pop up most often (along with my tried-and-true answers from years of making these for my little goblins):
Can I make this Halloween lunch ahead of time?
You totally can, but with a few tricks! Assemble the veggie shapes and store them in an airtight container with a damp paper towel – they’ll stay crisp for hours. For the sandwiches, I wait to cut the shapes until right before serving to prevent sogginess. If you must prep early, spread a thin layer of butter before the peanut butter – it creates a moisture barrier!
What other shapes can I use besides pumpkins and ghosts?
Oh honey, let your imagination run wild! We’ve done bats (just cut triangles from squares), witches’ hats (use a cone shape), and even « Frankenstein bolts » from zucchini slices. No Halloween cutters? A drinking glass makes perfect full moons, and a knife can turn cheese slices into tombstones. Last year we made « spider webs » by drizzling yogurt over whole wheat bread – the kids lost their minds!
How do I keep the sandwiches from getting soggy?
This was my biggest struggle at first! Here’s what works: 1) Toast the bread lightly first – it holds up better, 2) Spread peanut butter to the edges as a moisture barrier, and 3) Use thicker jelly rather than runny jam. If you’re packing these in lunchboxes, place a piece of parchment between layers – it absorbs extra moisture without making things mushy. Trust me, these little tweaks make all the difference!
Nutritional Information for Halloween Lunch
Now, I’m no nutritionist, but I can tell you this Halloween lunch is packed with good stuff – when you use wholesome ingredients, that is! The exact nutrition will totally depend on your bread choice, peanut butter brand, and how heavy-handed you are with the jelly. My advice? Focus on whole grain breads and natural peanut butters if you’re watching sugar. Those veggie decorations add a nice vitamin boost too! Just remember – with fun food like this, the real magic is in the smiles it creates, not the calorie count.
Share Your Halloween Lunch Creations
Okay, I need to see your spooky lunch masterpieces! Tag me on Instagram with your Halloween creations – I live for seeing how you put your own twist on this idea. Did you make bat-shaped sandwiches? Turn carrots into witch fingers? I want all the details! Drop your photos in the comments too – let’s make this a virtual Halloween party. And if you’ve got questions or brilliant new ideas, shout ’em out! Nothing makes me happier than seeing this simple lunch spark creativity in other kitchens. Now go forth and make some lunchtime magic!
Ingrédients
Equipment
Method
- Spread peanut butter and jelly on the bread slices to make sandwiches.
- Cut the sandwiches into Halloween shapes using cookie cutters.
- Slice the orange bell pepper into pumpkin shapes and the cucumber into ghost shapes.
- Arrange the sandwiches and vegetable shapes on a plate.