Oh, Thanksgiving—the one day a year when it’s totally acceptable to eat your weight in turkey and pie while wearing stretchy pants. But let’s be honest, the real star of the show at our family gatherings? The Thanksgiving charcuterie board that sits proudly on the counter, tempting everyone before the main event. I still remember the first time I threw one together in a panic when my aunt showed up with unexpected guests. That beautiful mess of cheeses, meats, and seasonal goodies saved the day and became our new holiday tradition.
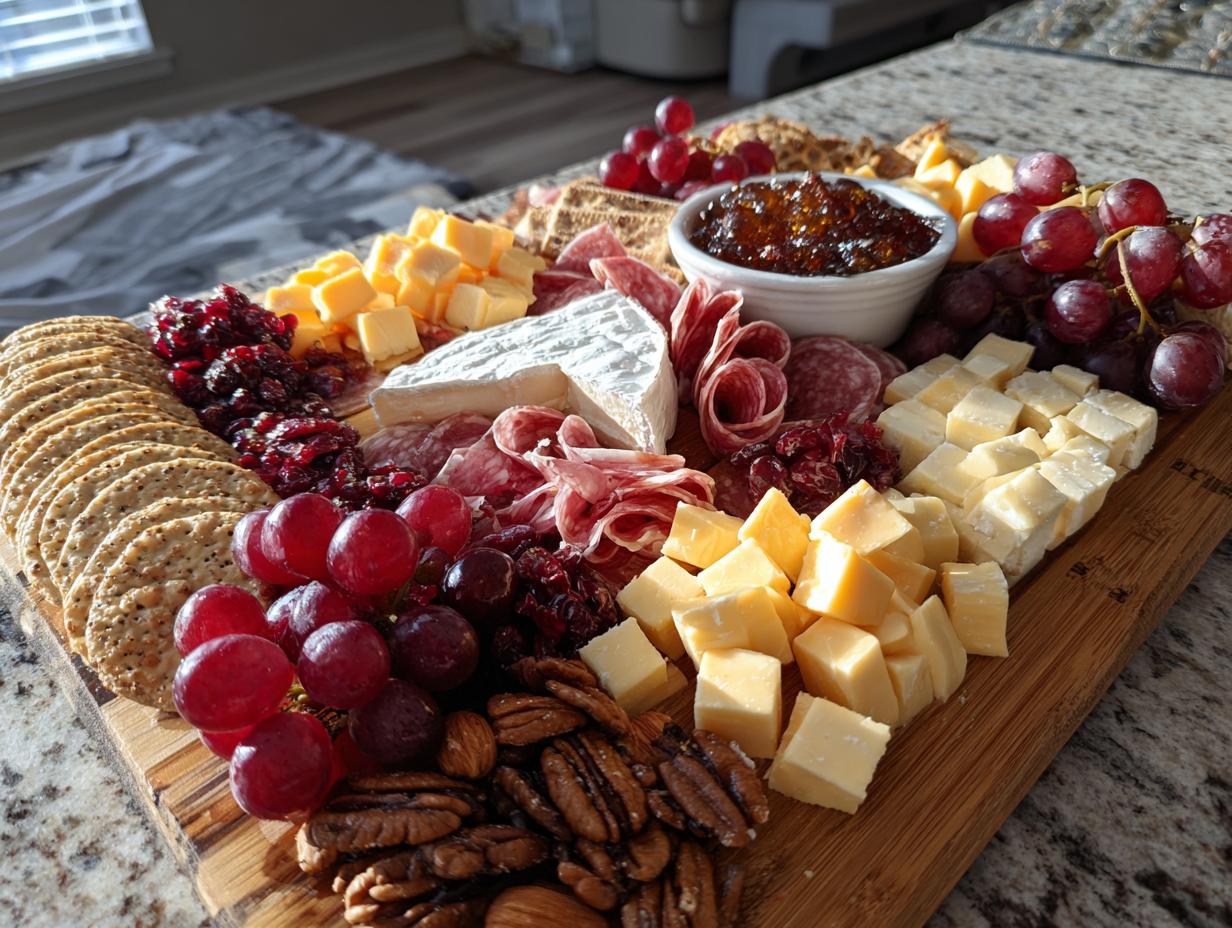
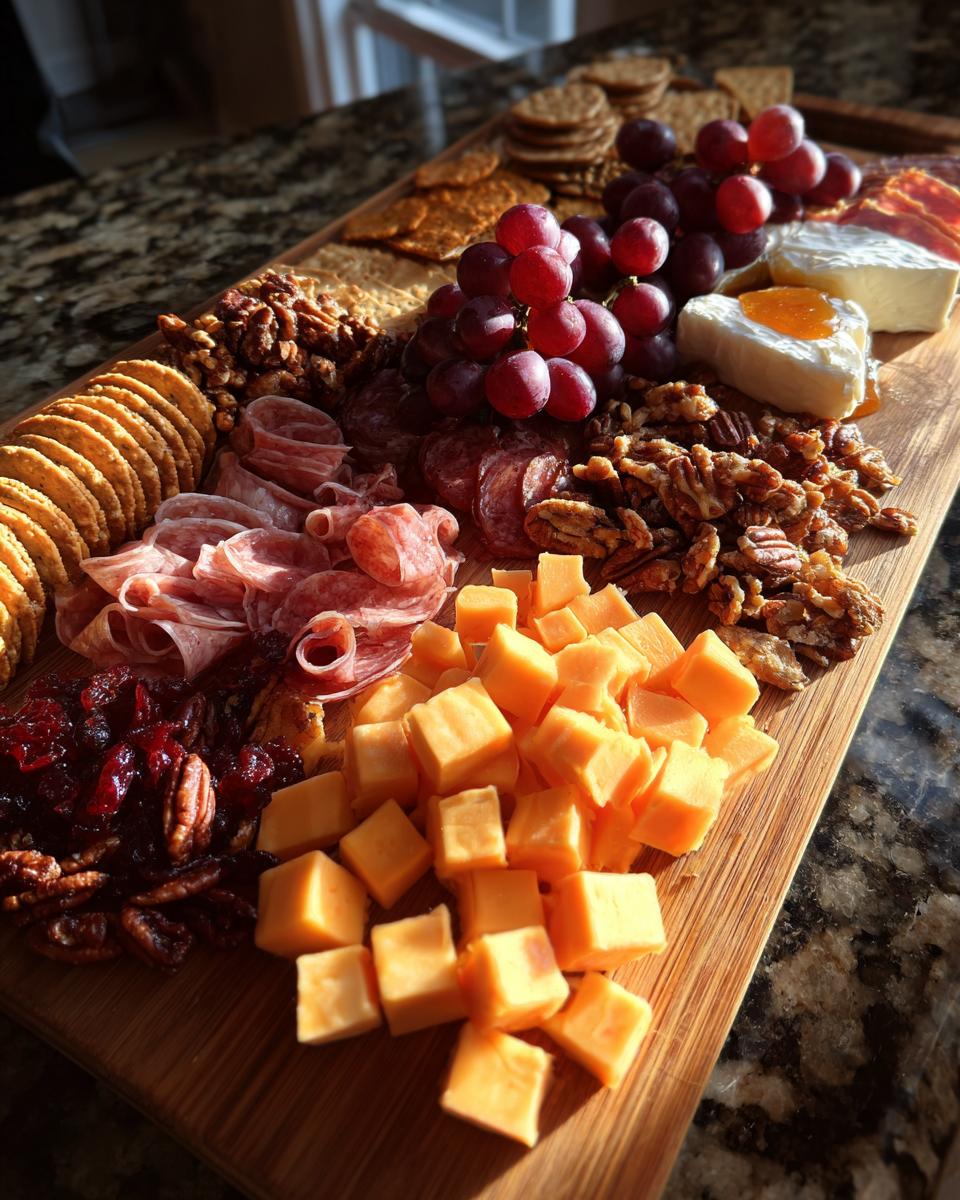
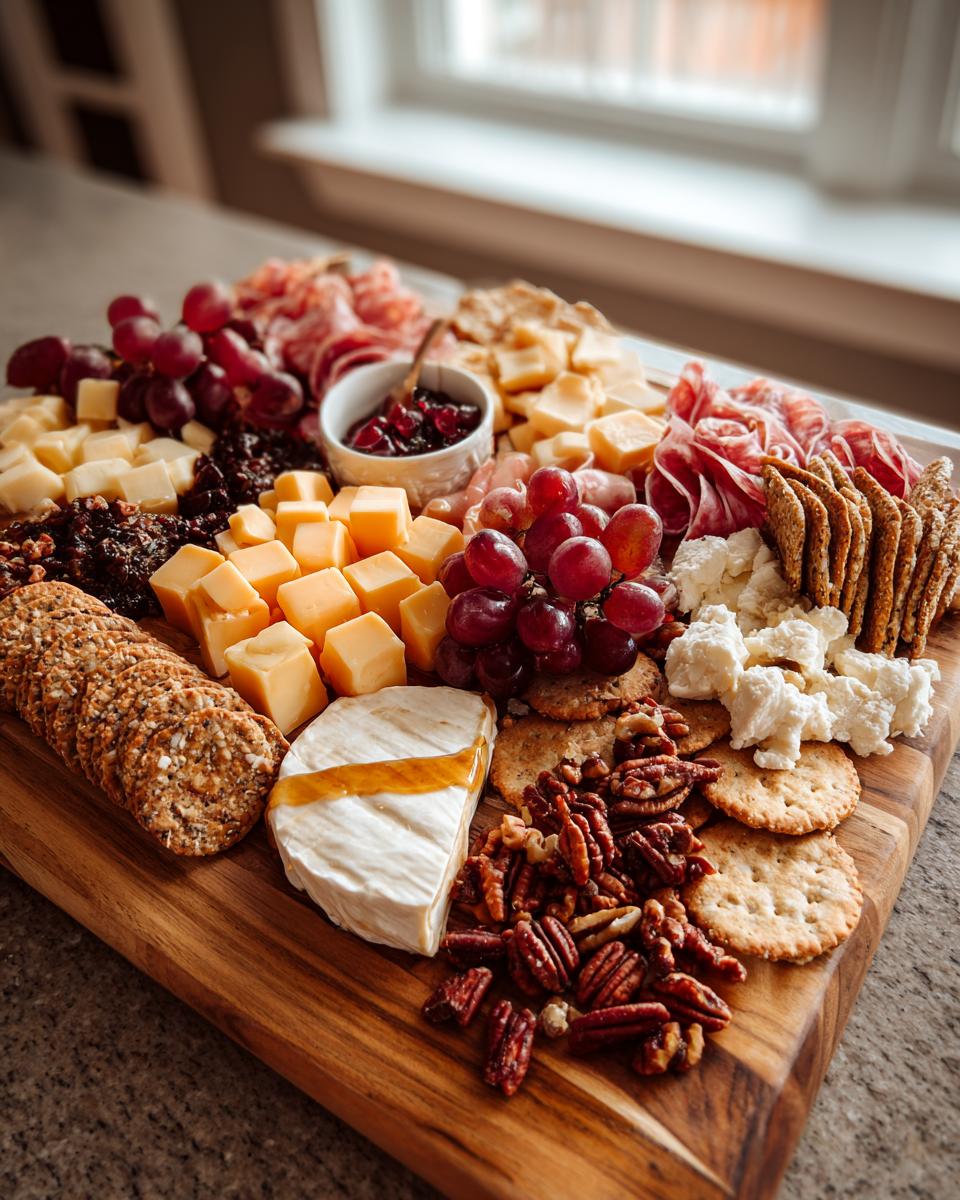
What makes these thanksgiving charcuterie board ideas so magical? They’re like edible centerpieces—bursting with color, texture, and flavor. The deep red grapes against creamy brie, the golden honey drizzled over sharp cheddar, those candied pecans that always disappear first… It’s a feast for the eyes before it even hits your taste buds. And the best part? Everyone can graze at their own pace while catching up with family. No plates needed, just good conversation and even better snacks.
Now my nieces and nephews race to see who can assemble the most creative board each year (last year’s turkey-shaped arrangement with pepperoni feathers was pretty impressive). Whether you’re feeding a crowd or just want something special to nibble on while watching the parade, a Thanksgiving charcuterie board is the perfect way to kick off the festivities.
Why You’ll Love These Thanksgiving Charcuterie Board Ideas
Let me tell you why this Thanksgiving charcuterie board is my go-to every year—it’s like the Swiss Army knife of holiday appetizers! First off, it’s downright gorgeous. The mix of colors from the red grapes, golden honey, and orange dried cranberries makes it look like a fall masterpiece. And the best part? It takes barely 20 minutes to throw together—perfect for when you’re juggling a million other Thanksgiving tasks.
Got picky eaters? No problem! You can easily swap out ingredients to please everyone. My cousin’s gluten-free? More crackers for me! Vegetarian in-laws? Extra cheese it is. And when unexpected guests show up (because they always do), just double the portions—this board stretches like magic to feed a crowd.
Trust me, once you see how quickly it disappears at your gathering, you’ll understand why this charcuterie board has become my favorite Thanksgiving tradition. It’s the perfect way to get people mingling and snacking while you put the finishing touches on the turkey.
Ingredients for Your Thanksgiving Charcuterie Board
Okay, let’s talk ingredients – this is where the magic happens! I’ve broken everything down into categories because, let’s be honest, that’s how my brain works when I’m racing through the grocery store the day before Thanksgiving. Here’s exactly what you’ll need to create a showstopping board:
Cheeses (because let’s be real, they’re the star):
- 1 cup sharp cheddar cheese cubes (I like to cut them into bite-sized chunks)
- 1 cup brie cheese slices (leave the rind on – it’s delicious!)
- 1 cup goat cheese (the creamy log kind, not crumbles)
Meats (for that perfect salty bite):
- 1 cup sliced prosciutto (fold it like fancy little handkerchiefs)
- 1 cup sliced salami (I prefer the hard kind that holds its shape)
Fruits & Nuts (for that sweet and crunchy balance):
- 1 cup red grapes (leave them in small clusters – so pretty!)
- 1 cup dried cranberries (these scream Thanksgiving to me)
- 1 cup candied pecans (trust me, these will disappear first)
Extras (the glue that holds it all together):
- 1 cup whole grain crackers (something sturdy enough to pile toppings on)
- ½ cup honey for drizzling (get the good stuff – it makes a difference)
Pro tip: If you’re feeling extra festive, grab some fresh rosemary sprigs too – they make gorgeous garnishes and smell amazing!
How to Assemble Your Thanksgiving Charcuterie Board
Alright, let’s get this beautiful board together! The key here is to think like an artist – we’re creating edible artwork. First, take your cheeses out about 30 minutes before assembling (room temp cheese tastes so much better!). Grab your largest wooden board – the more space you have, the prettier it’ll look. Trust me, even if you think you’ve got too much space at first, you’ll find ways to fill it!
Step 1: Arrange the Cheeses
Start with your cheeses as anchor points. Place them in a triangle formation – it keeps everything balanced. The brie goes whole (I just slice a few pieces to show it’s okay to dig in), cheddar cubes in a little pile (I like pyramid shapes), and the goat cheese gets its own spot. Leave some space between them – this isn’t cheese Tetris! Pro tip: if your goat cheese is super soft, a small knife sticking out of it makes serving way easier.
Step 2: Add the Meats
Now for the meats! Prosciutto loves to be folded into cute little ruffles – just drape slices over your finger in an accordion fold. Place them near the brie (they’re best friends). For salami, you can either fold them in half or get fancy and roll them into cones. I like to tuck some around the cheddar – the saltiness cuts through the sharp cheese perfectly. Don’t worry about making it perfect – rustic is charming!
Step 3: Fill Small Bowls
Grab those little bowls (I use vintage teacups for extra charm) and fill one with dried cranberries (they’re like edible confetti!) and another with honey. Place them in empty spots between cheeses. The honey bowl goes especially well near the goat cheese – when people drizzle it on, it’s magical. These bowls aren’t just practical (hello, no sticky fingers everywhere), they add height and dimension to your board.
Step 4: Scatter Remaining Items
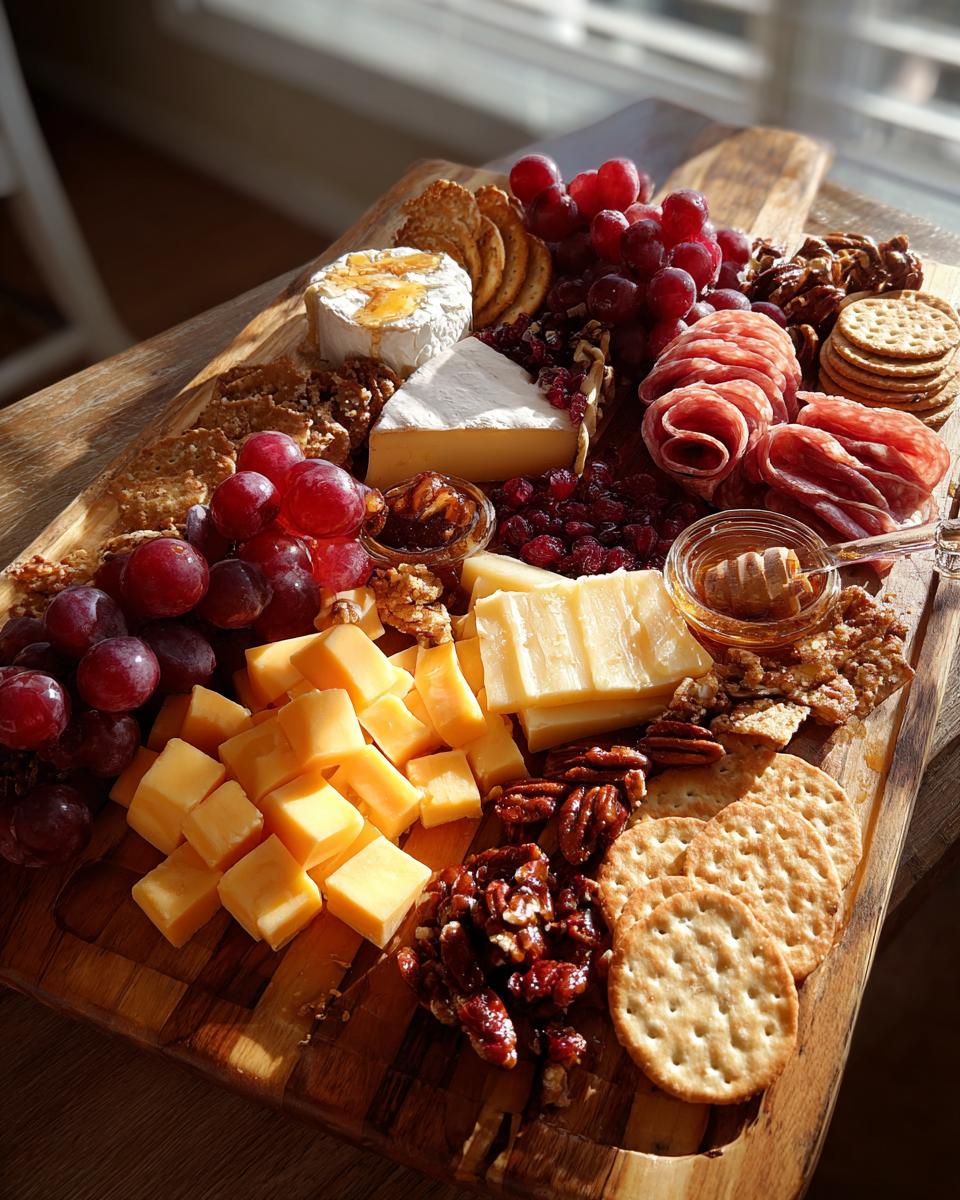
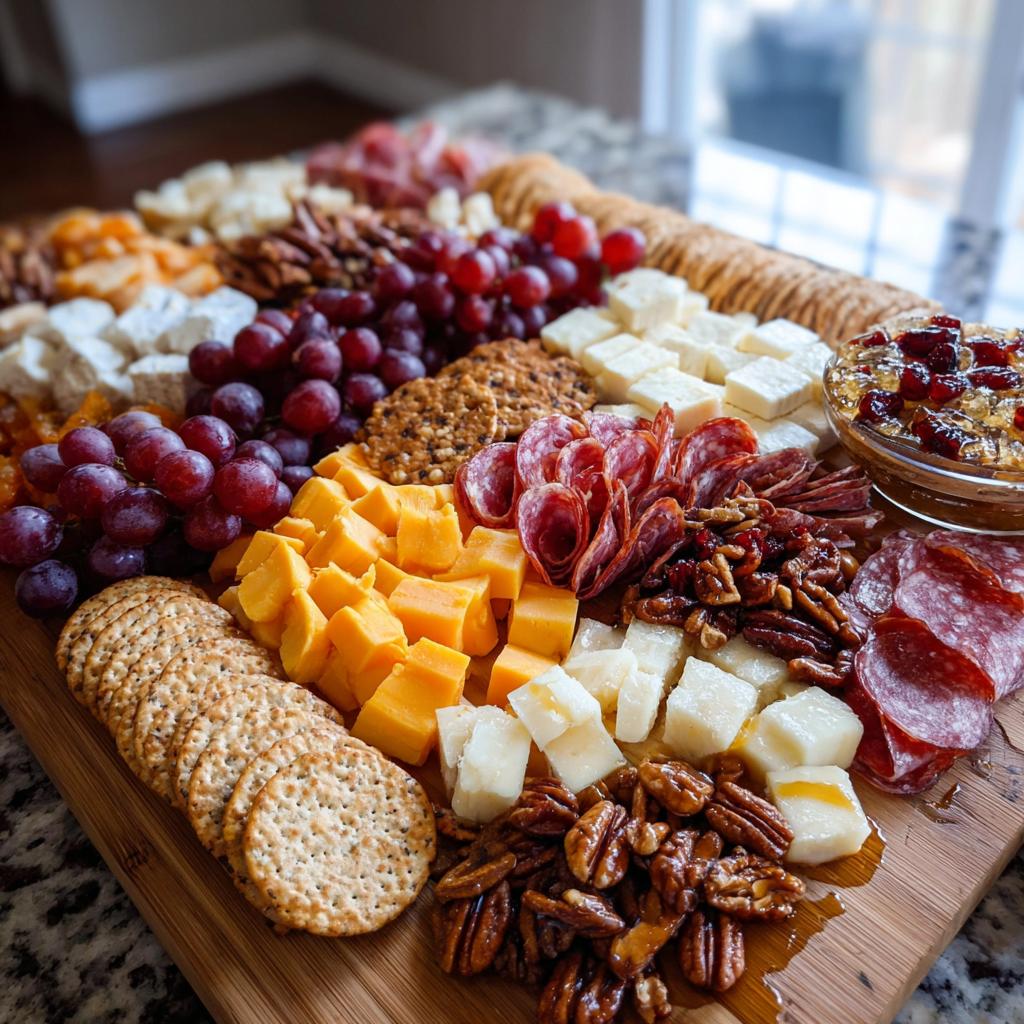
Now the fun part – scattering! Toss grape clusters in the larger empty spaces (keep some vines attached for a rustic look). Sprinkle candied pecans wherever there’s a gap (they’ll migrate as people snack, so don’t stress). Finally, artfully arrange crackers around the edges – I like to stand some up against cheeses for drama. Step back – if you see board, add more nuts or fruits until it looks generously full. Voila! Your masterpiece is ready to wow your guests.
Tips for the Perfect Thanksgiving Charcuterie Board
After making more Thanksgiving charcuterie boards than I can count (and yes, I’ve had some hilarious fails along the way), I’ve picked up some game-changing tricks. First and foremost – let those cheeses breathe! Take them out of the fridge at least 30 minutes before assembling. Cold cheese is sad cheese, and we want all those creamy, tangy flavors to shine.
When it comes to ingredients, think seasonal and textural. Those dried cranberries aren’t just tasty – their chewy texture plays off the crispy pecans and creamy cheeses beautifully. One year I swapped in pomegranate arils when I ran out of cranberries, and now it’s a requested addition!
Here’s my secret weapon: I always make little « zones » for different eaters. Vegetarian? Stick to this brie corner. Kid who only eats white foods? More cheddar over here! Last Thanksgiving, my gluten-free sister-in-law nearly cried when she saw her own little cracker-free section with extra nuts.
And remember – more is more with charcuterie boards. What looks like overwhelming abundance at first will disappear faster than you can say « second helping of mashed potatoes! »
Thanksgiving Charcuterie Board Variations
Okay, let’s get creative! Once you’ve mastered the basic Thanksgiving charcuterie board, it’s time to have some fun with variations. Last year, I found these adorable mini pumpkin-shaped brie wheels at Trader Joe’s – instant holiday magic! You could also use cookie cutters to shape cheddar into leaves or turkeys (the kids love helping with this part).
For themed crackers, look for ones shaped like autumn leaves or – my personal favorite – little turkey silhouettes. I’ve even seen sweet potato crackers that add gorgeous color! Spice up your nuts by tossing them with pumpkin pie spice before candying – the warm cinnamon and nutmeg flavors scream Thanksgiving.
Got dietary restrictions? No problem! Swap in vegan cheeses (the almond-based brie-style ones are surprisingly good) and gluten-free crackers. For a nut-free version, try roasted chickpeas tossed in maple syrup instead of candied pecans. One year I even made a « sweet » version with pumpkin bread, apple slices, and chocolate-covered pretzels for dessert. The possibilities are endless!
Remember, the best part about charcuterie boards is making them your own. Whether you go all-out with themes or keep it simple with seasonal flavors, your guests will love digging in.
Serving and Storing Your Thanksgiving Charcuterie Board
Here’s the thing about serving your masterpiece – it’s meant to be enjoyed at room temperature! All those cheeses need about 30 minutes out of the fridge to reach their full, creamy potential. I like to set my board out right as guests arrive – it gives everything time to soften and makes the kitchen smell amazing with all those mingling flavors.
Now, about leftovers (if you’re lucky enough to have any!). First, ditch anything that’s been sitting out more than 2 hours – especially the meats. For the rest, carefully cover the board with cling wrap or transfer to airtight containers. The cheeses and fruits will keep for about 2 days in the fridge, though the crackers might lose their crunch. Pro tip: store the honey separately – it gets weird when refrigerated. And those candied pecans? They never last long enough to worry about storage in my house!
Nutritional Information
Just a quick heads up – these nutritional estimates are ballpark figures that can vary wildly depending on your specific ingredients and brands. My grandma always said, « If you’re counting calories at Thanksgiving, you’re doing it wrong! » But seriously, between the cheeses, meats, and those addictive candied pecans, this board is meant to be enjoyed guilt-free as part of the holiday feast. The exact numbers will change based on how generous you are with that honey drizzle (I’m always extra generous!).
Frequently Asked Questions
Can I prepare my Thanksgiving charcuterie board ahead of time?
Absolutely! I actually recommend prepping most elements 1-2 hours before your gathering. Just wait to add the crackers until the last minute so they stay crisp. Cheeses and meats can be arranged on the board, then loosely covered with wax paper and kept at cool room temp. The honey and dried fruits can sit out all day – no worries there!
What are the best cheeses for a Thanksgiving charcuterie board?
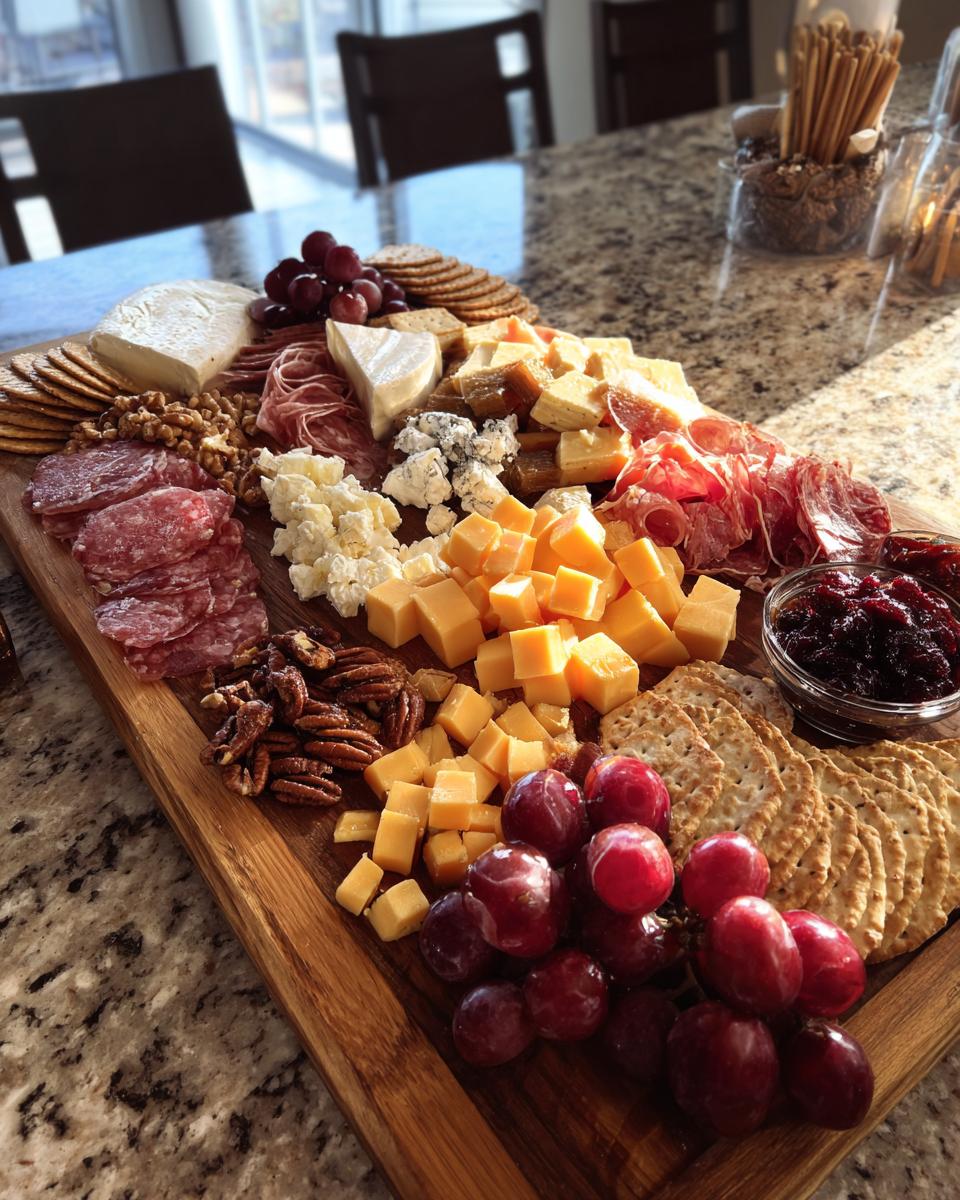
You want a mix of textures and flavors that scream « holiday! » My must-haves are sharp cheddar (for that classic bite), creamy brie (because it pairs perfectly with everything), and tangy goat cheese (for balance). If you’re feeling adventurous, try adding a blue cheese – the bold flavor cuts through all the richness beautifully.
How do I keep my charcuterie board fresh during the party?
Here’s my trick: keep a damp paper towel under any cheeses that might dry out (looking at you, cheddar cubes). If your gathering lasts more than 2 hours, consider refreshing the meats – I’ll often tuck a backup plate in the fridge to swap in. And that honey drizzle? Do it right before serving so it stays picture-perfect!
Can I make a vegetarian version of this Thanksgiving board?
Of course! Just double up on the cheeses and add more seasonal goodies like roasted squash slices, spiced nuts, and fig jam. I sometimes include mini pumpkin hummus bowls too – they’re always a hit. The beauty of charcuterie is how easily you can customize it for any diet.
What’s the best way to arrange everything on the board?
Start with your cheeses as anchor points, then build around them. I like to create little « flavor neighborhoods » – pair brie with grapes near the prosciutto, cheddar next to the crackers, goat cheese by the honey. Don’t stress about perfection though – the best boards look generously abundant and slightly rustic!
Thanksgiving Charcuterie Board
Ingrédients
Equipment
Method
- Arrange cheeses on the board, spacing them evenly.
- Fold or roll the meats and place them near the cheeses.
- Fill small bowls with dried cranberries and honey, then place them on the board.
- Scatter grapes, candied pecans, and crackers around the board.
- Drizzle honey over the cheeses if desired.