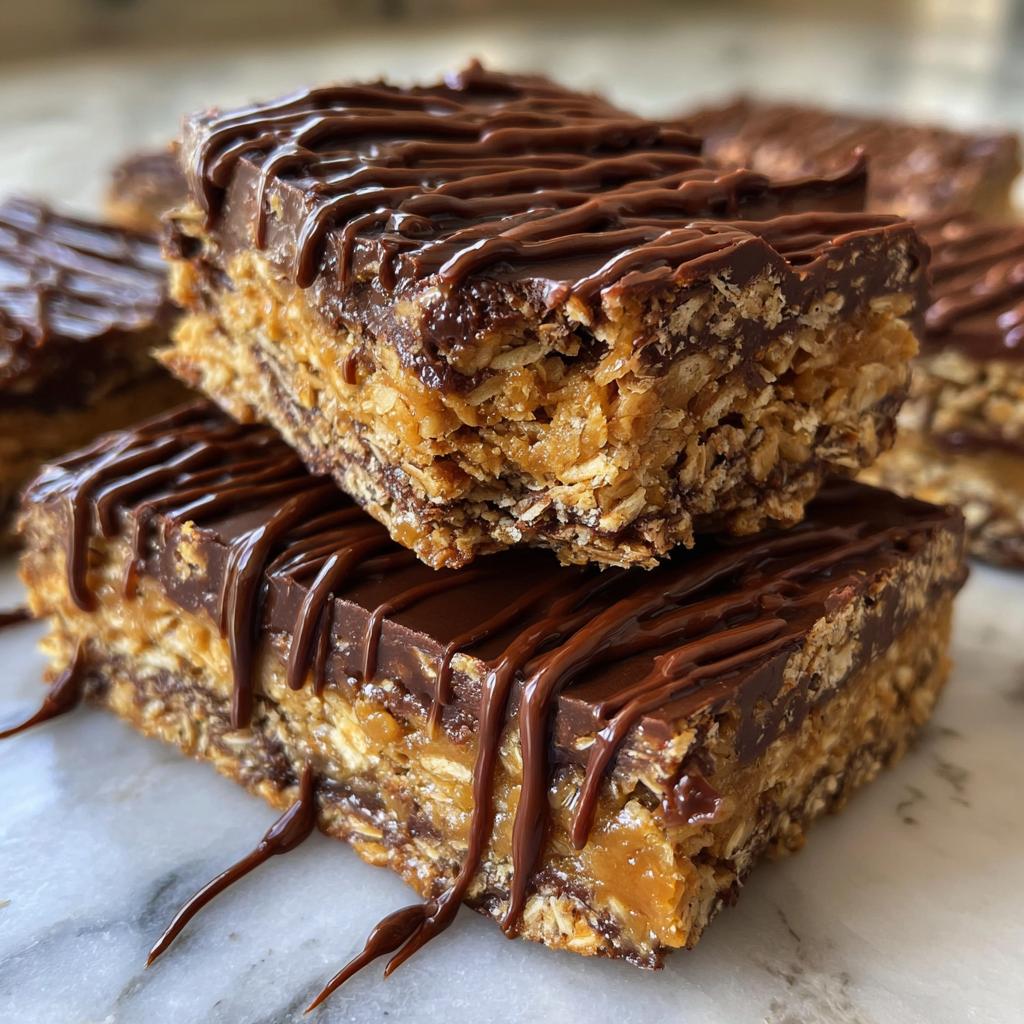
You know those days when you’re craving something sweet but the thought of turning on the oven makes you groan? That’s exactly when these no bake chocolate oat bars became my kitchen superhero. I first whipped them up during a heatwave when my kids were begging for cookies but the idea of baking sounded like torture. Fifteen minutes and zero oven time later, we had these chewy, chocolatey squares that disappeared faster than I could say « dessert. » Now they’re our go-to treat for busy weeknights, last-minute potlucks, or anytime we need a little chocolate pick-me-up without the fuss.
Why You’ll Love These No Bake Dessert Recipes
Let me tell you why these no bake chocolate oat bars are my secret weapon in the kitchen. First off, they’re ridiculously easy – we’re talking mix, press, and chill. No fancy equipment, no oven preheating, just pure simplicity. You probably have all the ingredients in your pantry right now (butter, oats, chocolate chips – that’s practically breakfast, right?).
The best part? They’re foolproof. No worrying about overbaking or underbaking. Just melt, mix, and let the fridge do the work. And oh my, the flavor! That perfect combo of chewy oats and rich chocolate makes these disappear faster than I can make them. Kids go crazy for them, but honestly? I’ve seen grown adults sneak seconds (and thirds) at potlucks.
When summer hits and turning on the oven feels like a crime, these bars are my go-to. They’re cool, satisfying, and ready in about the time it takes to clean up the mixing bowl. Trust me, once you try them, you’ll understand why they’re always the first dessert to vanish from my fridge.
Ingredients for No Bake Chocolate Oat Bars
One of my favorite things about this recipe? You likely have everything you need already sitting in your pantry! I love recipes that don’t require special trips to the store. Let’s break it down by layers – because yes, we’re building deliciousness in stages here.
Base Layer Ingredients
For that perfect chewy foundation, you’ll need:
- 1 cup butter (melted – I just zap it in the microwave for 30-second bursts until it’s pourable)
- ½ cup packed brown sugar (dark brown gives the best caramel flavor, but light works too)
- 3 cups rolled oats (not quick oats – trust me on this, the texture makes all the difference)
That’s it! Just three simple ingredients for the base that’ll make your kitchen smell amazing.
Chocolate Layer Ingredients
Now for the good stuff – the chocolatey middle that makes these bars irresistible:
- 1 cup chocolate chips (I use semi-sweet, but milk chocolate works if you’ve got a sweet tooth)
- ½ cup peanut butter (creamy or crunchy – your call! I’ve even used almond butter when we ran out)
Pro tip: If you’re making these for someone with nut allergies, sunflower seed butter works surprisingly well as a substitute. The chocolate will still set beautifully.
How to Make No Bake Chocolate Oat Bars
Alright, let’s get to the fun part – making these ridiculously easy bars! I promise, even if you’re not much of a baker, you can nail this recipe. The whole process takes about 15 minutes of active time, then the fridge does the rest of the work while you put your feet up (or sneak bites of chocolate straight from the bag – no judgment here).
Preparing the Base Layer
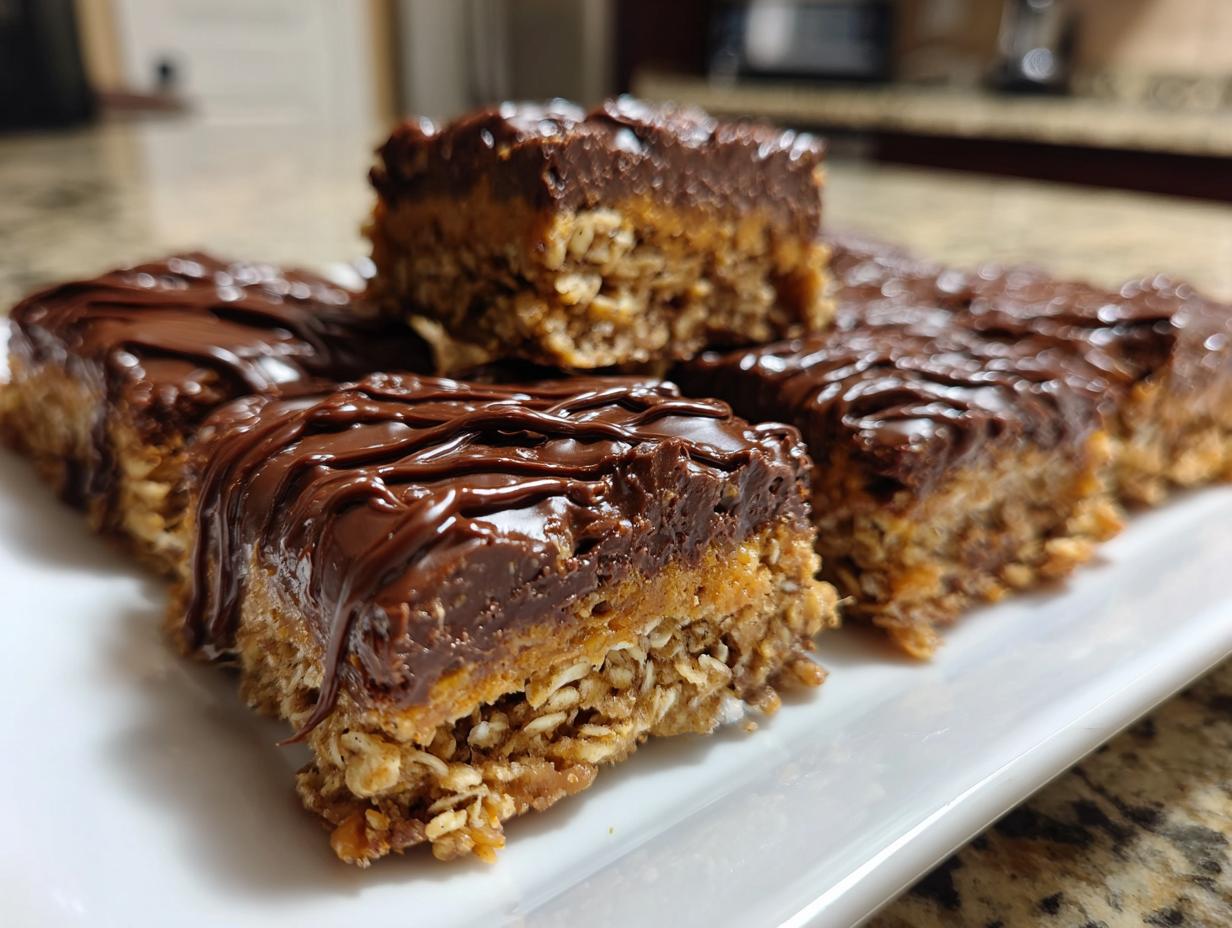
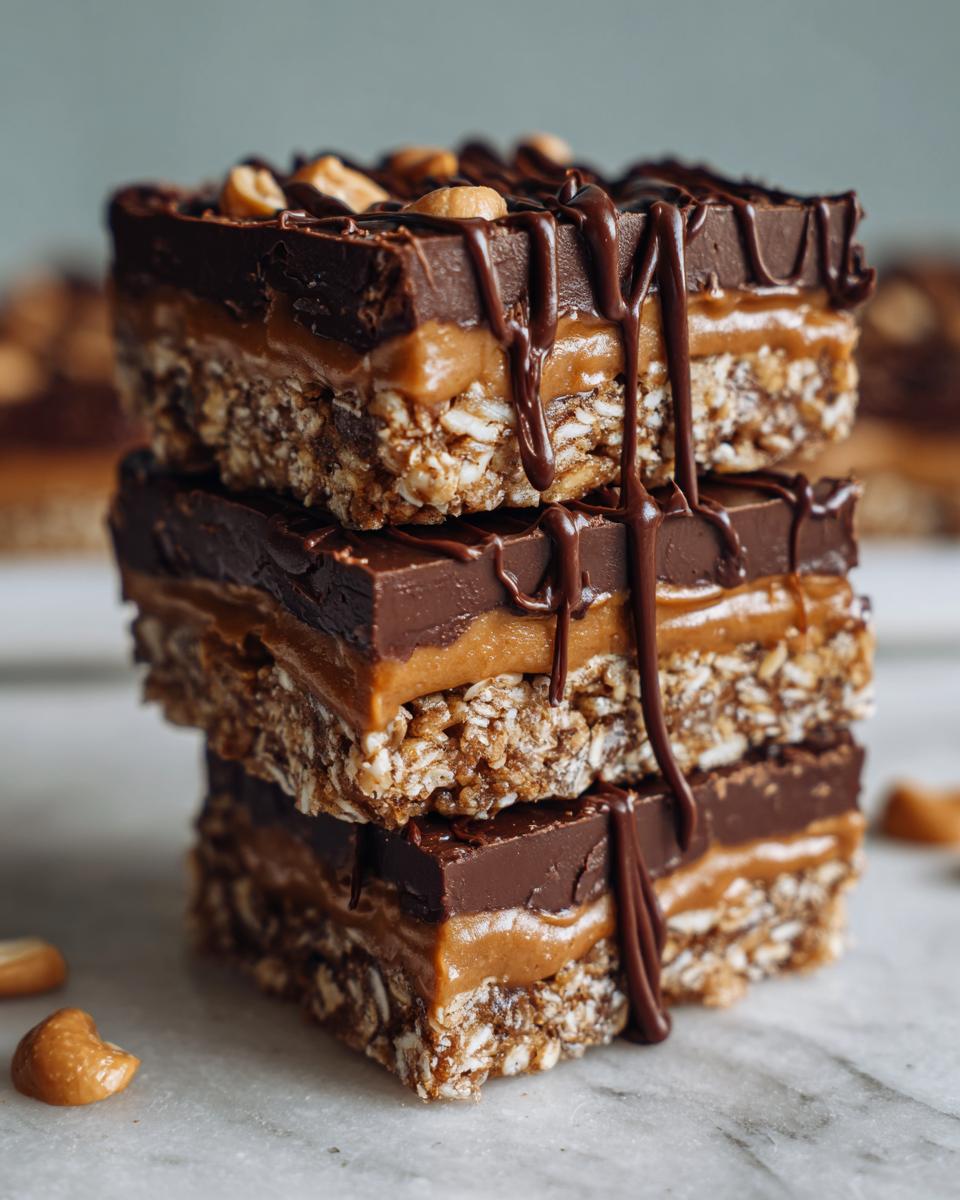
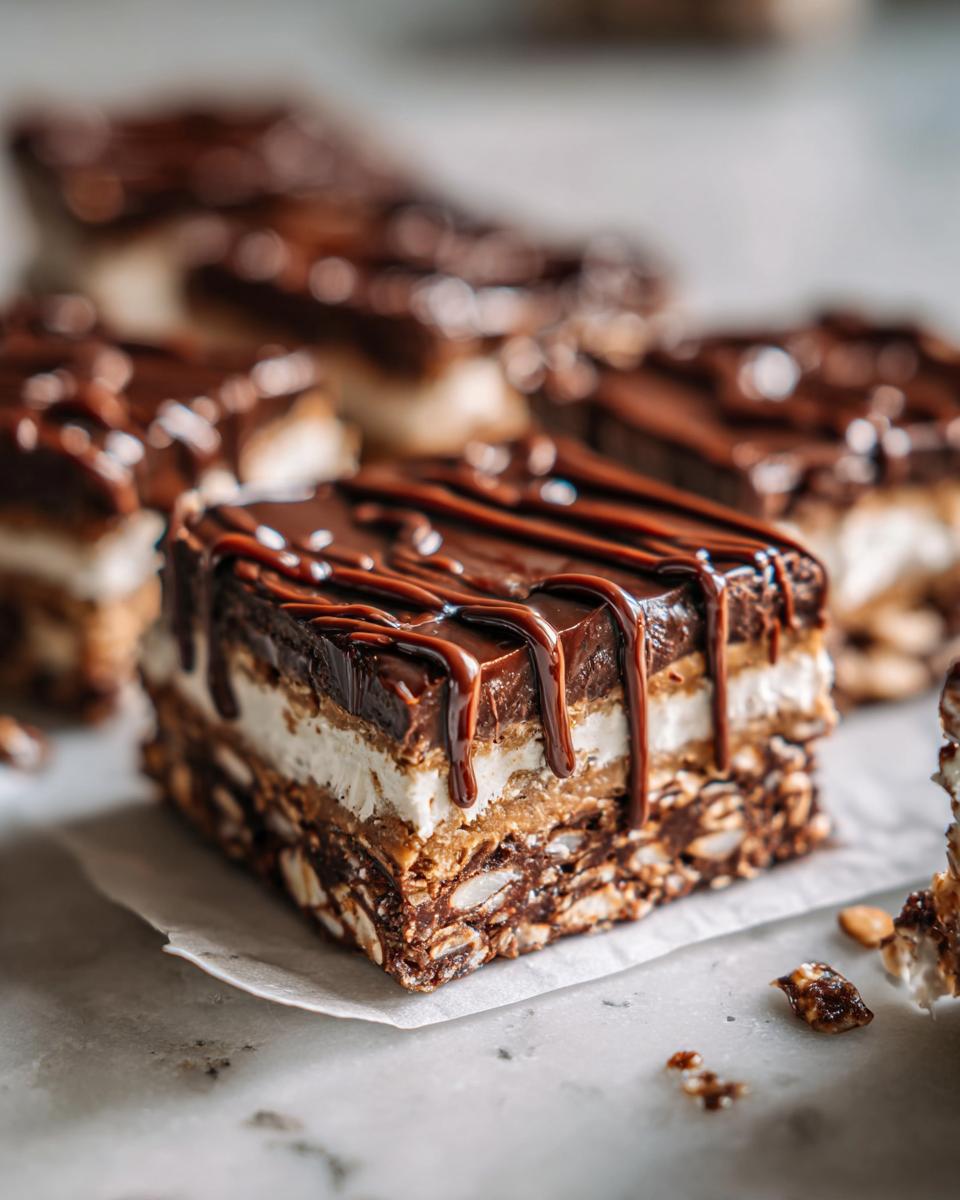
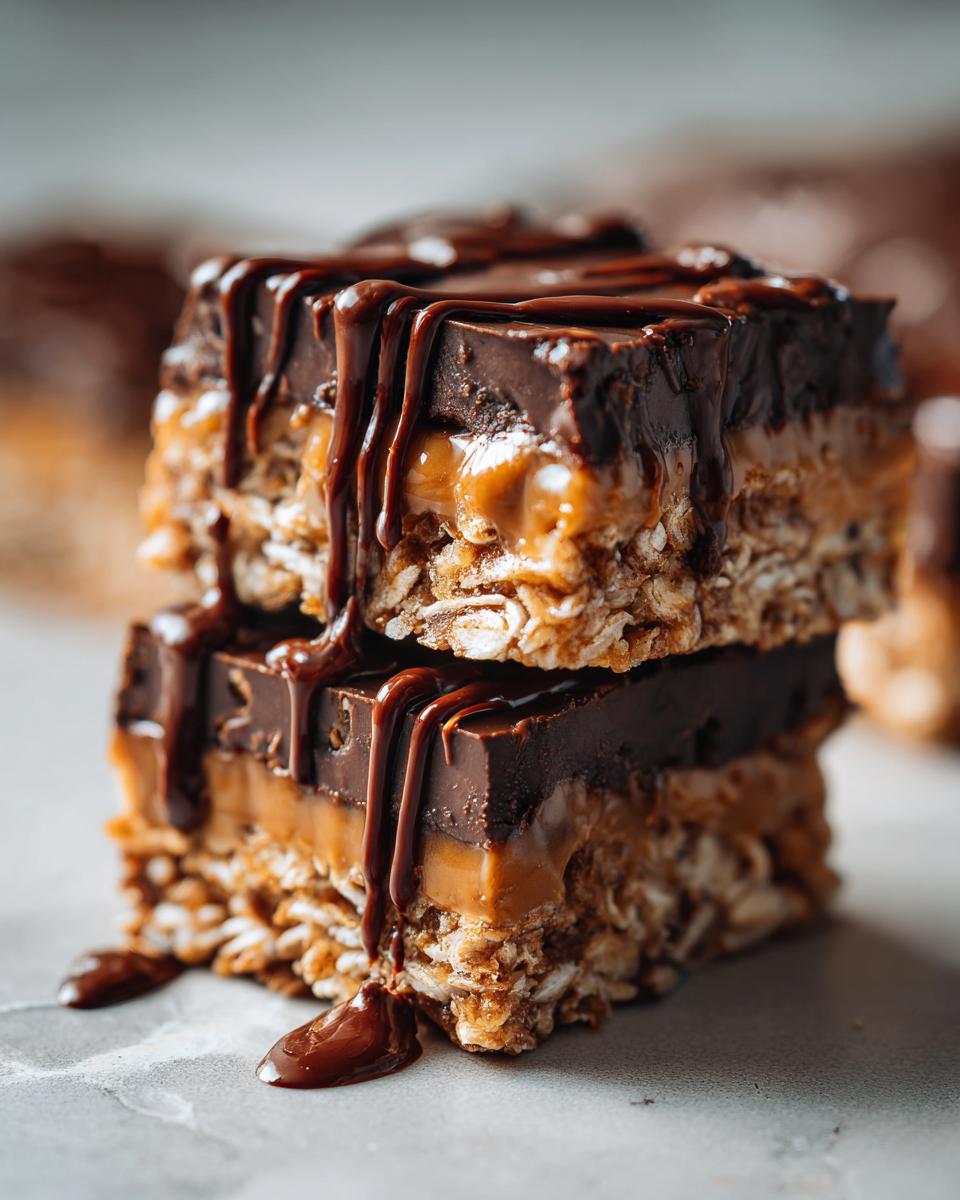
First things first – grab that 8×8 pan and line it with parchment paper. This little trick saves so much frustration later! Now, dump your melted butter, brown sugar, and oats into a big mixing bowl. I like to use a wooden spoon for this – there’s something satisfying about mixing it by hand. You’ll know it’s ready when every oat is coated in that buttery goodness.
Here’s my secret for the perfect base: press half the mixture firmly into the pan using the back of a measuring cup. Really pack it down – this prevents crumbly bars later. If the mixture sticks to your cup, just wet it slightly or lay a piece of plastic wrap over the oats before pressing.
Making the Chocolate Layer
Now for the best part – the chocolate! I usually melt my chocolate chips and peanut butter in the microwave (30-second bursts, stirring in between) because it’s quick and easy. But if you’re feeling fancy, a double boiler works great too. Just don’t walk away – chocolate burns faster than you’d think!

Once it’s smooth and glossy, pour it over your oat base. Use a spatula to spread it evenly, going all the way to the edges. This middle layer is what makes these bars so decadent – that perfect balance between sweet and slightly salty from the peanut butter.
Assembling and Chilling
Almost done! Sprinkle the remaining oat mixture over the chocolate layer and gently press it in. Don’t worry if it doesn’t cover every inch – those little chocolate peeks make them look homemade and delicious.
Now the hardest part – waiting! Pop them in the fridge for at least an hour. I know it’s tempting to cut into them early, but trust me, letting them set properly means clean slices and perfect layers. When they’re ready, lift them out using the parchment paper and cut into squares. Watch them disappear faster than you can say « no bake magic! »
Tips for Perfect No Bake Dessert Recipes
After making these chocolate oat bars more times than I can count, I’ve picked up some tricks that’ll guarantee perfect results every time. First, parchment paper isn’t just helpful – it’s essential! Those sticky chocolate layers will cling to your pan without it. I like leaving extra paper hanging over the edges so I can lift the whole slab out in one beautiful piece.
Temperature matters more than you’d think. If your butter is too hot when you mix it with the oats, you’ll end up with greasy bars. Let it cool just until it’s warm to the touch – about the temperature of a nice bath. And speaking of oats, always use old-fashioned rolled oats. Quick oats absorb too much moisture and turn mushy.
Want to switch things up? Try adding a pinch of sea salt to the chocolate layer or mixing in some chopped nuts for crunch. The beauty of no bake recipes is how forgiving they are – perfect for when you want to play around without worrying about baking disasters!
Storage and Freezing Instructions
Here’s the beautiful thing about these no bake bars – they actually get better after a day in the fridge! I always store mine in an airtight container with parchment between layers. They’ll keep beautifully for up to a week, though let’s be honest – they never last that long in my house.
Want to make a big batch? These freeze like a dream! Just wrap individual bars tightly in plastic wrap, then pop them in a freezer bag. They’ll stay perfect for up to 3 months. When that chocolate craving hits, no need to thaw – I just grab one straight from the freezer and let it sit on the counter for about 10 minutes. The chocolate stays firm but the oats soften just enough to make them chewy perfection.
Pro tip: If you’re freezing the whole pan, cut the bars first but leave them in place. That way you can easily break off just what you need without thawing everything. Works wonders for portion control (or so I tell myself as I reach for a second one).
Nutritional Information
Now, I’m no nutritionist, but I can tell you these no bake chocolate oat bars aren’t exactly health food – though they do have oats, so that counts for something, right? Keep in mind these numbers can vary based on your specific ingredients (especially the type of chocolate chips you use). A typical bar runs about 220 calories with 14g of fat and 12g of sugar. Not bad for a treat that satisfies your sweet tooth without turning on the oven!
Frequently Asked Questions
Can I make these without peanut butter?
Absolutely! I’ve used almond butter, sunflower seed butter, and even cookie butter in a pinch. The key is using something with similar thickness – about ½ cup of any nut or seed butter works. If you’re really in a bind, you can even use melted marshmallows for a different kind of sticky sweetness.
How do I make these gluten-free?
Easy peasy! Just make sure your oats are certified gluten-free (regular oats are often processed in facilities with wheat). That’s literally the only change needed – everything else in the recipe is naturally gluten-free. I’ve made them this way for my gluten-sensitive friends, and they couldn’t tell the difference!
Why won’t my chocolate layer set properly?
This usually happens if the chocolate got too hot or if you didn’t use enough chocolate chips. Next time, try adding an extra ¼ cup of chips to the mix. Also, make sure your fridge is cold enough – I like to chill mine for at least 2 hours if I’ve got the time. If you’re really in a hurry, 30 minutes in the freezer does the trick!
Can I use quick oats instead of rolled oats?
I don’t recommend it, friend. Quick oats absorb too much moisture and make the bars mushy. Rolled oats give that perfect chewy texture we all love. If you only have quick oats, try using ½ cup less butter to compensate – but really, it’s worth grabbing the right oats for this one.
How long do these bars stay fresh?
They’ll keep beautifully in the fridge for up to a week in an airtight container (if they last that long!). The chocolate might start to look a little dull after a few days, but the flavor stays amazing. For longer storage, freeze them – they’ll stay perfect for 3 months. Just thaw at room temp for about 10 minutes before eating.
No Bake Chocolate Oat Bars
Ingrédients
Equipment
Method
- Line an 8×8 inch baking pan with parchment paper.
- Mix melted butter, brown sugar, and rolled oats in a bowl until combined.
- Press half of the oat mixture into the prepared pan.
- Melt chocolate chips and peanut butter together, then spread over the oat layer.
- Top with the remaining oat mixture and press gently.
- Refrigerate for 1 hour before cutting into bars.