Easter just wouldn’t be complete without these adorable Easter bunny brownies winking at you from the dessert table! I’ve been making these every spring since my niece was little – she’s in college now, but still insists I bring them to our family brunch. What I love most is how they turn ordinary brownies into something magical with just a few simple decorations. Kids go crazy for them (who am I kidding, adults do too!), and they’re so easy that even if you’re not a baker, you’ll look like a holiday rock star. The secret? Letting the rich chocolate flavor shine through while those cute marshmallow ears and jelly bean noses do all the talking.
Why You’ll Love These Easter Bunny Brownies
Oh my goodness, where do I even start? These little guys are absolute showstoppers every single year. Here’s why they’ve become my go-to Easter dessert:
- Super quick to whip up – From bowl to bunny in under an hour! Perfect for when you realize at 10pm that you promised to bring something festive tomorrow.
- Kid-approved magic – The moment those marshmallow ears go on, you’ll hear squeals of delight. Even picky eaters can’t resist taking a bite!
- Instant holiday cheer – That pop of white frosting against rich chocolate just screams « Easter! » without being fussy.
- Seriously delicious – Forget dry, cakey brownies. These stay fudgy for days (if they last that long!).
Trust me, once you see how these transform a basic brownie into something special, you’ll be making them every spring too. They’re the edible equivalent of putting bunny ears on your kids for photos – silly, sweet, and guaranteed to make everyone smile!
Ingredients for Easter Bunny Brownies
Okay, let’s gather our bunny-making supplies! I’ve learned over the years that having everything measured and ready makes decorating way more fun. Here’s what you’ll need – separated into the brownie base and those adorable decorations that bring these little guys to life:
For the Brownies
- 1 cup unsalted butter, melted (I always use real butter – it makes all the difference!)
- 2 cups granulated sugar (yes, it seems like a lot, but trust me, it balances the cocoa perfectly)
- 4 large eggs, at room temperature (they incorporate so much better this way)
- 1 teaspoon vanilla extract (the good stuff if you’ve got it!)
- 1 cup all-purpose flour
- 3/4 cup cocoa powder (I use Dutch-processed for extra richness)
- 1/2 teaspoon salt (just enough to make all the flavors pop)
For Decoration
- 1 cup white frosting (store-bought works great, but homemade is even better)
- 24 mini marshmallows (2 per brownie – these become the cutest little ears)
- 12 pink jelly beans (1 per brownie – the perfect bunny nose)
- 24 chocolate chips (2 per brownie – eyes that make them come alive!)
Pro tip: Set up a little decorating station with all your toppings ready to go. It makes assembly line decorating with kids (or just by yourself!) so much easier. And don’t worry if you’re missing something – I’ll share some fun substitutions later!
Equipment Needed for Easter Bunny Brownies
Alright, let’s talk tools! You probably have most of this stuff already, but here’s what you’ll need to make these bunny brownies come to life:
- 9×13 inch baking pan – My trusty old metal one works perfectly, but glass is fine too
- Mixing bowl – Big enough to contain your enthusiastic stirring
- Whisk – Or a fork in a pinch, but a whisk makes everything smoother
That’s seriously it! No fancy equipment needed – just these basics and your creative spirit. I sometimes use a spatula to scrape every last bit of that delicious batter into the pan, but that’s optional. Now let’s get baking!
How to Make Easter Bunny Brownies
Alright, let’s hop to it! Making these adorable Easter bunny brownies is easier than you think, and I’ll walk you through each step. The key is taking your time with both the baking and decorating – trust me, the results are worth it. I’ve made these so many times I could probably do it in my sleep, but I’ll share all my little tricks so yours turn out perfect on the first try!
Preparing the Brownie Batter
First things first – preheat that oven to 350°F (175°C) and grease your 9×13 inch pan. I like to use butter for greasing because, well, butter makes everything better! Now grab your mixing bowl and whisk together the melted butter and sugar until they’re best friends. Add those room-temperature eggs one at a time, mixing well after each, then splash in that vanilla. Here’s where I always take a deep breath of that sweet vanilla scent – heavenly!
Now for the dry ingredients: sift together the flour, cocoa powder, and salt right into the bowl. This is crucial – sifting prevents lumps and makes for super smooth brownies. Gently fold everything together until just combined. Resist the urge to overmix! A few flour streaks are totally fine – they’ll disappear during baking. Pour that gorgeous dark batter into your prepared pan and pop it in the oven for exactly 25 minutes.
Decorating the Easter Bunny Brownies
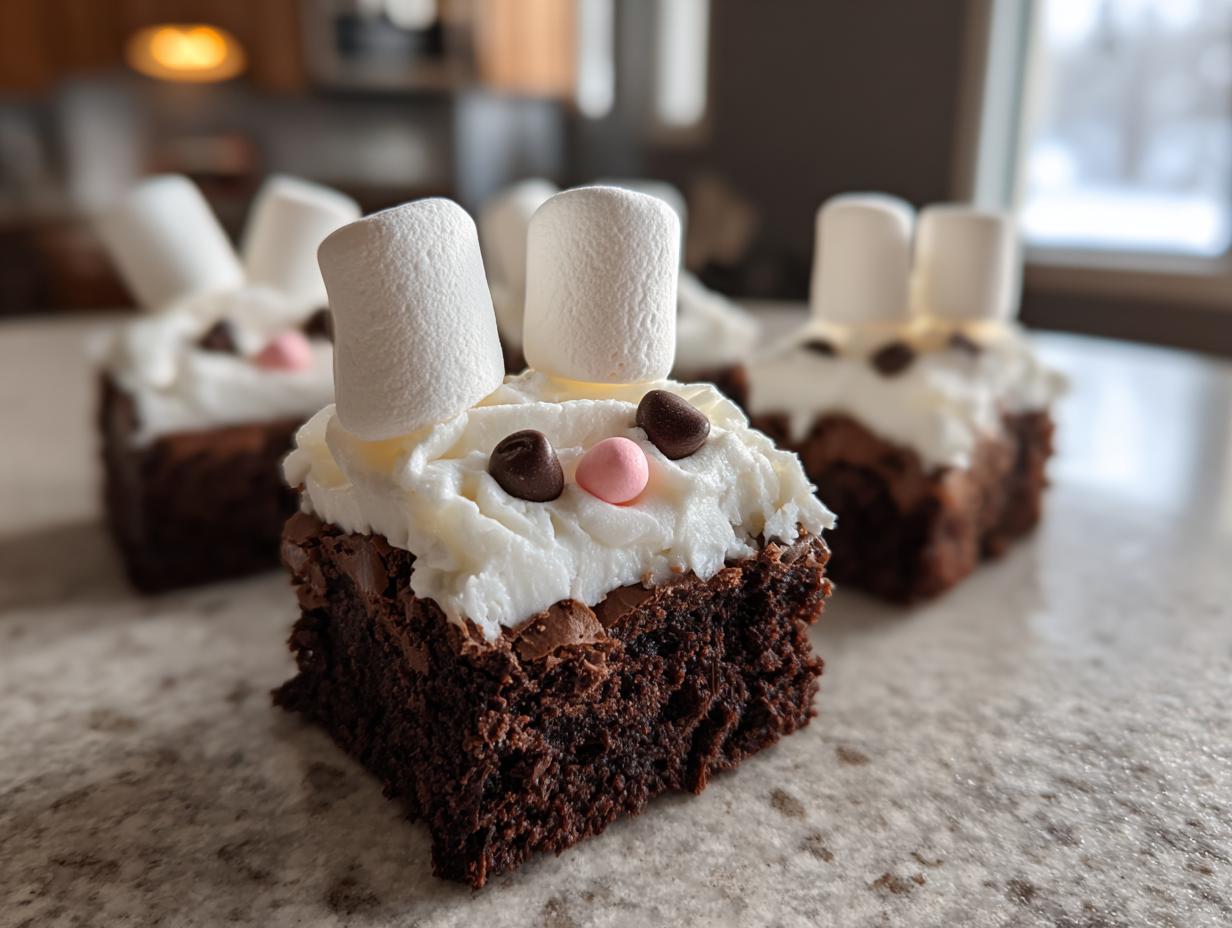
Here comes the fun part! Let those brownies cool completely – I know it’s tempting, but decorating warm brownies leads to melty bunny faces (learned that the hard way!). Once cooled, cut them into squares. I usually get about 12 good-sized brownies from my pan.
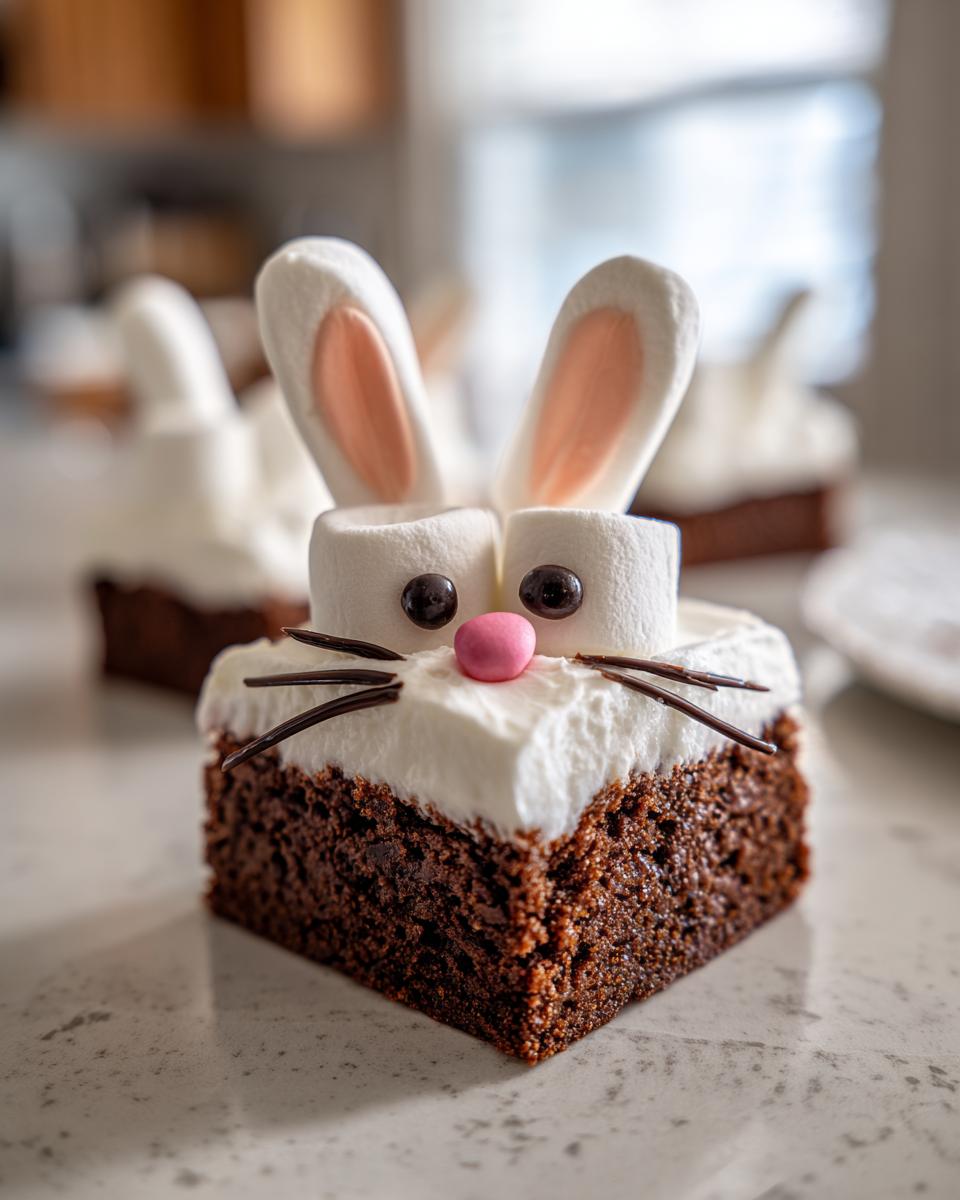
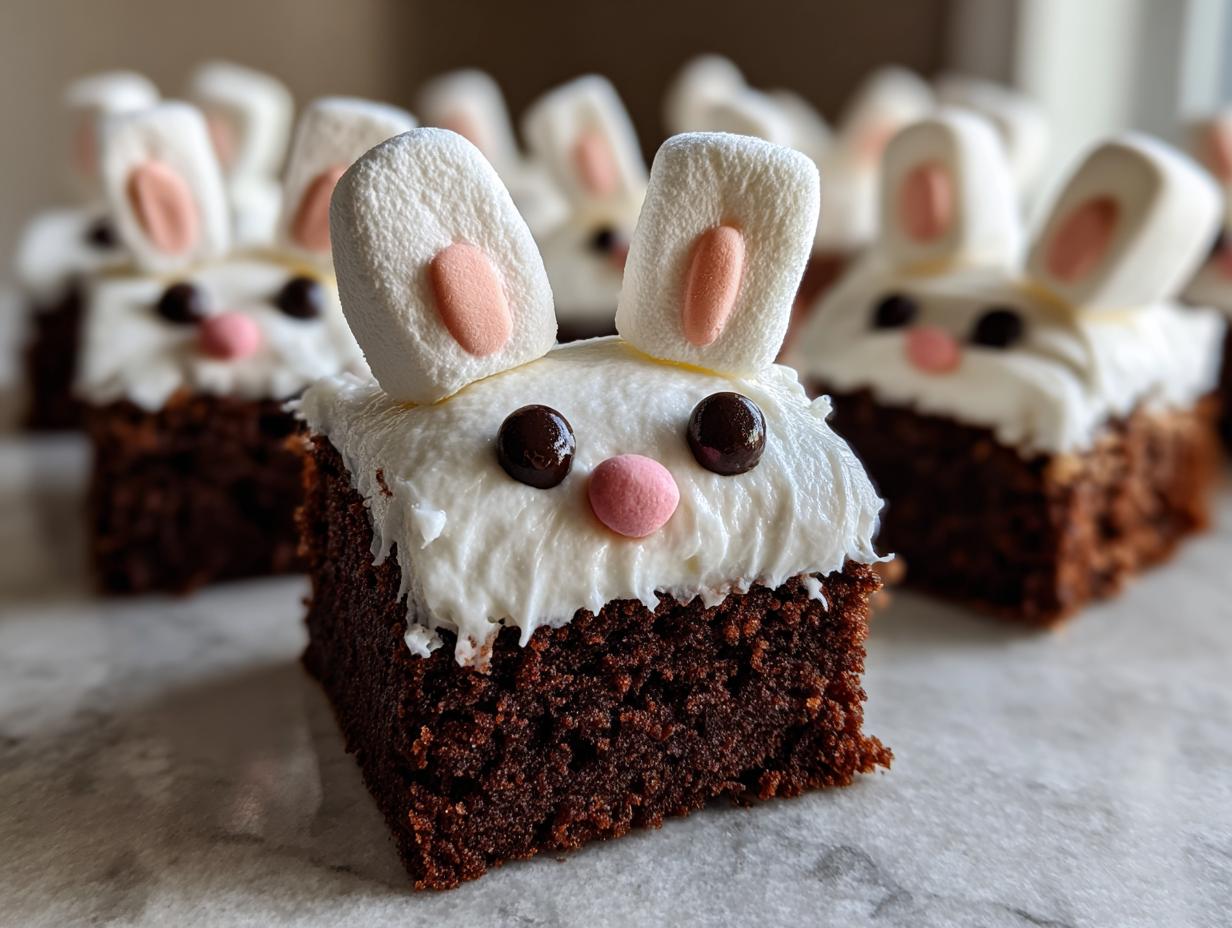
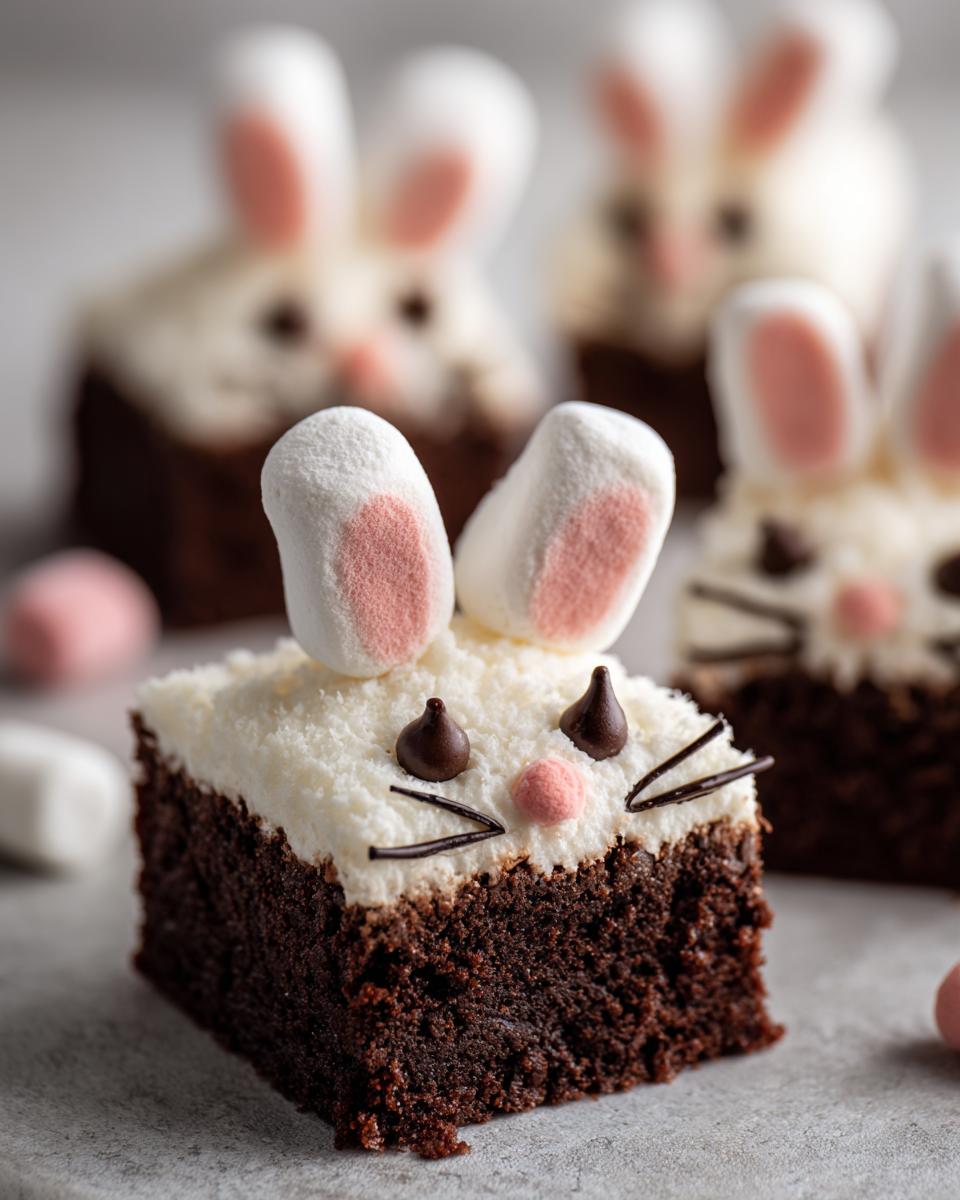
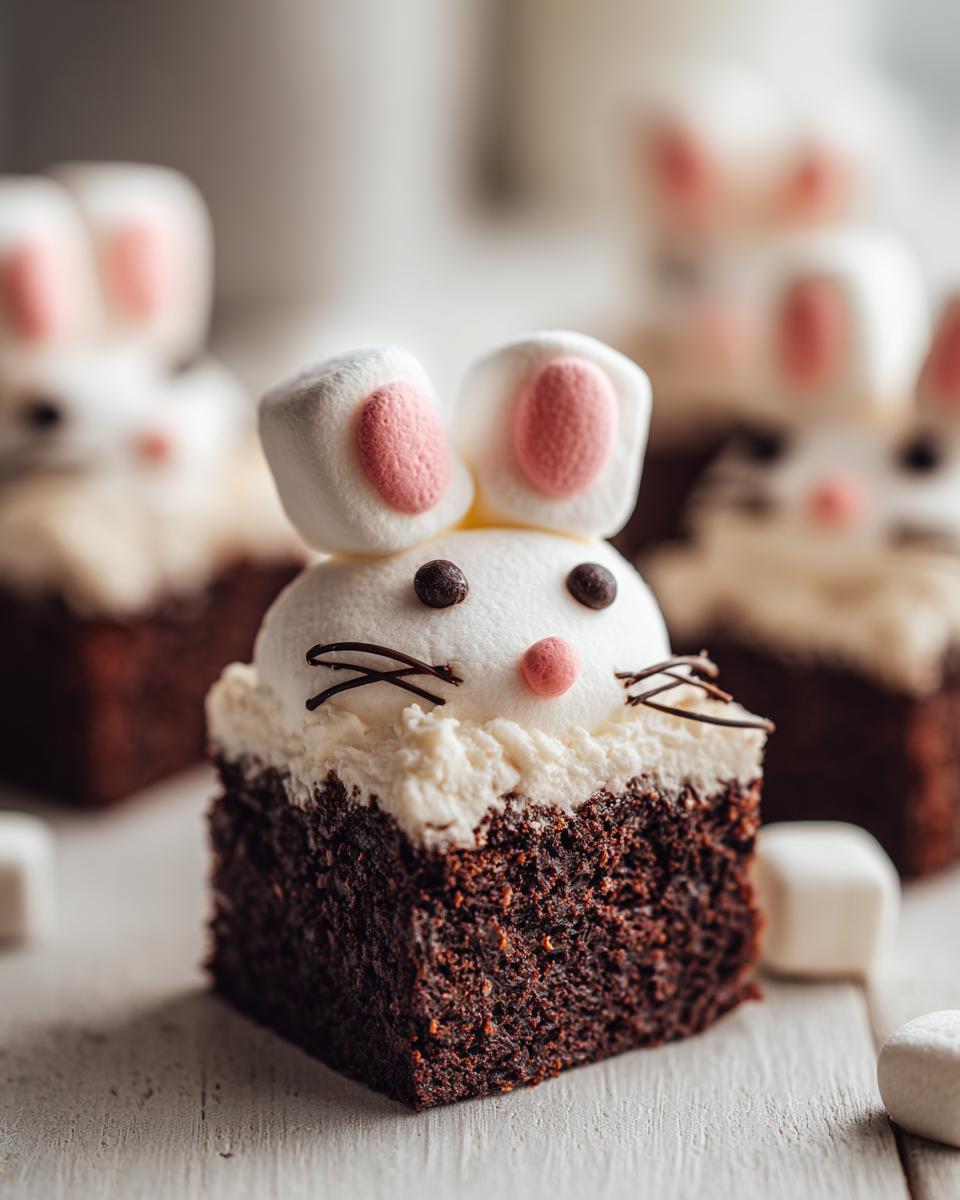
Now spread about a tablespoon of white frosting on each brownie – don’t worry about perfection here, a little rustic charm makes them even cuter. Take two mini marshmallows for each bunny and gently press them into the frosting at the top to make ears. For the nose, one pink jelly bean right in the center does the trick. Finally, two chocolate chips for eyes completes your bunny’s sweet little face!
Want to mix it up? Try pink-tinted frosting for the ears, or use white chocolate chips for albino bunnies! One year I even added shredded coconut « fur » that was a huge hit. The possibilities are endless – let your creativity run wild!
Tips for Perfect Easter Bunny Brownies
After making these adorable Easter bunny brownies more times than I can count, I’ve learned a few tricks that’ll take yours from good to « oh my goodness, how’d you make these?! » level. First up – those eggs really do need to be room temperature! I know it’s tempting to skip this step, but cold eggs make the batter seize up, and nobody wants lumpy bunny faces. Just set them out about 30 minutes before you start baking.
Here’s my golden rule: always sift the cocoa powder. I learned this the hard way when I once got lazy and ended up with little cocoa lumps that looked like freckles on my bunnies. Not the look we’re going for! A quick sift makes the batter silky smooth.
When it comes to decorating, timing is everything. Wait until the brownies are completely cool before frosting – I usually give them a good hour. Otherwise, that frosting melts right into the chocolate, and your bunnies end up looking like they’ve been out in the spring rain!
Storage tip: keep these cuties in an airtight container at room temperature. The fridge makes the frosting hard and the brownies dry out faster. They’ll stay fresh and fudgy for about 3 days… if they last that long!
Variations for Easter Bunny Brownies
Oh, the fun you can have with these little guys! Once you’ve mastered the basic bunny look, try these playful twists that always get rave reviews at my Easter gatherings:
- Pink-eared bunnies – Tint some of your frosting pink with food coloring for the ears. Suddenly you’ve got Easter pastel perfection!
- Candy eyes – Swap chocolate chips for those little candy eyeballs you find in baking aisles. They give the bunnies such personality!
- Coconut fur – Sprinkle shredded coconut over the frosting before adding decorations for fluffy-looking bunnies.
- Peanut butter noses – Use brown M&Ms or Reese’s Pieces instead of jelly beans for a nutty twist.
My neighbor’s kids once insisted we make « rainbow bunnies » by dividing the frosting into different colors – messy but absolutely worth the squeals of delight! The beauty of this recipe is how easily you can make it your own.
Storing and Serving Easter Bunny Brownies
Okay, let’s talk about keeping these adorable bunny brownies fresh and happy! The key is storing them in an airtight container at room temperature – I’ve found a cake carrier works perfectly if you’ve got one. Whatever you do, don’t refrigerate them! The cold makes the frosting hard and the brownies lose their fudgy magic. They’ll stay delicious for about 3 days this way… though in my house, they never last that long!
When serving, I like to arrange them on a pretty platter with some Easter grass or pastel sprinkles scattered around. They’re perfect at room temperature, but if you want to gild the lily, a quick 5-second microwave zap makes them just warm enough to smell heavenly. Pro tip: make extras if you’re taking them to a party – people always go back for seconds!
Nutritional Information for Easter Bunny Brownies
Now, I’m no nutritionist, but I can tell you these bunny brownies are definitely a treat! The nutritional info will vary depending on your specific ingredients (like whether you use store-bought or homemade frosting), but generally speaking, each adorable bunny packs some serious chocolatey goodness. They’re rich in happiness, if that counts!
Remember, these are estimates – your actual numbers might hop around a bit based on brand choices and how generous you are with those marshmallow ears. Everything in moderation, right? Except maybe Easter joy – feel free to go overboard with that!
Frequently Asked Questions
Can I use boxed brownie mix instead of making them from scratch?
Absolutely! While I adore my from-scratch recipe, I won’t judge if you use a box mix – we’ve all been there! Just follow the package directions for a 9×13 pan, let them cool completely, then decorate as usual. Pro tip: choose a fudgy-style mix rather than cakey for the best texture. The decorating magic makes them special either way!
How long do decorated Easter bunny brownies last?
These cuties stay fresh at room temperature for about 3 days in an airtight container. The marshmallows might start to dry out after day 2, but they’ll still taste delicious. If you need to make them ahead, I suggest baking the brownies in advance and decorating the day you plan to serve them. That way everything looks and tastes its bunny best!
Can I freeze Easter bunny brownies?
You sure can, but with a catch! Freeze the undecorated brownies wrapped tightly for up to 3 months. Thaw at room temperature before decorating. The frosting and toppings don’t freeze well – the marshmallows get weirdly chewy and the frosting can separate. Learned that lesson the hard way one hectic Easter!
What if I can’t find mini marshmallows for the ears?
No worries! Get creative – piped frosting ears work great, or try halved large marshmallows. One year I used pink candy melts shaped into ears and they were a huge hit. The beauty of these Easter bunny brownies is how adaptable they are to whatever you’ve got on hand!
Can kids help decorate these?
Oh my goodness, YES! This is one of my favorite Easter activities to do with little ones. Set up a decorating station with all the toppings in small bowls and let them create their own bunny personalities. Just be prepared for some… creative interpretations of what a bunny face should look like!

Easter Bunny Brownies
Ingrédients
Equipment
Method
- Preheat the oven to 350°F (175°C). Grease a 9×13 inch baking pan.
- In a mixing bowl, whisk together melted butter and sugar until combined.
- Add eggs and vanilla extract. Mix well.
- Sift in flour, cocoa powder, and salt. Stir until just combined.
- Pour the batter into the prepared pan and bake for 25 minutes. Let cool completely.
- Cut the brownies into squares. Frost the top of each brownie with white frosting.
- Place two mini marshmallows near the top for bunny ears. Add a pink jelly bean for the nose and two chocolate chips for the eyes.