There’s nothing quite like gathering around with friends and family on a chilly evening, steaming mugs in hand, watching everyone’s faces light up as they customize their perfect cup of hot chocolate. That’s exactly what happened last winter when I first tried making a Hot Chocolate Charcuterie Board for our annual game night. What started as a fun experiment turned into the star of the evening – with everyone from my picky nephew to my chocolate-snob sister finding their dream combination of toppings. The best part? You’re not stuck making six different versions of hot chocolate. Just one rich, velvety base and let everyone go wild with marshmallows, crushed peppermint, caramel drizzle, and whatever else makes their hearts happy. It’s like a choose-your-own-adventure dessert that brings people together in the coziest way possible.
Why You’ll Love This Hot Chocolate Charcuterie Board
Trust me, once you try this Hot Chocolate Charcuterie Board, you’ll wonder how you ever survived winter without it! Here’s what makes it so special:
- Customizable: From peppermint lovers to marshmallow fanatics, everyone gets their dream cup
- Party perfect: Fills your gathering with laughter as people compare their creations
- Quick magic: Ready in 15 minutes flat – even when surprise guests show up
- Kid-approved: My nieces call it « hot chocolate art » and beg to make it
- Cleanup cheat: One pot, one board = minimal dishes (my favorite benefit!)
It’s winter’s answer to summer ice cream sundae bars – but cozier and with way more chocolate.
Ingredients for Your Hot Chocolate Charcuterie Board
Gathering the right ingredients is half the fun of making this board – it’s like shopping for a chocolate lover’s treasure chest! I’ve broken everything down into two simple categories: the luxuriously smooth hot chocolate base (the real MVP) and all those dreamy toppings that make each cup unique.
Hot Chocolate Base
This isn’t your average powdered-mix hot chocolate – we’re making the good stuff from scratch! Here’s what you’ll need:
- 6 cups milk: Whole milk gives the creamiest results, but 2% works too
- 1/2 cup heavy cream: The secret to that velvety mouthfeel
- 1/2 cup chocolate chips: I prefer dark or semi-sweet (about 60% cacao) but milk chocolate works for sweeter palates
- 1/4 cup cocoa powder: The richer, the better – I like Dutch-processed
- 2 tablespoons sugar: Start with this, then taste – I often add an extra tablespoon
- 1 teaspoon vanilla extract: Pure vanilla makes all the difference
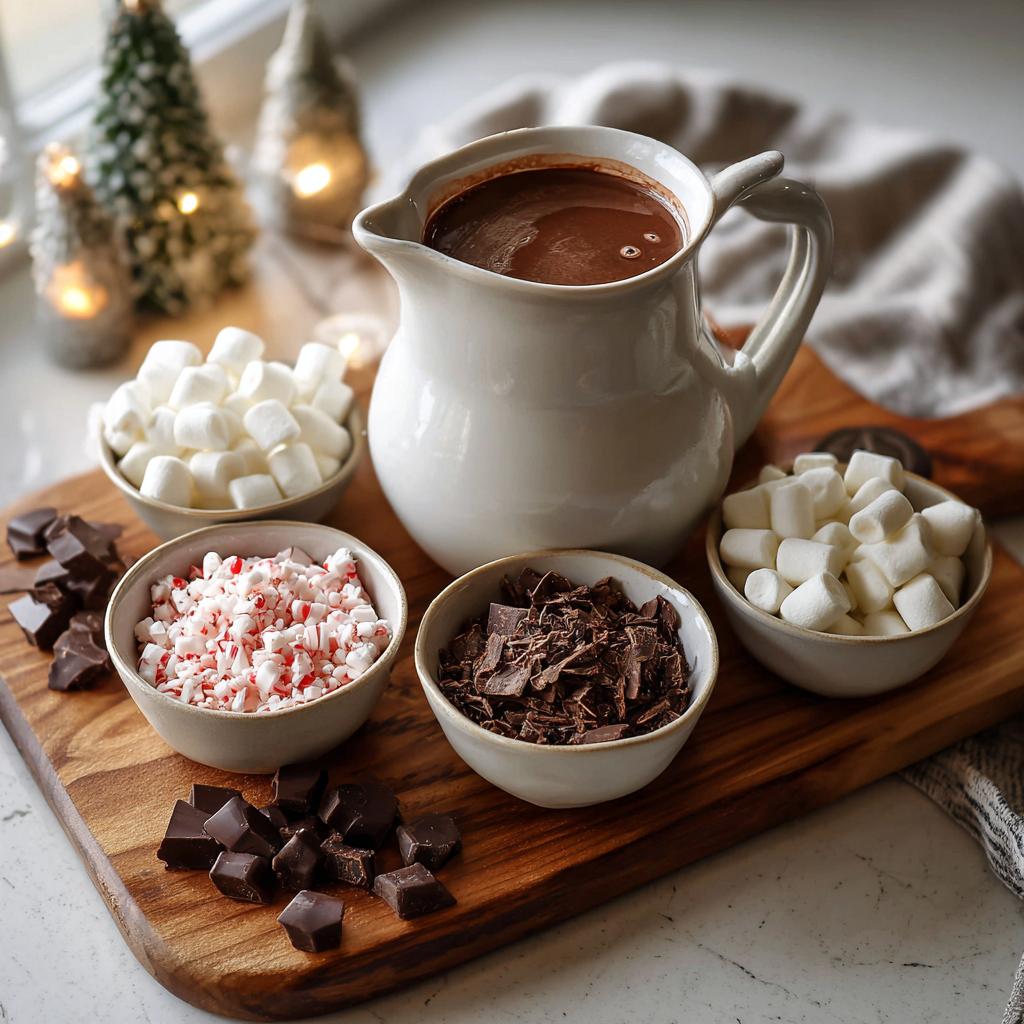
Toppings
This is where the party starts! While you can absolutely customize, these are my must-haves:
- 1/2 cup mini marshmallows: The classic that everyone reaches for first
- 1/4 cup chocolate shavings: Use a veggie peeler on a chocolate bar for pretty curls
- 1/4 cup crushed peppermint: Especially magical during the holidays
- 1/4 cup whipped cream: Dollop or spray can both work
- 1/4 cup caramel sauce: Warm it slightly for easy drizzling
- 4 cinnamon sticks: For stirring and flavor infusion
Feeling fancy? Add extras like sea salt flakes, butterscotch chips, or even chili powder for adventurous guests!
Equipment Needed for Your Hot Chocolate Charcuterie Board
You probably already have most of what you need in your kitchen! Here’s my go-to setup for creating the perfect hot chocolate board:
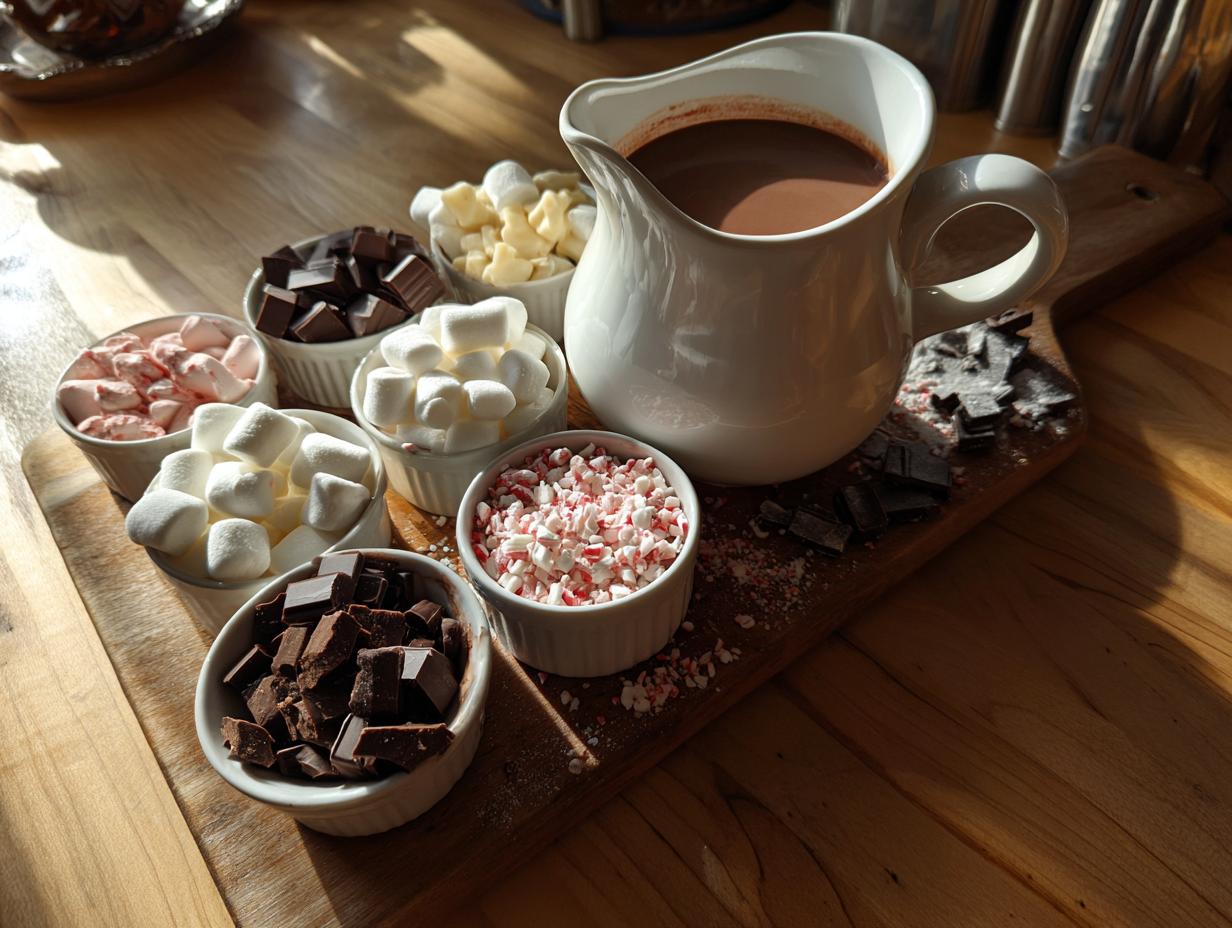
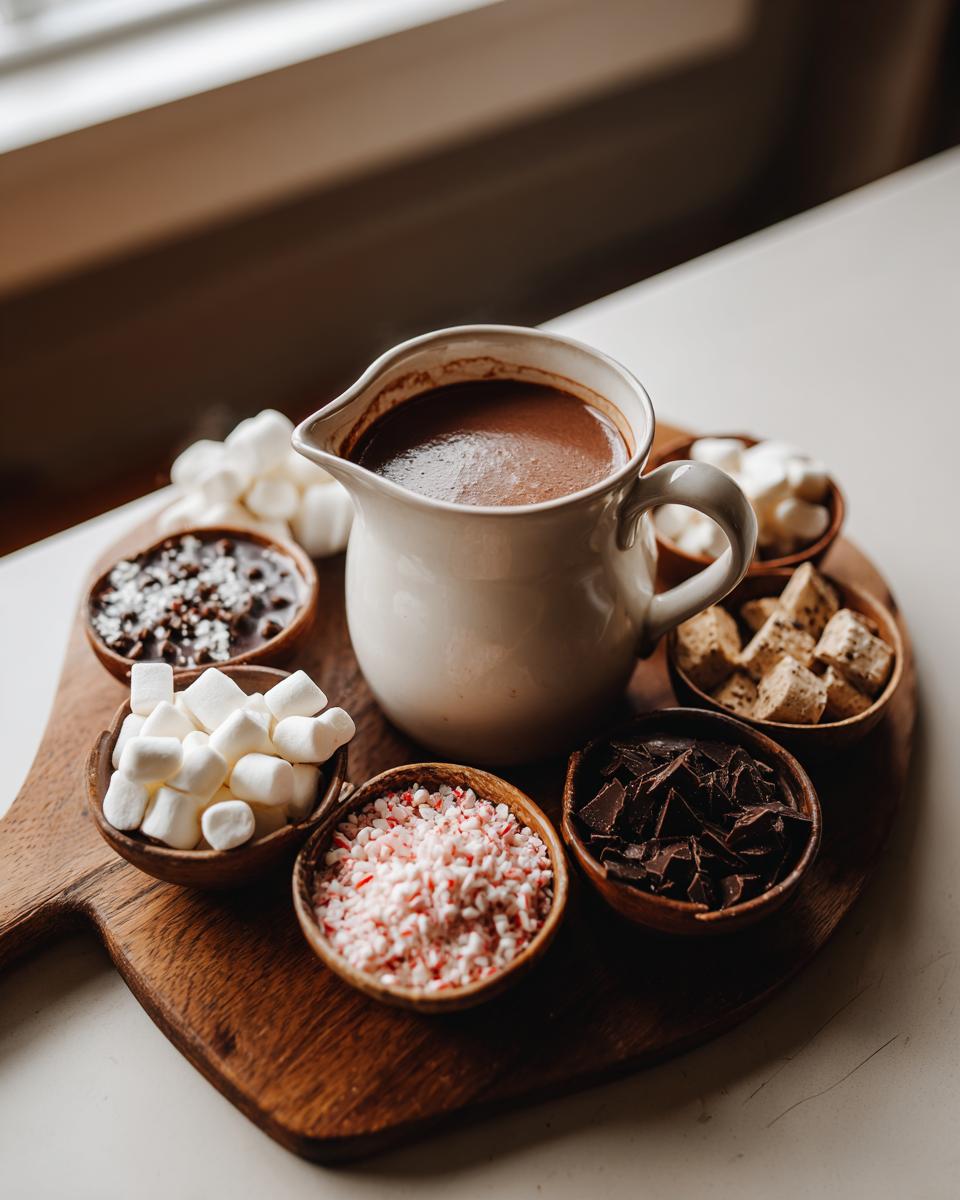
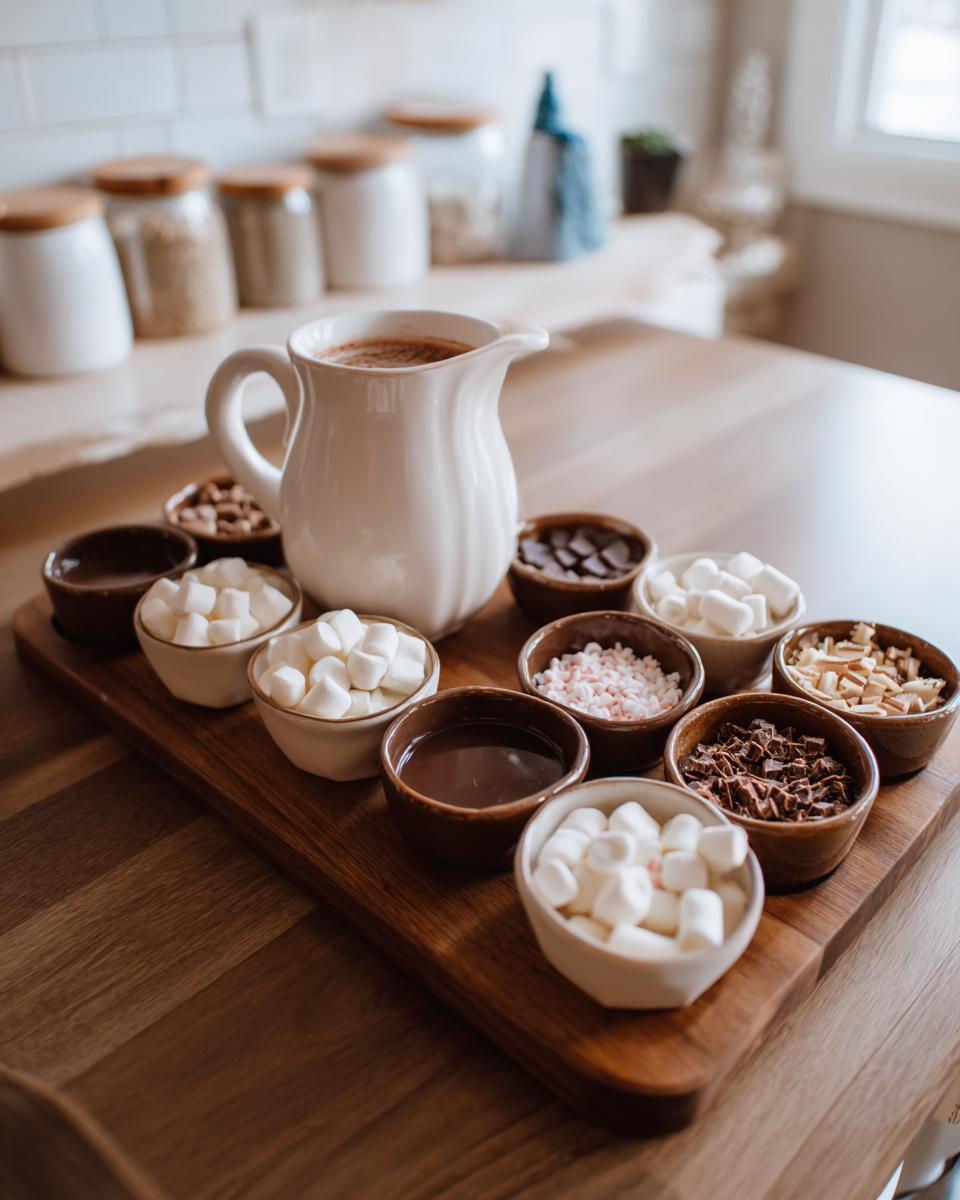
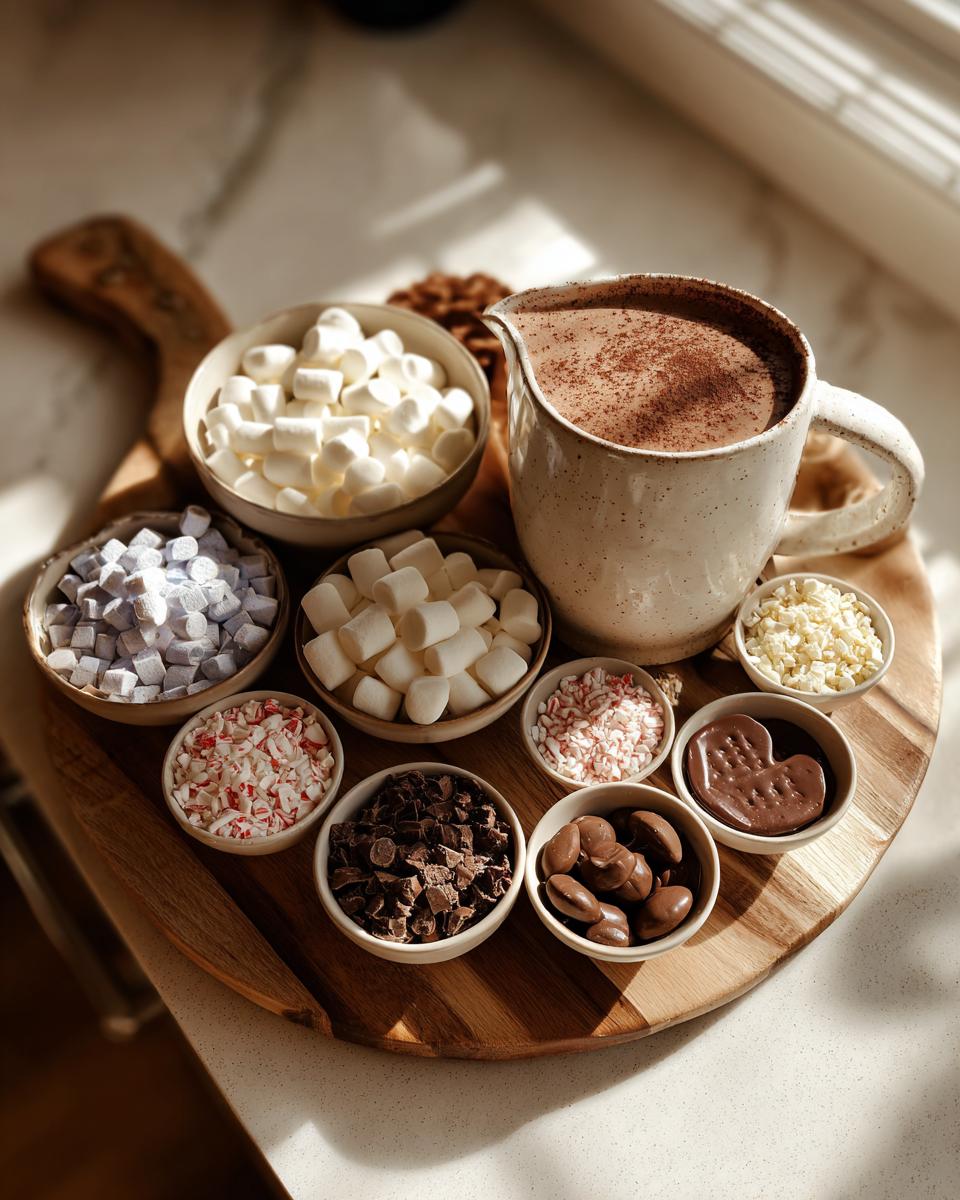
- Large wooden board or platter: Mine’s about 18 inches – big enough for toppings but still fits on the coffee table
- Small bowls or ramekins: I use mismatched teacups for extra charm
- Medium saucepan: For that silky-smooth hot chocolate base
- Whisk: Gets rid of cocoa powder lumps like magic
- Mugs or heatproof glasses: Clear ones let you see all those pretty layers
That’s it! No fancy gadgets required – just simple tools that make sharing easy and fun.
How to Make a Hot Chocolate Charcuterie Board
Making this show-stopping hot chocolate board is easier than you think, and I promise it’ll become your go-to for easy winter entertaining. The secret? Do the hot chocolate base first before you get creative with the toppings. Here’s my foolproof method that has yet to fail me – even when I’ve had last-minute guests arriving in 15 minutes!
Preparing the Hot Chocolate
First, grab that saucepan and let’s make magic happen. Combine your milk, heavy cream, chocolate chips, cocoa powder, and sugar over medium heat – don’t crank it up too high or you’ll risk scorching. Now, here’s my trick: whisk constantly until those chocolate chips melt. It should take about 5 minutes, and you’ll know it’s ready when the mixture looks smooth as satin. See any stubborn cocoa powder lumps? Keep whisking – they’ll disappear.
Once everything’s melted together, take it off the heat. That’s when I stir in the vanilla extract (vanilla is finicky and can lose its flavor if cooked too long). The smell at this point is absolute heaven! Now, taste it – this is your chance to adjust the sweetness. Need more sugar? Add a tablespoon at a time until it’s perfect for you.
Important: Never let it boil! That makes the texture grainy instead of silky. If you see tiny bubbles forming at the edges, that’s your cue to lower the heat.
Setting Up the Board
While your hot chocolate is cooling slightly (you don’t want third-degree burns when serving!), let’s create that beautiful board. I like to use a large wooden cutting board, but any big platter works. Here’s how I arrange mine for maximum wow factor:
- Start with anchors: Place your small bowls first – I put marshmallows in one, whipped cream in another, and caramel in a third.
- Scatter the dry stuff: Sprinkle chocolate shavings and crushed peppermint directly on the board between bowls – it looks so pretty against the wood!
- Add height: Stand those cinnamon sticks upright in a little bowl or lean them against other toppings.
- Final touches: Keep spoons and small jars of extra toppings nearby for refills during the party.
Now pour that luscious hot chocolate into mugs (I keep a thermal carafe nearby for easy refills too) and let the customization begin! Watching everyone create their perfect cup is half the fun.

Tips for the Perfect Hot Chocolate Charcuterie Board
After making this hot chocolate board more times than I can count (okay maybe 32 times if we’re being precise – what can I say? My friends keep inviting themselves over in winter!), I’ve learned all the tricks to make it foolproof. First, pre-warm your mugs with hot water for a minute then dump it out – nobody likes lukewarm chocolate. Here’s my golden rule: keep sauces like caramel in little slow cookers or heatproof bowls over candle warmers so they stay drizzle-able all night long.
Seasonal touches make it extra special – try candy cane crumbles in December, heart-shaped marshmallows in February, or edible flowers in spring. My biggest aha moment? Putting sprinkles in salt shakers – no more messy fingers digging into bowls! Last Christmas, I surprised everyone with a « s’mores station » add-on with graham crackers for dipping – the kids went wild. And if your crowd includes adults, a little bowl of boozy additions (peppermint schnapps, anyone?) lets them spike their own cups.
Variations for Your Hot Chocolate Charcuterie Board
Oh, the possibilities! One of my favorite things about this Hot Chocolate Charcuterie Board is how endlessly adaptable it is. Swap out ingredients based on your guests’ needs or get creative with themes – I promise even the most basic version will have folks raving. Last Valentine’s Day, I did an all-pink version that had everyone snapping photos before they even took a sip!
Need dairy-free? Almond or oat milk work beautifully – just bump up the chocolate chips by 1/4 cup for extra richness. For coffee lovers, stir in a shot of espresso or flavored syrup (my hazelnut addicted brother swears by this). Holiday version? Go wild with themed sprinkles, crushed candy canes, or even those adorable mini gingerbread cookies as dunkers. I’ve even done a « grown-up » version with liquors in cute dropper bottles – peppermint schnapps and Irish cream are always the first to disappear.
Serving Your Hot Chocolate Charcuterie Board
Now comes the best part – the grand reveal! I always serve the board right in the center of my coffee table where everyone can reach. Keep that thermos handy to keep the hot chocolate warm (I learned this the hard way after a few lukewarm batches!).
For an extra special touch, pile some shortbread cookies or cinnamon-dusted apple slices around the board. My French press stays brewing coffee for those who want to mix mocha creations. The real trick? Put out little tasting spoons so guests can sample toppings before committing – watching my nephew’s face light up when he discovered the caramel drizzle was pure magic!
Nutritional Information for Hot Chocolate Charcuterie Board
Okay, let’s be real – we’re not drinking hot chocolate for our health, but it’s good to know what you’re enjoying! These numbers are estimates (toppings can really change things) based on my standard recipe with a spoonful of each topping. A typical serving has about:
- 320 calories – Mostly from that luscious chocolate and cream
- 28g sugar – Pro tip: dark chocolate lowers this number
- 18g fat – The good kind that makes it taste like a hug in a mug
- 3g fiber – Thank you, cocoa powder!
Remember, your exact numbers will vary based on how generous you are with marshmallows or if you sneak extra caramel like I always do! Brands differ too, so check labels if you’re tracking closely.
FAQs About Hot Chocolate Charcuterie Boards
After serving this at dozens of gatherings, I’ve heard every question imaginable about Hot Chocolate Charcuterie Boards! Here are the answers to the ones that come up most often:
Can I prepare the hot chocolate board ahead of time?
Absolutely! Make the hot chocolate base up to 2 days in advance and store it in the fridge. Just reheat gently before serving. But here’s my golden rule from experience: add the marshmallows and other toppings right before your guests arrive – nothing’s sadder than soggy sprinkles!
What are the best kid-friendly toppings?
Oh, the mini marshmallows are always the first to disappear with kids! My niece’s current favorites are rainbow sprinkles, crushed cookies, and chocolate animal crackers for dunking. Keep a separate « kids’ corner » with less messy options if you’re hosting little ones.
How can I make this dairy-free?
Easy peasy! Swap the milk for almond or oat milk (the barista blends work best), use coconut cream instead of heavy cream, and pick up some vegan chocolate chips. All the toppings are naturally dairy-free except whipped cream – just grab a can of coconut whipped topping instead.
What if my hot chocolate gets too thick?
No worries – this happens to me all the time! Just whisk in a splash more warm milk until it’s your perfect sipping consistency. If you’re reheating leftovers, do it low and slow to prevent separation.
How long will leftover toppings keep?
The dry toppings (marshmallows, sprinkles, etc.) last weeks in airtight containers. Sauces like caramel should be refrigerated and used within a week. Pro tip: stash leftover crushed candy canes in the freezer – they’re perfect for next time!
Hot Chocolate Charcuterie Board
Ingrédients
Equipment
Method
- Heat the milk, heavy cream, chocolate chips, cocoa powder, and sugar in a saucepan over medium heat. Stir until the chocolate melts and the mixture is smooth.
- Remove from heat and stir in the vanilla extract.
- Pour the hot chocolate into mugs or a serving pitcher.
- Arrange the toppings in small bowls or directly on a large wooden board.
- Serve the hot chocolate with the toppings for guests to customize their drinks.