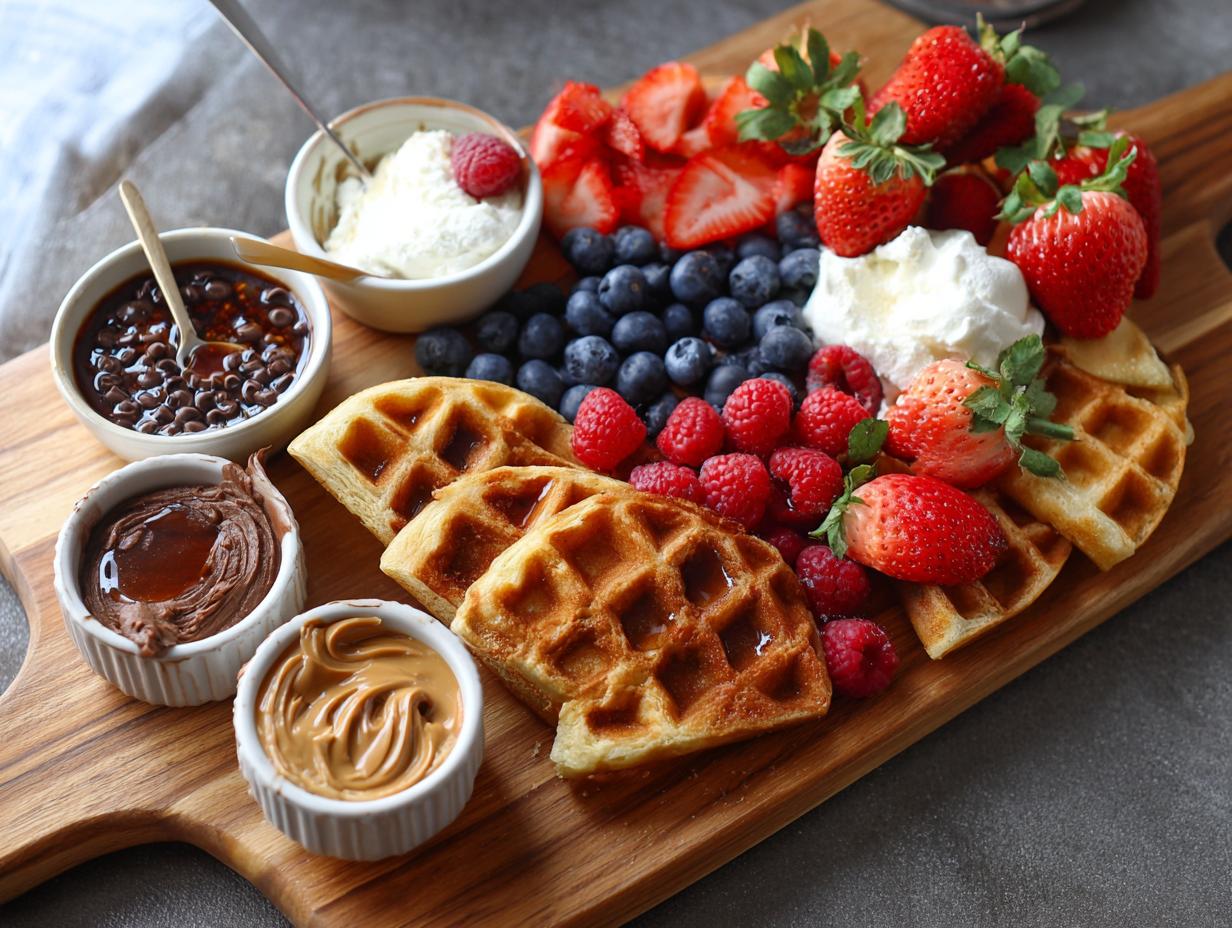
If there’s one thing I’ve learned hosting brunch for my chaotic group of friends, it’s that everyone wants something different for breakfast. That’s why I fell head over heels for the breakfast waffle charcuterie board – it’s the ultimate crowd-pleaser! Picture this: golden, crispy waffles cut into perfect fingers waiting to be dipped and topped with anything your heart desires. Last Sunday, I set one out for my nieces and nephew, and you should’ve seen their faces light up when they realized they could create their dream breakfast combo. Sweet blueberries with maple syrup? Go for it. Savory peanut butter with banana slices? Absolutely. This customizable spread turns lazy weekend mornings into something spectacular without any stress.
Why You’ll Love This Breakfast Waffle Charcuterie Board
Trust me, once you try this breakfast waffle charcuterie board, you’ll wonder how you ever survived brunch without it. Here’s why it’s my go-to:
- Everyone gets exactly what they want – Picky eaters? No problem. My cousin only eats peanut butter, my niece piles on berries, and I drizzle mine with ALL the syrup. It’s breakfast freedom!
- Takes the stress out of hosting – No more cooking eggs five different ways. Just one batch of waffles and all the toppings make you look like a brunch superstar.
- Ready in minutes – Unlike fussy breakfast casseroles, this comes together while the coffee’s still brewing. (Pro tip: Keep cooked waffles warm in the oven at 200°F while you prep toppings!)
- Endless possibilities – Found something new at the farmer’s market? Throw it on the board! Seasonal fruits, different nut butters, even savory options like bacon or avocado work beautifully.
Honestly, the best part is watching people’s faces when they see the spread. It’s like Christmas morning for breakfast lovers!
Ingredients for Your Breakfast Waffle Charcuterie Board
For the Waffles
Here’s what you’ll need to whip up the perfect base for your masterpiece. These measurements make about 8 waffles, which is perfect for a group of 4 (or 2 really hungry people!).
- Dry ingredients – 2 cups all-purpose flour (I sometimes use 1:1 gluten-free flour when my sister visits), 2 tbsp sugar, 1 tbsp baking powder (yes, a whole tablespoon!), 1/2 tsp salt
- Wet ingredients – 2 large eggs, 1 3/4 cups milk (any kind works – I’ve used almond milk in a pinch), 1/2 cup vegetable oil, and 1 tsp vanilla extract (the good stuff makes a difference!)
Pro tip: If you’re feeling fancy, add a pinch of cinnamon to the dry mix – it gives the waffles that irresistible « what IS that delicious flavor? » quality.
For the Toppings
This is where the magic happens! Use what you love and what looks good at the market. Here’s my usual lineup, but don’t be afraid to get creative:
- Fresh berries – strawberries (hulled and sliced), blueberries, raspberries – wash them right before serving so they stay perky
- Sweet drizzles – real maple syrup (please don’t use the fake stuff!), honey, chocolate sauce
- Creamy additions – whipped cream, yogurt (Greek or regular), nut butters (peanut, almond – whatever’s in your pantry)
- Extra goodies – chocolate chips, chopped nuts, banana slices, shredded coconut
Remember – there are no rules here! The best part is seeing what wild combos people come up with. Last time, my neighbor put everything on his waffle at once and it somehow… worked?
Equipment Needed for Your Breakfast Waffle Charcuterie Board
Okay, real talk – part of why I adore this breakfast waffle charcuterie board is that you barely need any special equipment! Here’s what I always grab:
- A trusty waffle maker – Mine’s an ancient belgian waffle iron I got at a garage sale ten years ago. It makes those perfect deep pockets to hold all the goodies!
- Cutting board – For slicing fruit and chopping nuts. Bonus if it’s pretty enough to use as your serving board too.
- Sharp knife – Nothing fancy needed, just something that’ll slice through strawberries without squishing them.
No waffle maker? No worries! Pre-made waffles from the freezer section work in a pinch – just crisp them up in the toaster. I won’t tell a soul. The main thing is having a fun, rustic board or platter to arrange everything on. My favorite is actually an old wooden cutting board that’s seen better days – it gives the whole spread that cozy, homemade vibe!
How to Make a Breakfast Waffle Charcuterie Board
Alright, let me walk you through the magic of putting together this breakfast waffle charcuterie board – it’s easier than you’d think, and the « wow » factor is totally worth it! The key is doing things in the right order so everything comes together warm and beautiful at the same time. I’ve ruined enough breakfasts to know timing is everything.
Preparing the Waffles
First things first – plug in that waffle maker! While it’s heating up (mine takes about 5 minutes and I never skip this step), whisk together all your dry ingredients in a big bowl. Here’s my best secret – make a little well in the center for your wet ingredients. Those eggs, milk, oil and vanilla? Beat them together separately first, then pour them right into that flour crater. Stir gently just until combined – I know it’s tempting to keep mixing when you see lumps, but stop! A few flour streaks are fine and will give you fluffier waffles.
Now comes the fun part – ladling that batter onto the hot iron. Don’t overfill it (learned that the hard way) because the batter expands. Cook until golden brown and crispy – about 3-4 minutes per batch in my ancient waffle maker. As they finish, keep them warm on a baking sheet in a 200°F oven so they stay perfect while you prep the toppings.
Assembling Your Breakfast Waffle Charcuterie Board
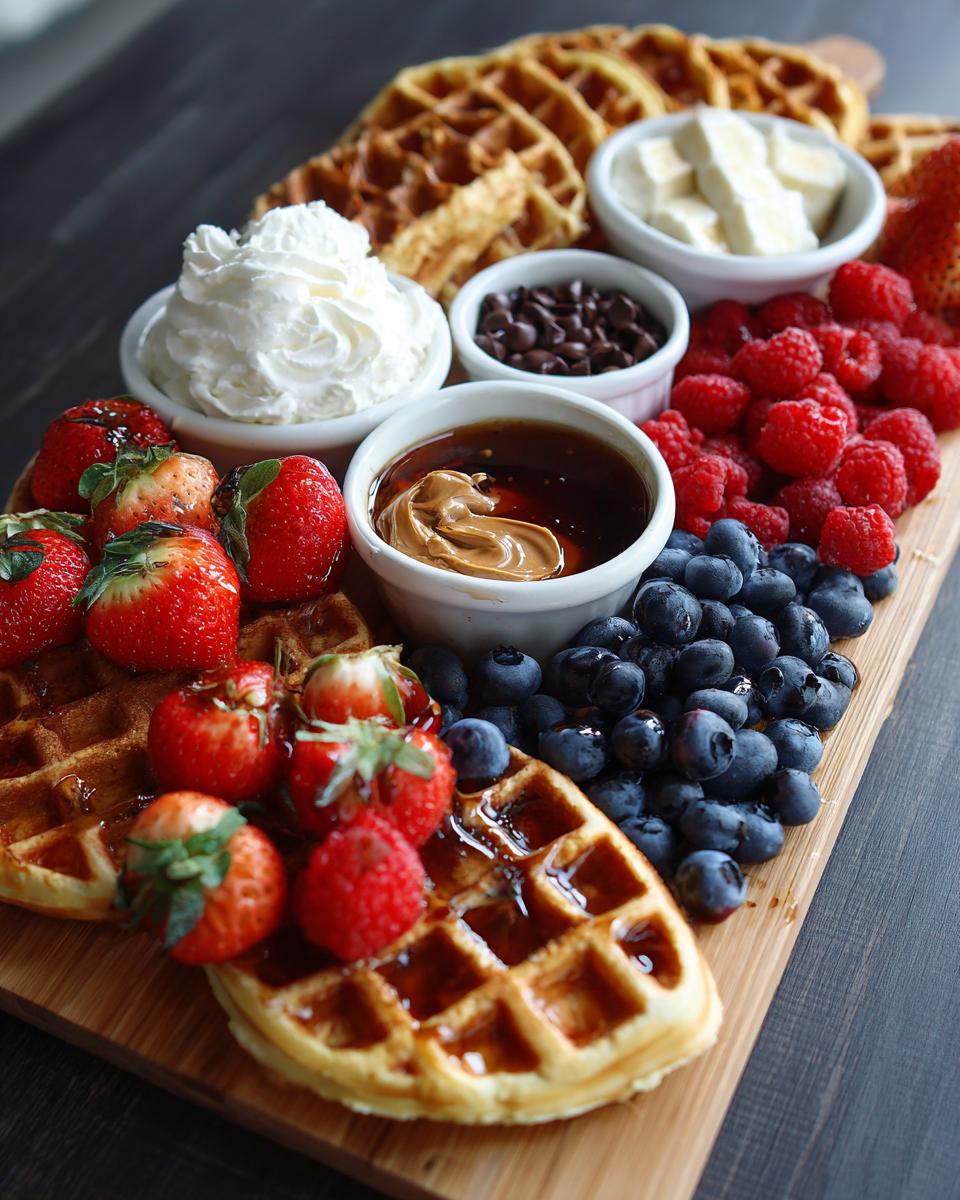
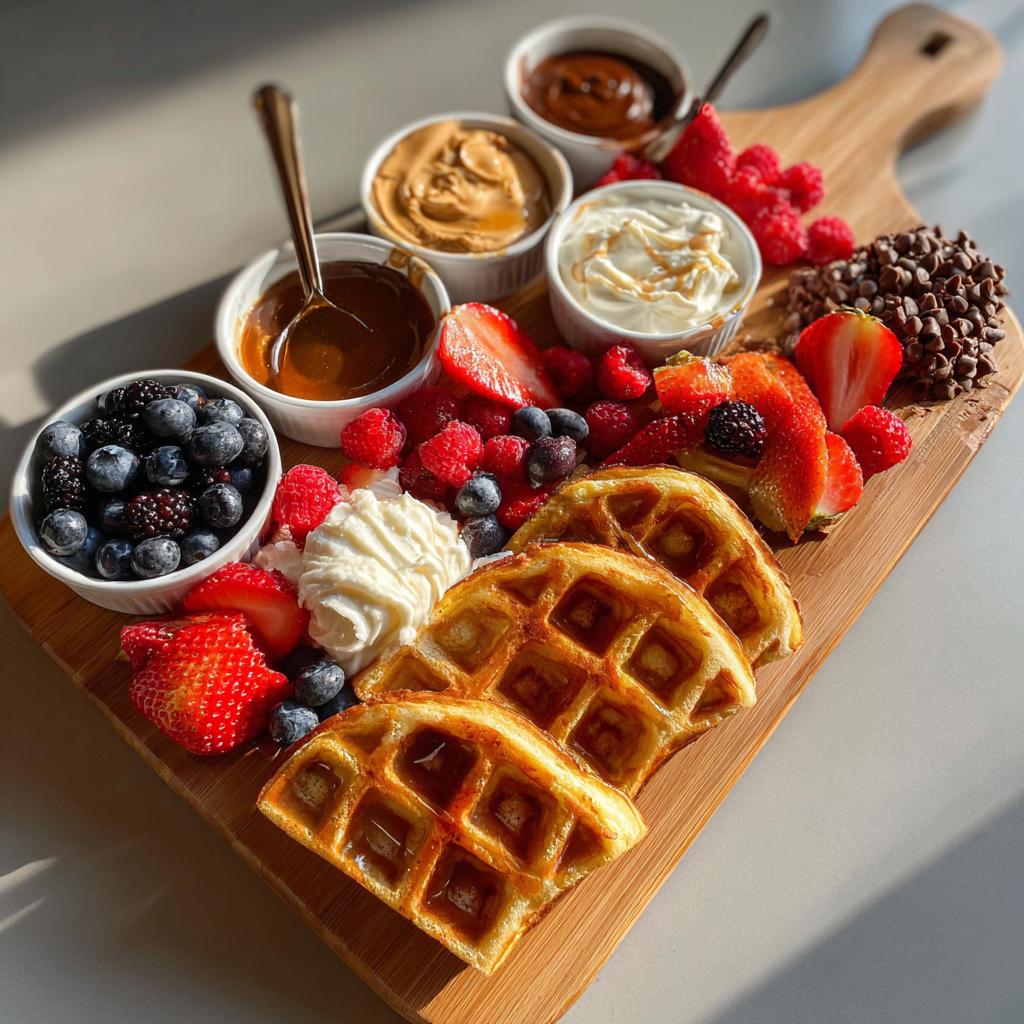
Okay, here’s where your artistic side gets to shine! Grab your favorite board or platter – mine’s an oversized wooden cutting board that’s seen better days, but somehow that makes everything look more rustic and inviting. Start by cutting your waffles into quarters – these cute little triangles are perfect for grabbing and dipping.
Arrange them slightly overlapping in the center, then start placing toppings around them. Put thick things like yogurt and nut butter in little ramekins (I use tiny mason jars), and let spills look « artistic. » Scatter berries and bananas freely – clumping colors together makes the board pop. Finally, drizzle syrups right over some waffles dramatically (this is Instagram gold!) and add whipped cream dollops at the last second so they don’t melt.
The goal? Make everyone feel like they’re at the fanciest brunch spot, even if you’re just wearing pajamas!
Tips for the Perfect Breakfast Waffle Charcuterie Board
After making more waffle boards than I can count (and learning from all my mistakes!), here are my can’t-live-without tips for creating the most drool-worthy spread:
- Waffle warmth is everything – Keep cooked waffles in a single layer on a baking sheet in a 200°F oven while prepping toppings. This keeps them crisp outside but still fluffy inside – no sad, soggy waffles here!
- Prep smarter, not harder – Wash and slice fruits the night before (store them in airtight containers with a paper towel to absorb moisture). Measure out dry ingredients too – you’ll thank yourself when you’re half-asleep at the stove.
- Seasonal is sensational – In summer, I load up on juicy peaches and berries. Come fall, roasted apples and cinnamon sugar steal the show. Let what’s fresh guide your topping choices!
- Drizzle with drama – I always add syrups and honey last minute so they don’t make everything soggy. Watching that golden honey cascade over the board? Pure breakfast theater!
- Embrace the mess – Some of my best combos came from accidental mixing. That time peanut butter met maple syrup and fresh raspberries? Life-changing. Let your guests play mad scientist!
Remember – there’s no wrong way to waffle board. The more relaxed you are, the more fun everyone has creating their perfect bite. Now go forth and brunch like a pro!
Frequently Asked Questions
Can I make the waffles ahead of time?
Absolutely! Here’s my lazy-hostess secret: I often make a double batch of waffles the night before and store them in the fridge. When I’m ready to serve, I pop them in the toaster or warm them in a 350°F oven for about 5 minutes until they’re crispy again. They’ll never be quite as perfect as fresh-off-the-iron, but with all those amazing toppings, no one will notice the difference!
How do I keep waffles crispy on the board?
Waffle crispness is sacred in my kitchen! I use a two-step approach: First, cook them a minute longer than usual so they’re extra golden (they’ll soften slightly when kept warm). Then, place them in a single layer on a wire rack set over a baking sheet in a 200°F oven. The air circulation prevents dreaded sogginess – key for that perfect breakfast waffle charcuterie board crunch!
What are the best kid-friendly toppings?
From years of feeding my nieces and nephews, I can confirm kids go wild for chocolate chips, sliced bananas (dip them in lemon juice first to prevent browning), and mini marshmallows. For picky eaters, I keep plain yogurt and peanut butter separate – they can « paint » their waffles like edible art! Pro tip: Cut waffles into fun shapes with cookie cutters – suddenly even broccoli becomes acceptable (okay, maybe not).
Can I make this gluten-free or vegan?
You bet! My sister needs gluten-free, so I simply swap all-purpose flour 1:1 with a good gluten-free blend (I prefer ones with xanthan gum already added). For vegan waffles, replace eggs with flax eggs and use almond milk – they’ll be slightly denser but still delicious. The beauty of a breakfast waffle charcuterie board is everyone can customize to their dietary needs!
How far in advance can I prep everything?
Toppings are your friends here! I wash and slice fruits the night before (store them with a paper towel in airtight containers). Dry ingredients can be mixed days ahead – I keep pre-measured bags in my pantry for last-minute brunch emergencies. Just wait to make actual waffles until about 30 minutes before serving – that beautiful crispness is worth waking up a bit earlier for!
Nutritional Information
Just to be real with you – all these numbers are ballpark estimates because let’s be honest, who actually measures their maple syrup drizzle? (Not me!) Here’s roughly what you’re looking at per serving for just the waffles, before toppings go wild:
- Calories: About 350 without toppings – but who eats them plain? Not us!
- Carbs: Around 45g from the waffle base
- Protein: 8g to start – pile on that Greek yogurt or nut butter for extra
Remember, every berry, every chocolate chip, every glorious dollop of whipped cream changes the game. My philosophy? On waffle board days, we eat with our hearts, not calculators!
Breakfast Waffle Charcuterie Board
Ingrédients
Equipment
Method
- Preheat your waffle maker.
- In a large bowl, whisk flour, sugar, baking powder, and salt.
- In another bowl, beat eggs, milk, oil, and vanilla.
- Pour wet ingredients into dry ingredients and stir until combined.
- Cook batter in waffle maker according to manufacturer instructions.
- Cut waffles into quarters and arrange on a board.
- Add toppings in small bowls or directly on the board.
- Serve immediately.