You know that moment when you’re craving something sweet, but you don’t want to spend hours in the kitchen? That’s exactly when these chocolate peanut butter desserts swoop in to save the day. Seriously, this combo is magic – the rich, velvety chocolate hugging that salty-sweet peanut butter like they were made for each other. I’ve been whipping up this 15-minute miracle since my college days (hello, dorm room microwave!), and it never fails to make people think I slaved over it. Just last week, my nephew declared it « better than store-bought candy » after I surprised him with a batch. Now that’s what I call a win for the easiest dessert in my arsenal!
Why You’ll Love These Chocolate Peanut Butter Desserts
Oh my goodness, where do I even start with why these desserts are absolute perfection? First off – they’re ridiculously easy. Like, « oops-I-forgot-about-the-bake-sale-until-5-minutes-ago » easy. Just melt, layer, chill, and boom – you’ve got something that tastes like you spent all afternoon in the kitchen. Here’s why this recipe is my go-to:
- Lightning fast: From craving to eating in 15 minutes flat (plus chilling time – try to be patient!)
- No-bake magic: Your oven gets a day off, and your kitchen stays cool
- Rich flavor bomb: The chocolate-peanut butter combo is basically nature’s most perfect pairing
- Crazy customizable: Add sea salt on top, mix in crunchy bits – make it your own!
- Always impresses: Everyone thinks you’re some kind of dessert wizard when you serve these up
Seriously, these little squares of joy check all the boxes. They’re what I make when I want maximum payoff for minimum effort – and isn’t that what we all want from our desserts?
Ingredients for Chocolate Peanut Butter Desserts
Okay, let’s talk ingredients – and I mean the good stuff that makes these chocolate peanut butter desserts so ridiculously delicious. I’ve made this recipe about a hundred different ways over the years (sometimes in desperation when the pantry was nearly empty!), and this combination is absolutely foolproof. Here’s what you’ll need:
For the Chocolate Mixture
- 1 cup chocolate chips – I always go semi-sweet because they balance the peanut butter perfectly, but dark chocolate works too if you’re feeling fancy
- 1 tablespoon coconut oil – This little magic trick makes the chocolate melt smoother and gives it that gorgeous shine
For the Peanut Butter Layer
- 1/2 cup peanut butter – Creamy gives you that velvety texture, but crunchy adds fun little surprises if that’s your jam
- 1 tablespoon honey – Just enough to sweeten things up without overpowering that beautiful peanut flavor
See? Told you it was simple! These are ingredients I bet you already have in your kitchen right now. And if you don’t – well, any excuse to go chocolate shopping, am I right?
How to Make Chocolate Peanut Butter Desserts
Alright, let’s get to the fun part – making these heavenly chocolate peanut butter desserts! I promise it’s easier than you think, and I’ll walk you through every step like I’m right there in the kitchen with you. The key is taking it slow and enjoying the process – after all, you’re creating something delicious!
Melting the Chocolate
First things first – let’s melt that chocolate! I always use the microwave because it’s quick and easy, but you’ve got to be careful not to burn it. Here’s my foolproof method: toss your chocolate chips and coconut oil in a microwave-safe bowl (I use my favorite little glass one) and zap it for 30 seconds. Take it out and give it a good stir – it’ll look like nothing happened at first, but trust me, the magic is starting. Pop it back in for another 30 seconds, stir again, and repeat until it’s perfectly smooth. If you’re feeling fancy, you can use a double boiler – just simmer some water in a pot, place your bowl on top (make sure it doesn’t touch the water!), and stir constantly until melted.
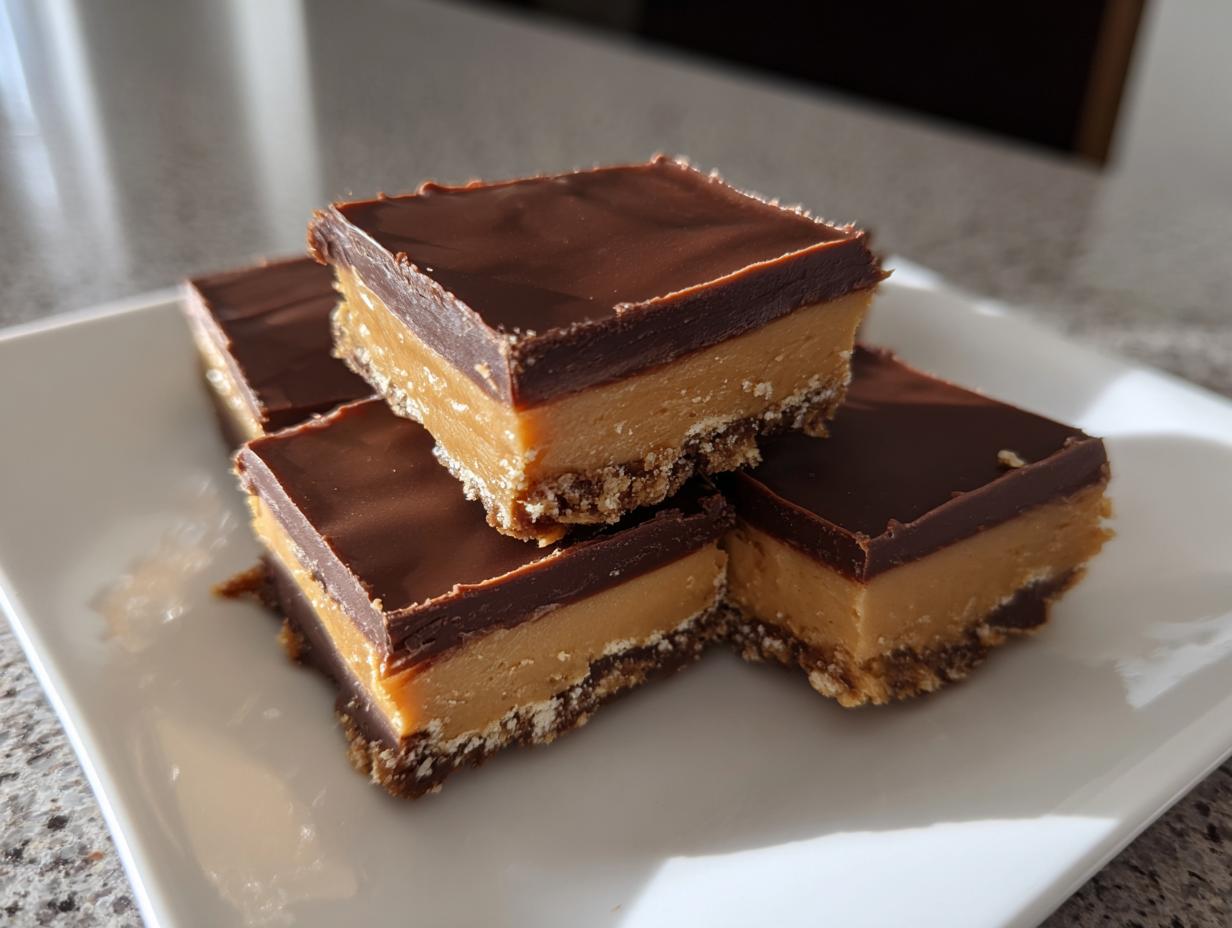
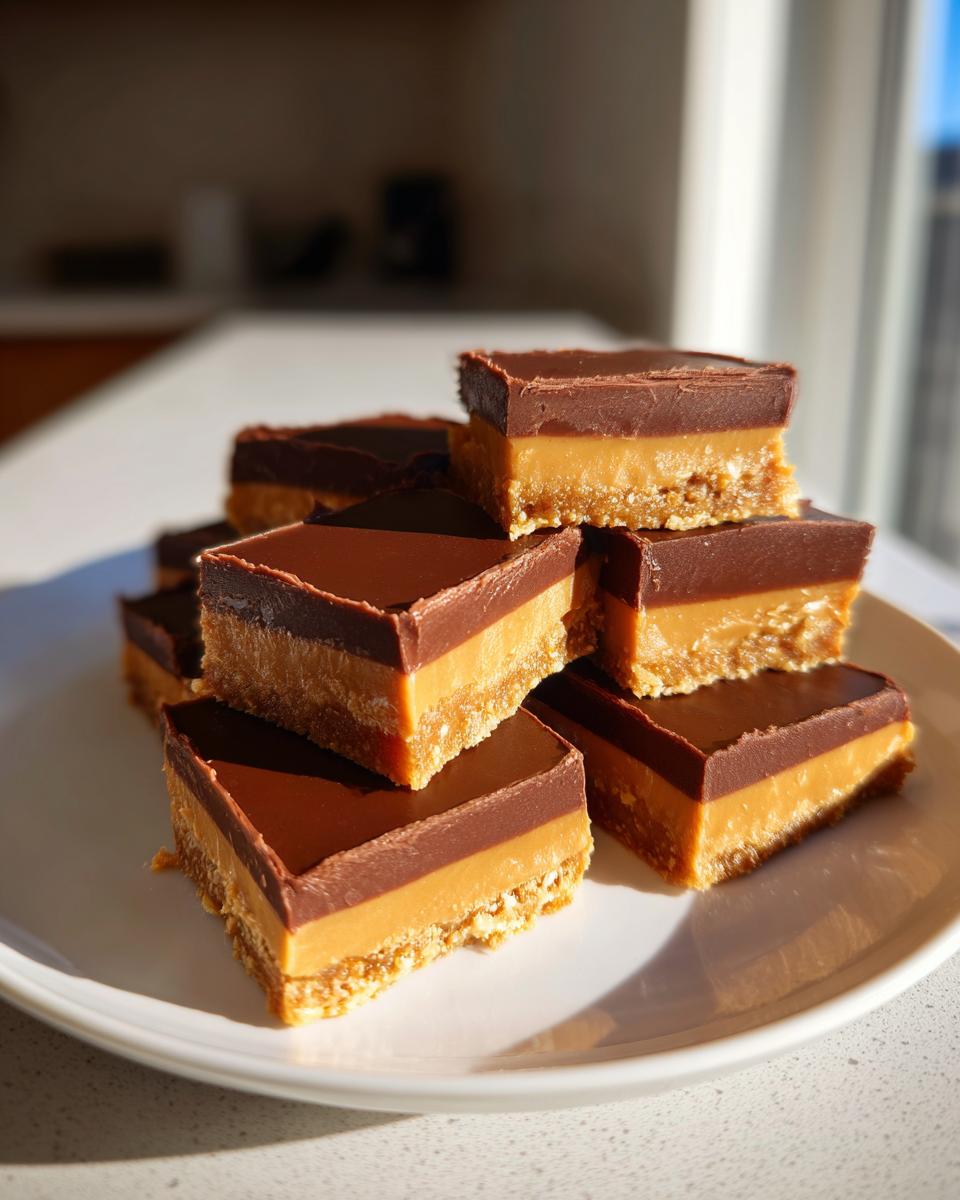
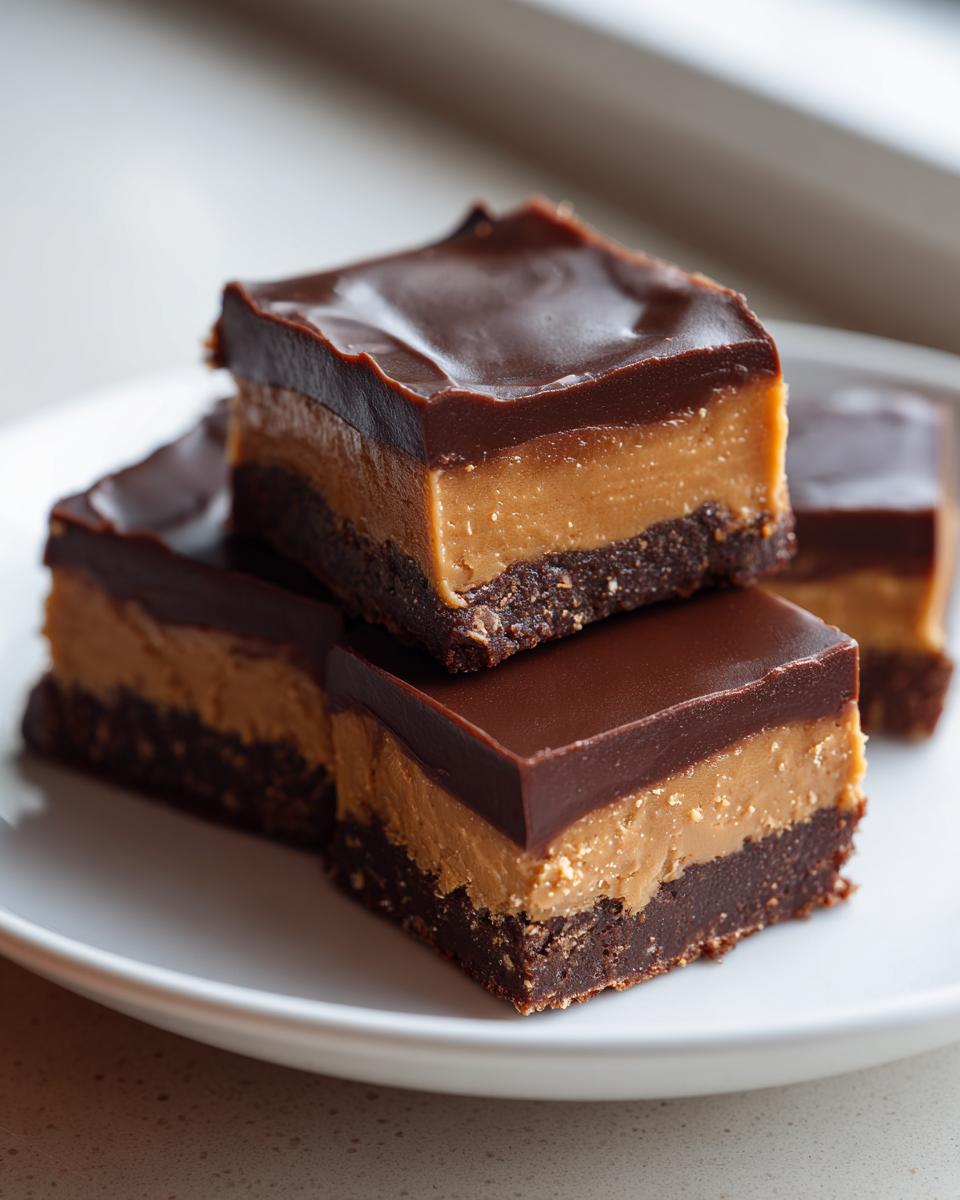
Layering the Dessert
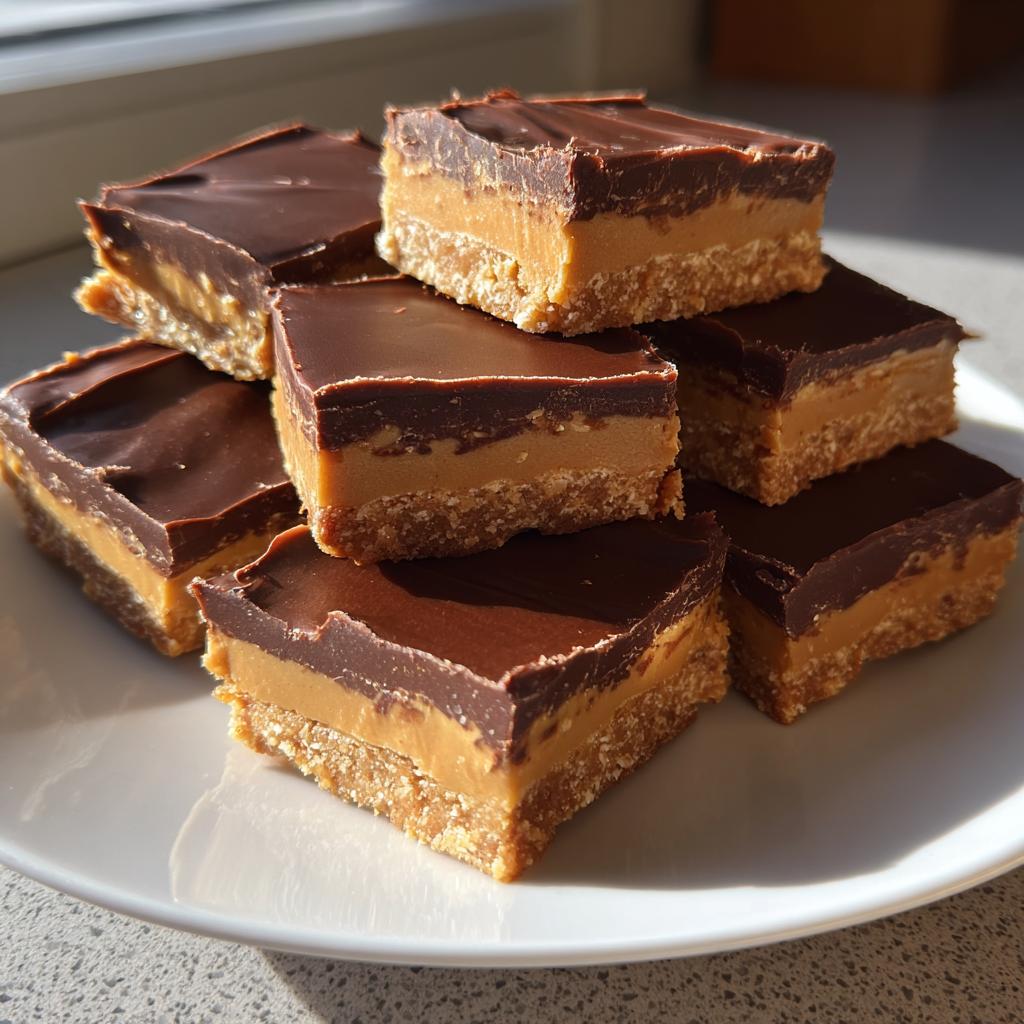
Now for the fun part – building those gorgeous layers! Grab your pan (I like using a small square baking dish lined with parchment paper – makes cleanup a breeze) and pour in half of your melted chocolate. Spread it evenly with a spatula – don’t worry about perfection here, just get it mostly even. Next comes the peanut butter mixture – dollop it right on top and gently spread it out, leaving just a tiny border of chocolate showing. Pro tip: warm your spatula under hot water and dry it quickly for super smooth spreading! Finish with the remaining chocolate, smoothing the top like you’re frosting a cake. Oh, and resist the urge to dive in right away – pop it in the fridge for at least an hour to set properly. I know, the waiting is the hardest part!
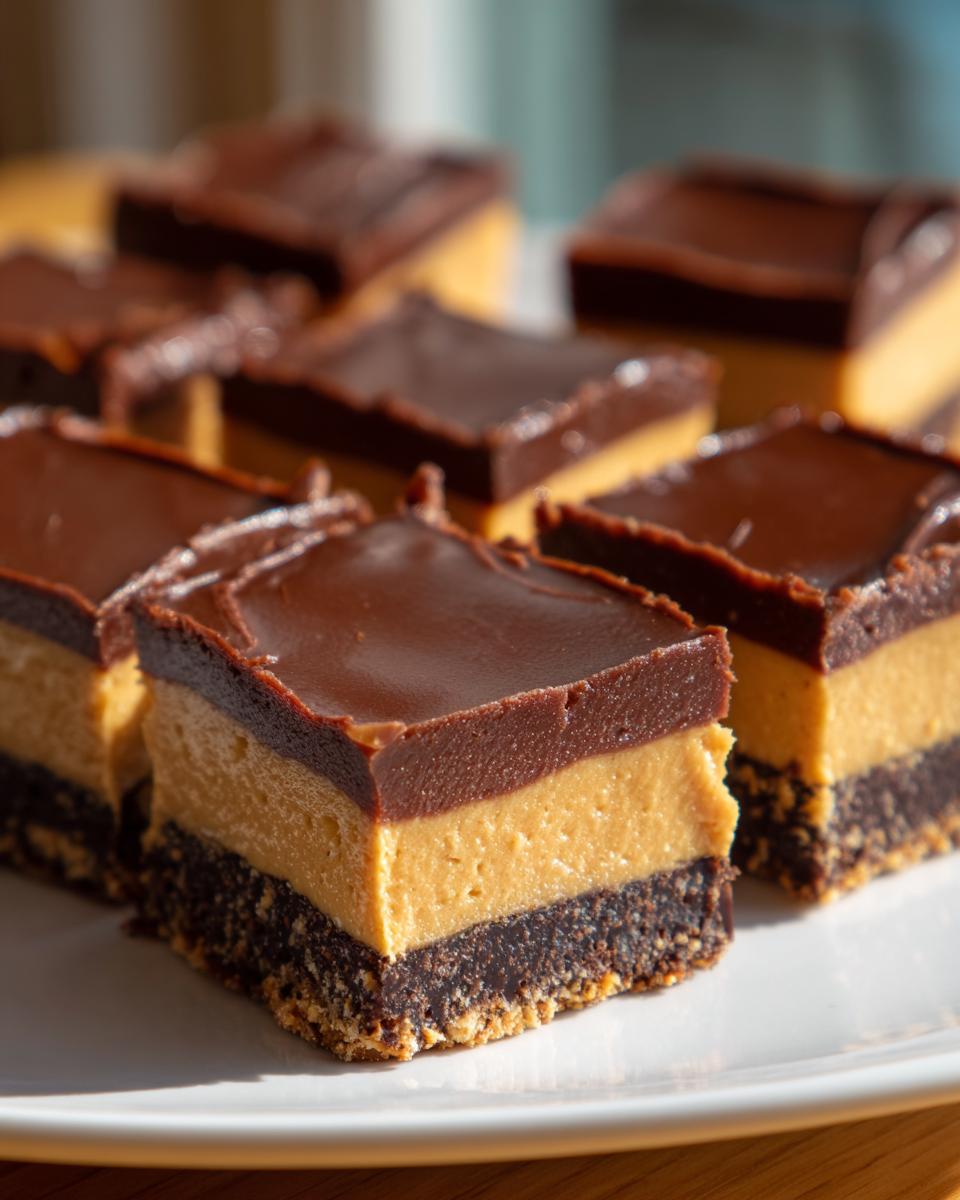
See? Told you it was simple! Now you’ve got these gorgeous layered treats that look like they came from a fancy bakery. Just try not to eat them all in one sitting – though I won’t judge if you do!
Tips for Perfect Chocolate Peanut Butter Desserts
Alright, let me spill all my little secrets for making these chocolate peanut butter desserts absolutely flawless every single time. I’ve learned these tricks through plenty of trial and error (and a few chocolate disasters!), so you don’t have to. First up – room temperature peanut butter is your best friend here. If yours has been in the fridge, just microwave it for 10-15 seconds to loosen it up. Trust me, trying to spread cold peanut butter over chocolate is like trying to frost a cake with cement!
Next, don’t skip lining your dish with parchment paper. Those little overhanging edges will be your lifeline when it’s time to lift out your masterpiece. I learned this the hard way after scraping chocolate off my favorite pan for an hour – never again!
And here’s my golden rule – patience pays off with chilling time. I know it’s tempting to dig in after 30 minutes, but give it that full hour in the fridge. The difference between « pretty good » and « mind-blowing » is just that extra chilling time letting everything set up properly. Pop it in before dinner, and you’ll have perfect squares ready for dessert!
Variations for Chocolate Peanut Butter Desserts
Oh, the fun part – making these chocolate peanut butter desserts your own! I’ve played around with this recipe more times than I can count, and here are my favorite twists that always get rave reviews. First up – crushed cookies! Toss some graham cracker crumbs or Oreo pieces between the layers for that perfect crunch. It’s like a candy bar and a cookie had a delicious baby.
Not a honey fan? No problem! Maple syrup works beautifully in the peanut butter layer – just use the same amount for that lovely caramel-like sweetness. And if peanut allergies are a concern (or you’re just feeling fancy), almond butter makes an amazing substitute with its rich, nutty flavor. I sometimes add a pinch of sea salt on top before chilling – trust me, that salty-sweet combo is next-level!
The best part? These variations don’t add any extra work to our already-simple recipe. Just swap, sprinkle, or mix in your favorite extras and watch how one basic recipe becomes a dozen different treats!
Storing and Serving Chocolate Peanut Butter Desserts
Okay, let’s talk about keeping these chocolate peanut butter desserts perfect until you’re ready to devour them! First rule – always store them in an airtight container in the fridge. They’ll stay fresh and delicious for up to a week (though let’s be real – they never last that long in my house!). The cold actually makes the chocolate even more satisfying with that perfect snap when you bite into it.
Now for the fun part – serving! These little squares are amazing all on their own, but if you want to get fancy, try them slightly chilled with a scoop of vanilla ice cream. The contrast between the cold chocolate and melting ice cream is just *chef’s kiss*. No need to reheat – these taste best cool or at room temperature. Pro tip: let them sit out for about 5 minutes before serving to take the edge off the chill. Trust me, your taste buds will thank you!
Nutritional Information for Chocolate Peanut Butter Desserts
Okay, let’s talk numbers – but don’t worry, I promise this won’t ruin the deliciousness! Each serving of these chocolate peanut butter desserts packs about 320 calories, with 22g of fat (9g saturated – blame the chocolate for that heavenly richness!). You’re also getting 8g of protein from the peanut butter, plus 3g of fiber to balance things out a bit. Not too shabby for such an indulgent treat!
Now, here’s my little disclaimer – these numbers can wiggle around depending on your specific ingredients. Using natural peanut butter? Might be a tad less sugar. Opting for dark chocolate? Could bump up those antioxidants! The moral of the story? Enjoy every bite knowing you’re treating yourself to something that tastes way more decadent than the nutrition facts suggest.
Frequently Asked Questions
Can I use milk chocolate instead of semi-sweet?
Absolutely! Milk chocolate works beautifully if you prefer sweeter desserts. Just keep in mind it melts faster than semi-sweet, so reduce those microwave intervals to 20 seconds. The first time I tried this, my nephew declared it « even better than the original » – high praise from a 10-year-old chocolate connoisseur!
How long does it take for these to set properly?
Patience, my friend! I know it’s tough, but give it at least one hour in the fridge. That’s the magic number for perfect slicing. Though if you’re like me and can’t wait, 30 minutes gets you soft-but-edible squares (no judgment here!).
Can I freeze these chocolate peanut butter desserts?
You bet! These freeze like a dream. Just wrap them tightly in plastic wrap first – I learned this the hard way when my first batch tasted like freezer smells. They’ll keep for up to 2 months frozen, but let them thaw in the fridge overnight for best texture.
Chocolate Peanut Butter Desserts
Ingrédients
Equipment
Method
- Melt the chocolate chips and coconut oil in a microwave-safe bowl in 30-second intervals, stirring between each, until smooth.
- Spread half of the melted chocolate mixture into a lined dish or mold.
- Mix the peanut butter and honey in a separate bowl, then spread it over the chocolate layer.
- Pour the remaining chocolate mixture over the peanut butter layer and smooth the top.
- Refrigerate for at least 1 hour before cutting into squares.