You know that moment when you walk into a holiday party and everyone turns to admire what you’re carrying? That’s exactly what happened the first time I brought my Christmas Charcuterie Tree to my cousin’s annual bash. I swear, the whole room went silent—then came the chorus of « Oh my gosh, how did you make that?! » The best part? It took me less time to assemble than it did to wrap my Secret Santa gift. This edible Christmas tree has become my go-to for every festive gathering since—it’s the ultimate showstopper that looks fancy but couldn’t be simpler to throw together. Just wait until you see your guests’ faces when you unveil this masterpiece. Pro tip: Keep your phone handy for all the Instagram requests—mine still gets tagged in photos of this charcuterie tree years later!

Why You’ll Love This Christmas Charcuterie Tree
If you’re looking for a holiday appetizer that wows without the work, let me tell you why this Christmas charcuterie tree steals the show every time:
- Instant festive magic: That rosemary tree shape with colorful « ornaments » makes people think you spent hours—our little secret!
- No cooking required: My kind of recipe—just assemble and watch the compliments roll in while you sip your eggnog.
- Endlessly customizable: Ran out of grapes? Use cucumbers. Allergic to nuts? Toss in some crackers. It’s practically foolproof.
- Feeds a crowd: Last Christmas, this bad boy served 12 hungry relatives and still had leftovers for midnight snacking.
- Kid-friendly fun: My nieces love helping « decorate » the tree—though half the cherry tomatoes mysteriously disappear during assembly.
Trust me, once you bring this to one gathering, you’ll be making it every year. My phone still blows up with « Can you bring the tree?! » texts every December.
Ingredients for Your Christmas Charcuterie Tree
Okay, let’s talk ingredients—this is where the magic happens! I’ve broken everything down into three simple categories so you can shop like a pro. Pro tip: Hit the olive bar at your grocery store for small quantities of fancy items. Here’s exactly what you’ll need to build your edible masterpiece:
For the Tree
- 1 cup green grapes – Look for firm ones that’ll stay put on your « branches »
- 1 cup rosemary sprigs – Fresh is best here, they’re your tree’s skeleton!
- 1/2 cup black olives – Pitted kalamatas are my go-to for that rich color
- 1/2 cup red cherry tomatoes – These are your « ornaments » so pick the roundest ones
- 1/2 cup yellow cherry tomatoes – The sunny contrast makes the tree pop
For the Cheese & Meats
- 8 oz cheddar cheese, cubed – I like sharp white cheddar for visual appeal
- 8 oz pepper jack cheese, cubed – Adds a nice kick that balances the sweetness
- 8 oz salami, sliced – Fold some into little fans for texture
- 8 oz prosciutto, rolled – These delicate ribbons make elegant « presents »
For the Extras
- 1/2 cup mixed nuts – Almonds and pistachios add great crunch
- 1/2 cup dried fruit – Apricots or figs work beautifully
- 1/4 cup honey, for drizzling – That golden finish ties everything together
See? Nothing too crazy—just good, festive ingredients that come together like holiday magic. The best part is you can adjust quantities based on your crowd. More cheese lovers? Double the cubes! Got veggie guests? Load up on those colorful tomatoes. This is your edible canvas—have fun with it!
How to Assemble Your Christmas Charcuterie Tree
Alright, let’s get building! I promise this is way easier than putting together those complicated toy sets for the kids. Here’s my foolproof, step-by-step method for creating a showstopping Christmas charcuterie tree that’ll have everyone reaching for their phones to snap pics:
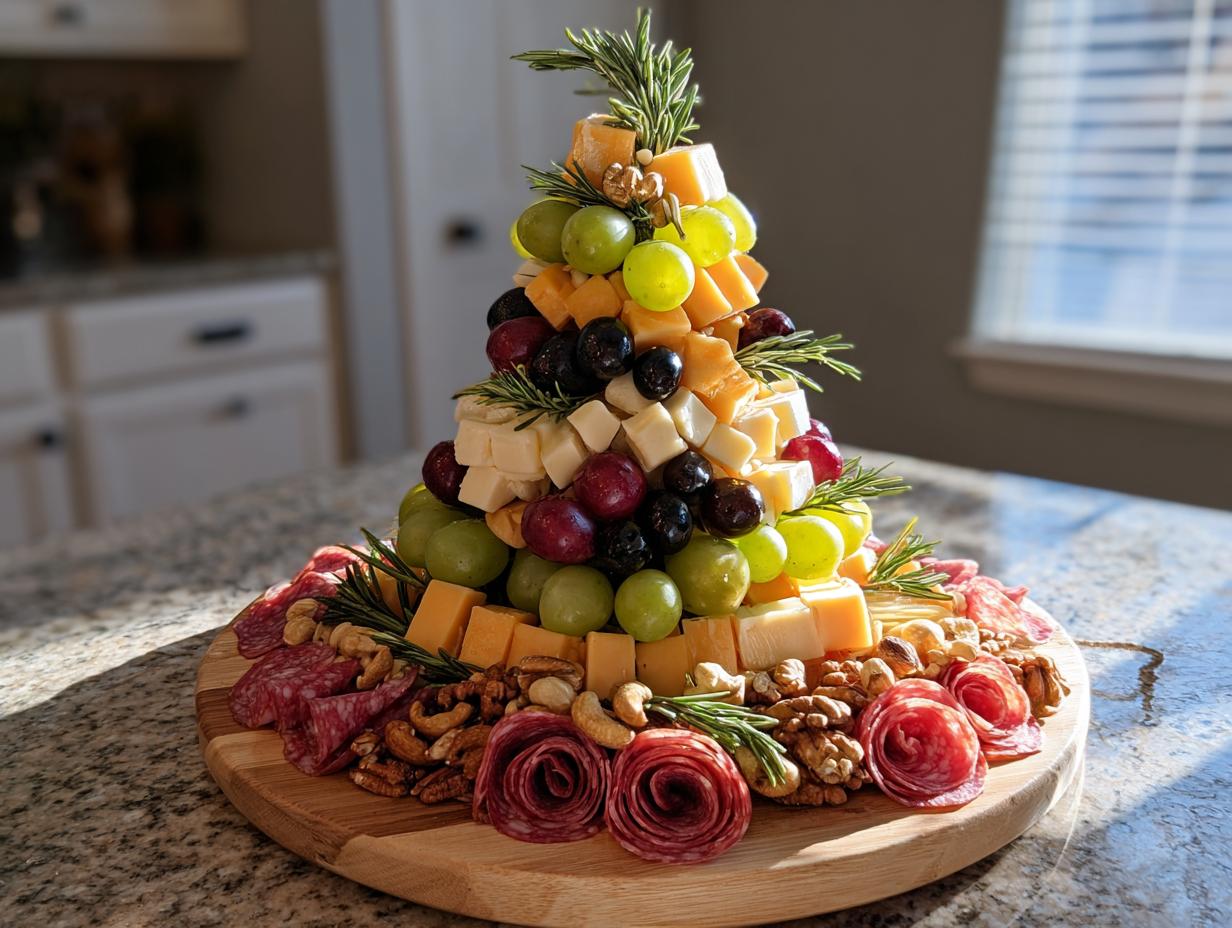
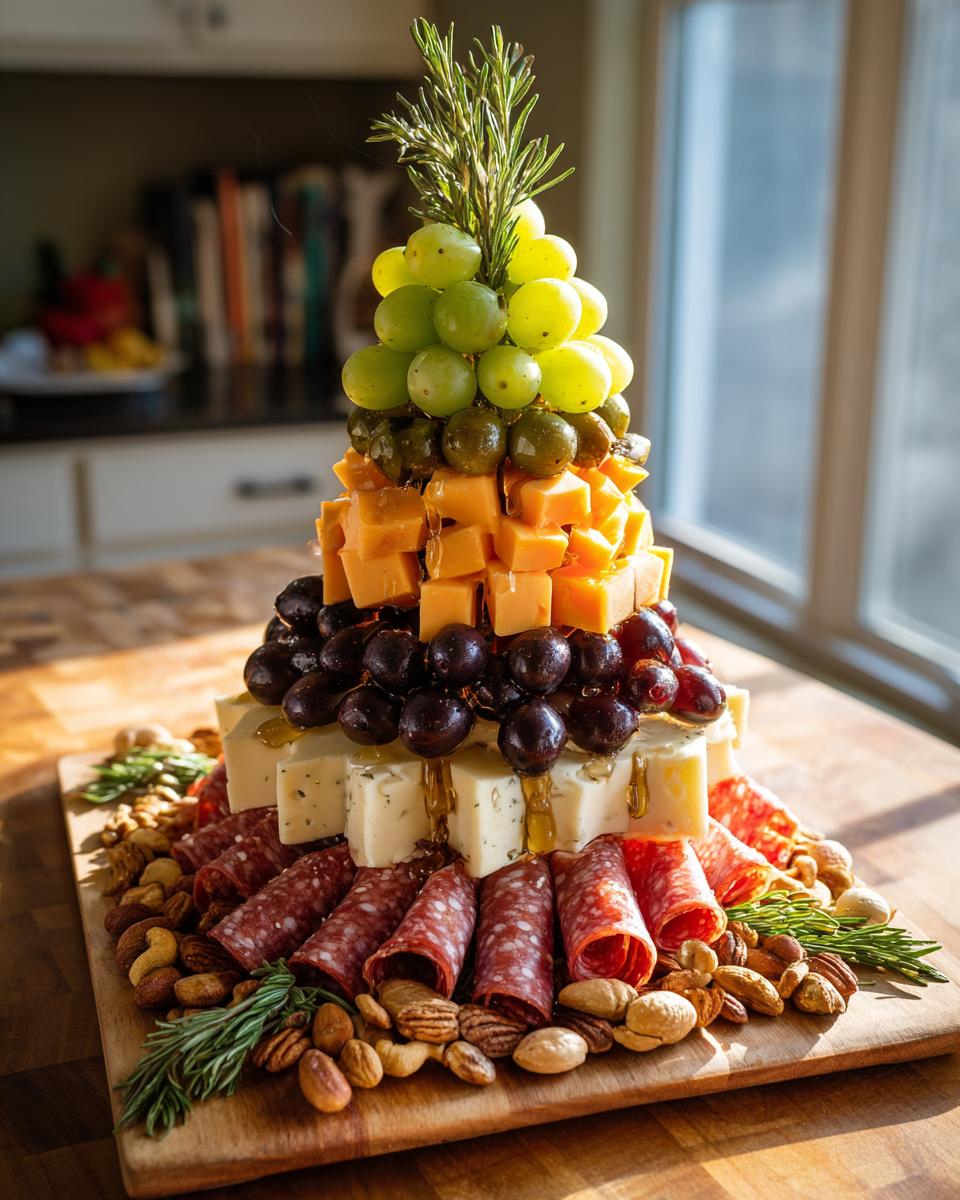
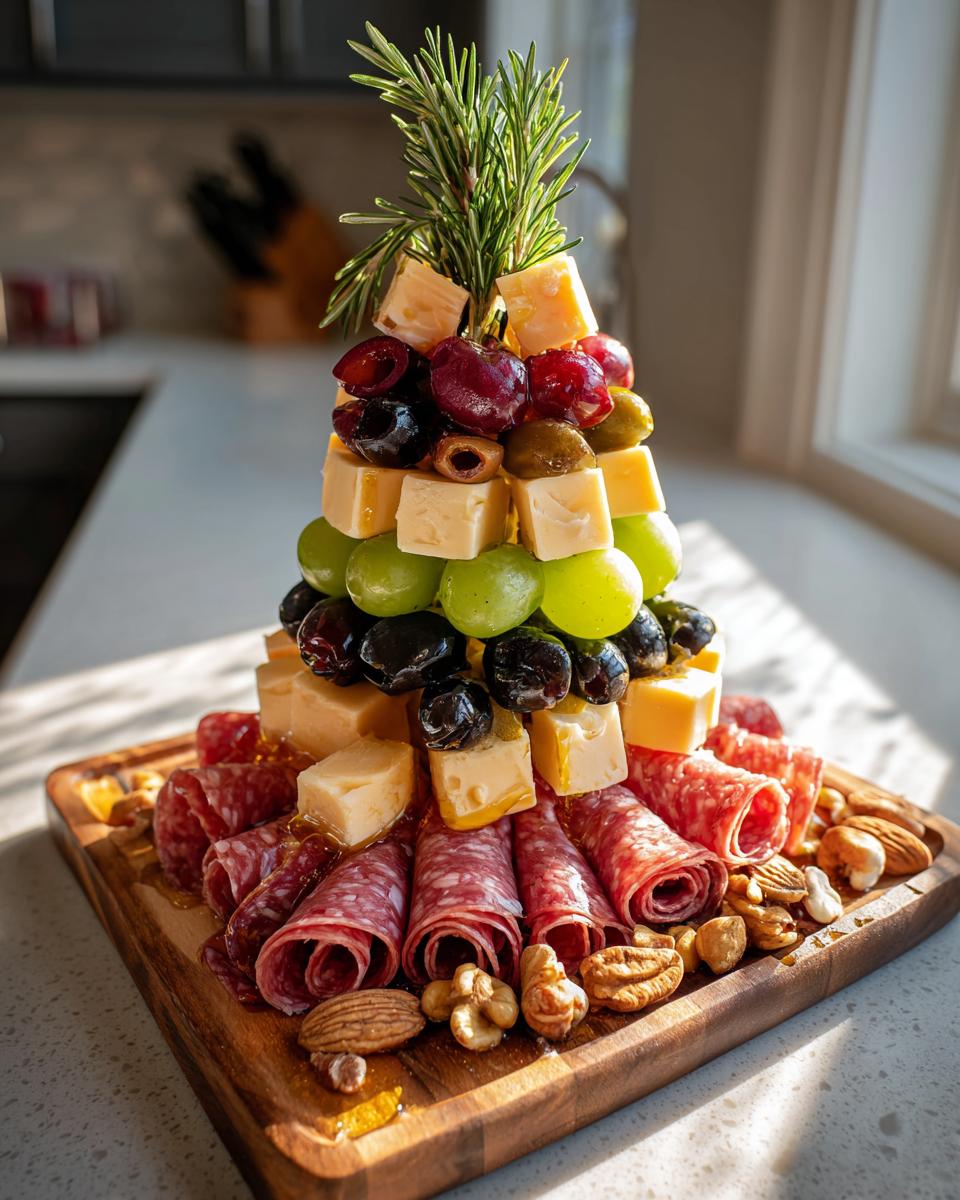
- Lay your foundation: Grab that large serving board (I use my trusty wooden one that’s seen many holiday battles) and start arranging the rosemary sprigs in a triangle shape for the tree. Don’t stress about perfection—nature isn’t symmetrical, and neither is your edible tree! Just make sure the base is wide enough to support all those tasty ornaments.
- Branch out: Take your green grapes and nestle them along the rosemary « branches. » I like to start from the bottom and work up, overlapping slightly as I go. Pro tip: pat the grapes dry first so they don’t go rolling off the board when great-aunt Susan gets overexcited.
- Hang your edible ornaments: Here’s where the fun begins! Alternate the black olives and cherry tomatoes along the grape « branches. » I pretend I’m decorating a real tree—pop a yellow tomato « star » at the very top, and scatter the red ones randomly like Christmas lights. The more haphazard, the more naturally festive it looks!
- Present your presents: Around the base of your tree, arrange the cubed cheeses and folded meats. I like to group similar items together—all the cheddar in one spot, the rolled prosciutto fanning out like little gift boxes. The salami slices can be folded into cute ruffles that add tons of texture.
- Fill in the gaps: Take a step back and look for empty spots—that’s where your mixed nuts and dried fruit come in. I call this step « the artful scatter »—toss them casually where you need pops of color and crunch. This is also where kids can help without ruining your master plan!
- Add the golden touch: Right before serving (and I mean RIGHT before—like set-the-board-down-before-you-drizzle close), take that honey and zigzag it over the cheeses at the base. It gives that magical « fresh snowfall » effect and makes the whole thing look professionally finished.
And voilà! You’ve just created the ultimate holiday centerpiece in about 15 minutes. I always remind myself: charcuterie boards are meant to be rustic, so if something shifts or cheese cubes aren’t perfectly aligned? That’s just extra charm. Now stand back and wait for the « How did you DO that?! » chorus—it never gets old!
Tips for the Perfect Christmas Charcuterie Tree
Want your Christmas charcuterie tree to look as good as it tastes? Listen close—these are my tried-and-true tricks straight from years of trial and (hilarious) error:
- Chill your cheese: Pop those blocks in the freezer for 20 minutes before cubing—it gives you clean, sharp edges instead of crumbly messes. Learned this the hard way after my first tree looked like it got into a snowball fight!
- Become a rosemary barber: Kitchen shears are your best friend for trimming those woody stems. I keep a dedicated pair just for herbs—nicknamed « Edward ScissorSprigs » in our house.
- Patience with grapes: Give them a good towel dry and let them air out a bit. Otherwise, you’ll be playing grape hockey across your kitchen floor—speaking from VERY personal experience here.
- Get glittery: For special occasions, I dust the tree with edible gold glitter right before serving. My nephew calls it « Christmas tree magic powder » and it makes the whole thing twinkle under the lights!
- Secure your base: Anchor the bottom rosemary sprigs with heavier items like cheese cubes first—nothing worse than a leaning charcuterie tree after all your hard work!

Remember—if something goes « wrong, » just call it rustic charm and pour yourself some mulled wine. Half the magic is in the happy accidents!
Christmas Charcuterie Tree Variations
The beauty of this Christmas charcuterie tree? You can reinvent it every time! My family makes themed versions all season—here are our favorites:
- Vegan Wonder: Swap in dairy-free cheeses and plant-based meats (my niece loves the pepperoni-style slices). Add roasted chickpeas for crunch!
- Gluten-Free Glam: Skip the crackers and use seed-covered cheese wheels as your « tree trunk » base. Pomegranate arils make stunning edible « lights. »
- Mediterranean Magic: Trade salami for folded lamb slices, use feta cubes, and decorate with kalamata olives. Bonus points for adding dolmas as little « gifts. »
- Breakfast Tree: Mini pancakes as ornaments, berries for garlands, and bacon curls at the base—Santa would approve!
Really, the only rule is: if it’s delicious, it belongs on the tree! I once made an all-dessert version with cookie ornaments—but that’s a story for another day.
Serving and Storing Your Christmas Charcuterie Tree
Here’s the deal with this showstopper—timing is everything! I always serve my Christmas charcuterie tree at room temperature (about 30 minutes after assembling) so the cheeses soften just enough to spread easily. But watch those grapes—if they sit out too long in a warm room, they tend to roll like marbles at a kids’ bowling party!
Now for leftovers—and let’s be real, with this crowd-pleaser, that’s a rare problem—but just in case: dismantle the tree and store components separately in airtight containers. The cheeses and meats will keep happily for 2 days in the fridge (if they last that long). The delicate rosemary starts looking sad after about 24 hours, so if you spot wilting « branches, » just pluck fresh sprigs next time you assemble. And pro tip: save that honey drizzle for your final presentation—nothing’s less festive than soggy cheese the next day!
Christmas Charcuterie Tree FAQs
You’ve got questions? I’ve got answers—here are the ones that always pop up when I bring this festive appetizer to parties (usually while people are mid-bite!):
Can I make the charcuterie tree ahead of time?
Absolutely! Here’s my trick: Prep all your ingredients and store them separately in the fridge. Wait to assemble the rosemary « tree » and grape « branches » until right before serving—that keeps everything looking fresh. The cheeses? They actually taste better at room temp, so take them out about 30 minutes before your guests arrive.
What if I need nut-free options?
No problem at all! Swap the nuts for pumpkin seeds (those little green ones look like tiny ornaments) or gluten-free crackers broken into fun shapes. My aunt’s allergic, so I always make a nut-free zone on the board with extra dried apricots and cubed cheese.
How do I transport this masterpiece?
Use a rimmed baking sheet or serving tray—those edges are lifesavers! I assemble directly on the tray, then cover loosely with plastic wrap (propped up with toothpicks to avoid smooshing). Keep it flat in your car, and bribe your passenger to hold it steady. Been there!
See? Nothing to stress about. This tree is as flexible as it is delicious—just like my holiday spirit after some spiked cider!
Nutritional Information
Now let’s talk numbers—but take these with a grain of festive salt! Nutrition varies wildly based on your ingredient choices and whether you sneak extra salami (no judgment here). My best estimates per serving: Calories 200-250, Fat 15g, Protein 10g, Carbs 12g. Honestly though? When it’s Christmas and you’re face-deep in this gorgeous tree, who’s counting? Just enjoy and make January’s resolutions tomorrow!
Share Your Christmas Charcuterie Tree Creations
I can’t wait to see your edible masterpieces! Snap a pic of your Christmas charcuterie tree and tag me—I’ll be checking #CharcuterieChristmasTree all season long. Nothing makes me happier than seeing your creative spins on this festive favorite. Bonus points if your cat photobombs the shot like mine always does!

Christmas Charcuterie Tree
Ingrédients
Equipment
Method
- Arrange the rosemary sprigs in the shape of a Christmas tree on a large serving board.
- Place the green grapes along the rosemary sprigs to form the tree branches.
- Alternate the black olives, red cherry tomatoes, and yellow cherry tomatoes as ornaments on the tree.
- Arrange the cubed cheeses, sliced salami, and rolled prosciutto around the base of the tree.
- Fill in any gaps with mixed nuts and dried fruit.
- Drizzle honey over the cheese and serve immediately.