Nothing screams Easter joy more than watching kids’ eyes light up when they see colorful chocolate lollipops waiting for them! I still remember my mom and I making these Easter chocolate lollipops when I was little – we’d always sneak a few chocolate chips before melting them, giggling like we were getting away with something. What I love most about this recipe is how simple yet magical it feels – just melted chocolate and festive sprinkles transformed into edible happiness. These treats take barely 25 minutes start to finish, making them the perfect last-minute Easter dessert to whip up with little ones. Whether you’re hosting an egg hunt or just want to surprise your family with something sweet, these lollipops always bring out everyone’s inner child.
Why You’ll Love These Easter Chocolate Lollipops
Oh, where do I even start with these little circles of happiness? These Easter chocolate lollipops are my go-to treat when I need something fast, fun, and guaranteed to make people smile. Here’s why you’ll adore them too:
- Super quick – I’m talking 25 minutes from pantry to party-ready. Perfect when last-minute guests show up or when your kids suddenly remember they need treats for class tomorrow!
- Kid-approved magic – Little hands love helping decorate these. My niece calls it « sprinkle art time » and takes it very seriously.
- Endless creativity – Swirl different colored chocolates, crush up pastel candies… I once made bunny faces with mini marshmallows for ears!
- Party perfect – Tie them with ribbons for place settings or stick them in an Easter basket. They’re almost too cute to eat. Almost.
Trust me, these lollipops will become your Easter tradition before you know it.
Ingredients for Easter Chocolate Lollipops
Gathering these simple ingredients feels like opening an Easter basket – bright, sweet, and full of possibilities. Here’s everything you’ll need to create your own edible masterpieces. Trust me, keeping it simple means less fuss and more fun when decorating time comes!
For the Lollipops
The chocolate is the star here, so don’t skimp! I always use 2 cups of chocolate chips – milk chocolate for classic sweetness or dark chocolate if you want something richer. That 1 tablespoon of vegetable oil may seem small, but it’s the secret to getting that perfect glossy texture that makes your lollipops shine.
For Decoration
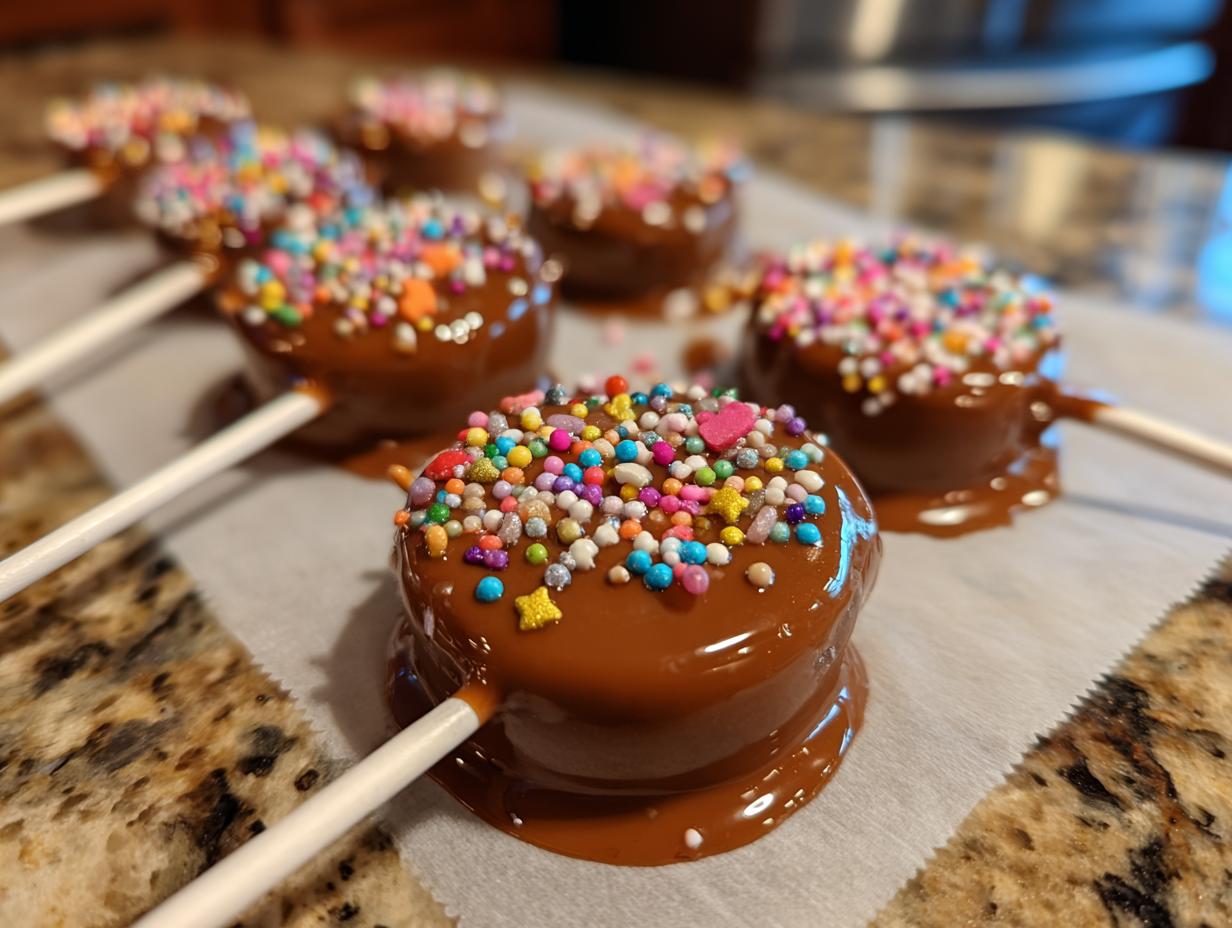
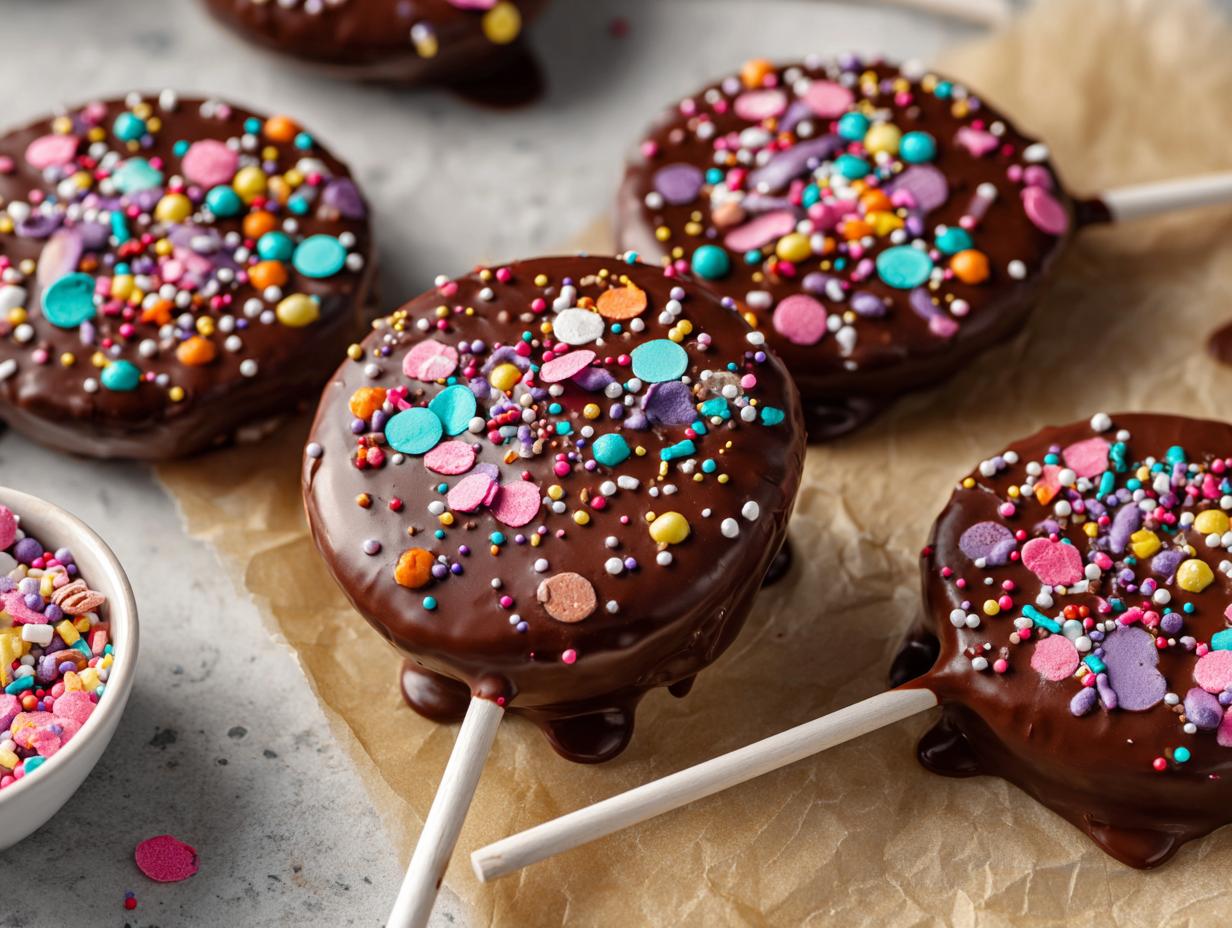
This is where the Easter magic happens! Grab some Easter-themed sprinkles – think pastel eggs, bunnies, or spring flowers. And don’t forget the edible glitter – nothing makes kids (okay, and me) gasp with delight like sparkly chocolate. Tip: I keep a variety on hand so we can mix and match patterns for every lollipop.
Equipment Needed for Easter Chocolate Lollipops
You probably have most of these tools already – this isn’t one of those recipes that requires fancy gadgets! All you really need is:
- Lollipop sticks (the flat kind work best – they stay put in the chocolate)
- A microwave-safe bowl (I use my favorite Pyrex measuring cup – bonus spout for easy pouring!)
- Parchment paper (wax paper will stick, trust me – learned that the messy way)
That’s it! No special equipment means more budget for extra sprinkles. Now let’s make some magic!
How to Make Easter Chocolate Lollipops
Okay, let’s get to the fun part – transforming those simple ingredients into edible Easter joy! I’ve made these lollipops so many times I could probably do it in my sleep, but I’ll walk you through every step so yours turn out perfect. The key is working quickly (but calmly – melted chocolate waits for no one) and embracing the playful imperfections that make homemade treats special. Ready?
Step 1: Prepare the Baking Sheet
First things first – lay out a sheet of parchment paper on your baking sheet. This is non-negotiable, learned-the-hard-way advice! Wax paper will make your lollipops stick (ask me how I know), and going naked means chocolate disaster cleanup. Just smooth out a nice big piece – no need to grease it.
Step 2: Melt the Chocolate
Here’s where the magic starts! Dump those chocolate chips and vegetable oil into your microwave-safe bowl. I do 30-second bursts, stirring vigorously between each, until it’s gloriously smooth. Don’t walk away – chocolate burns if you blink! Pro tip: The residual heat keeps melting it as you stir, so pull it out when there are still a few chips left. Keep stirring and watch them disappear into silky perfection.
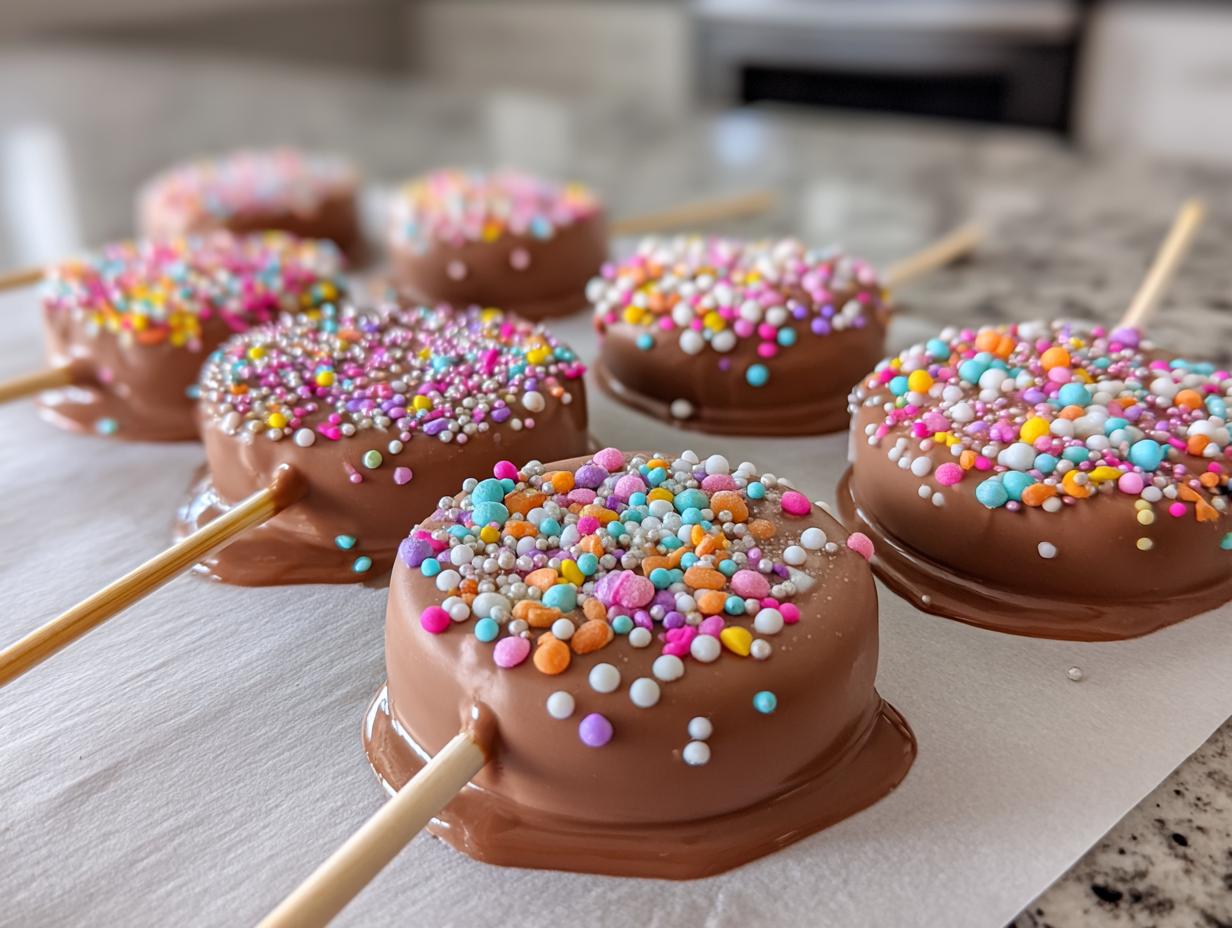
Step 3: Shape the Lollipops
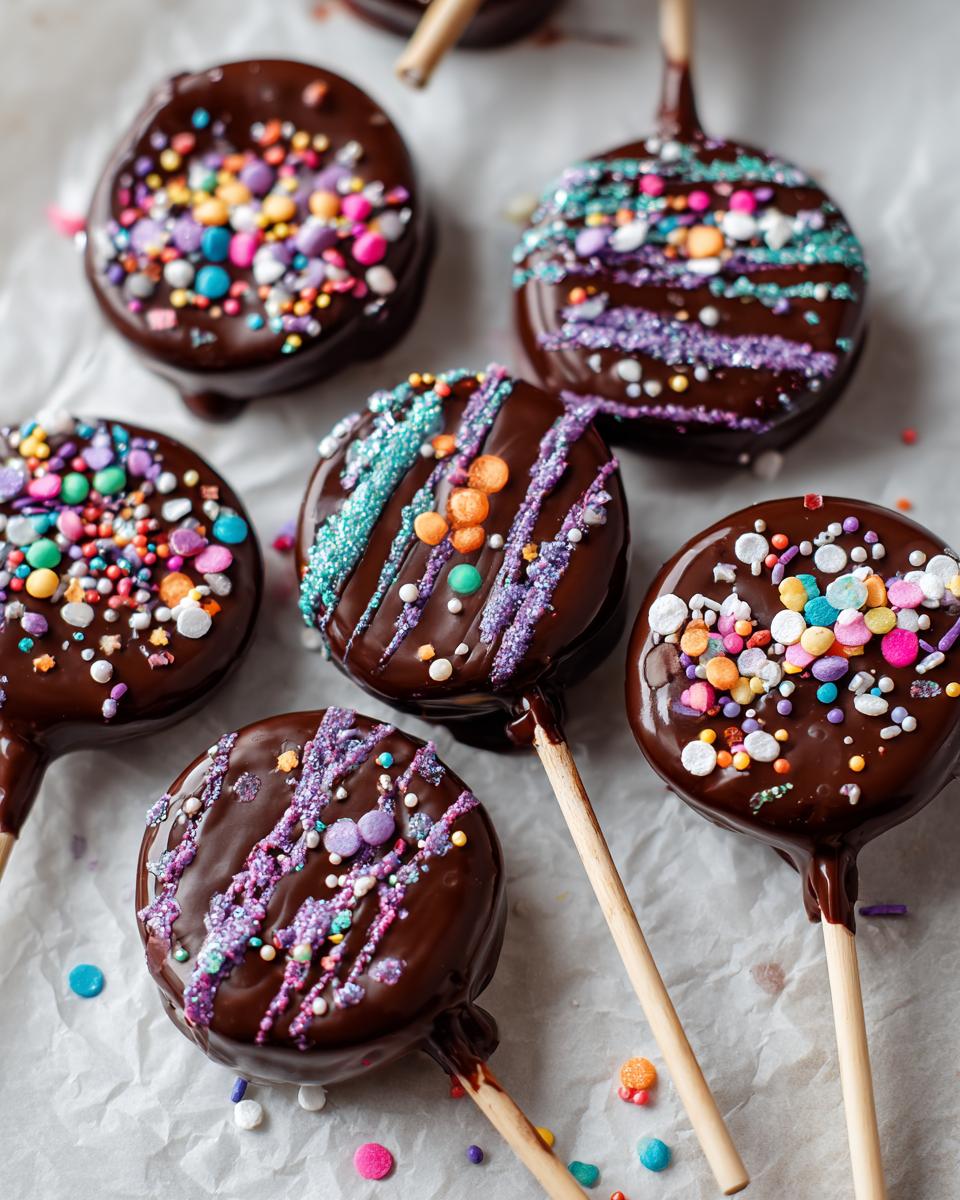
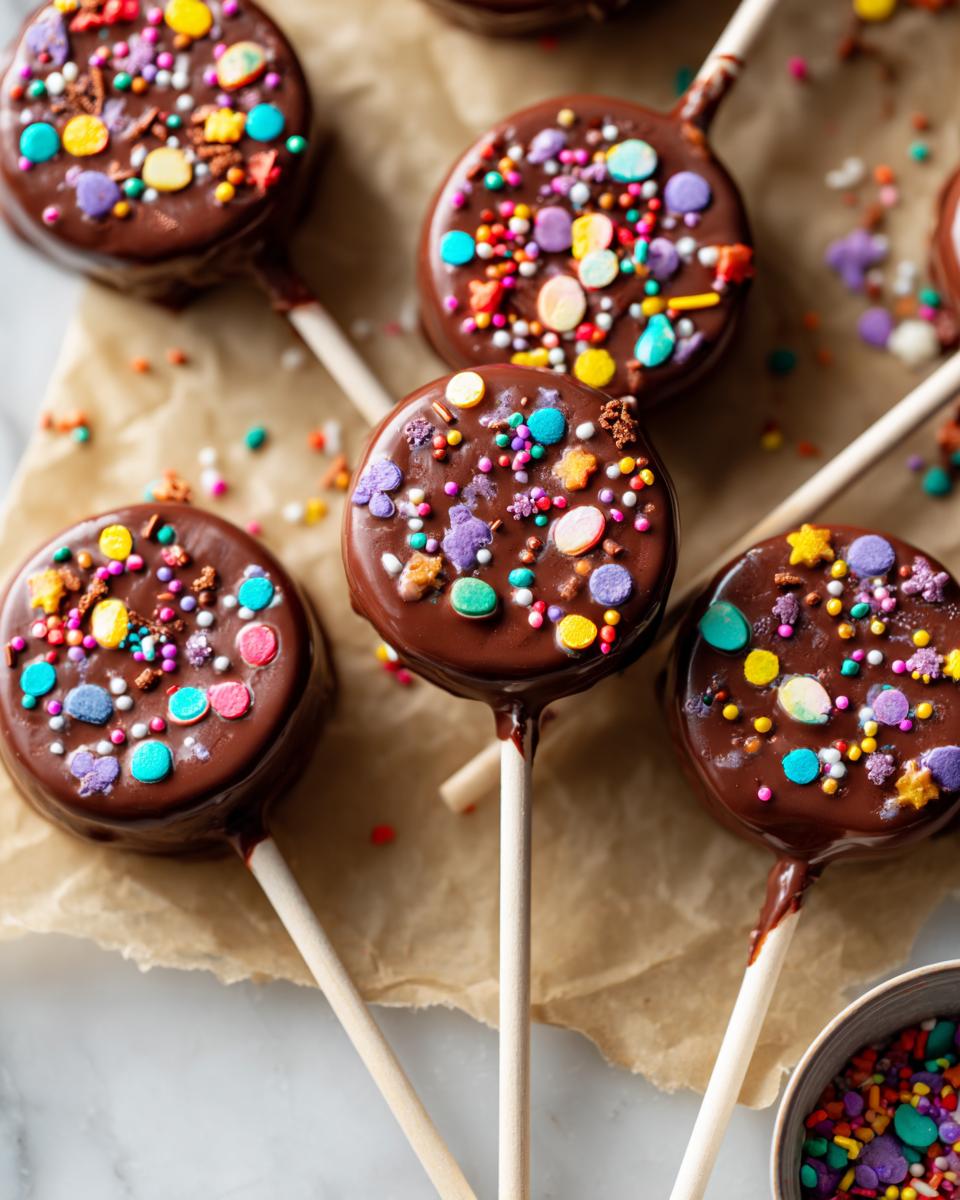
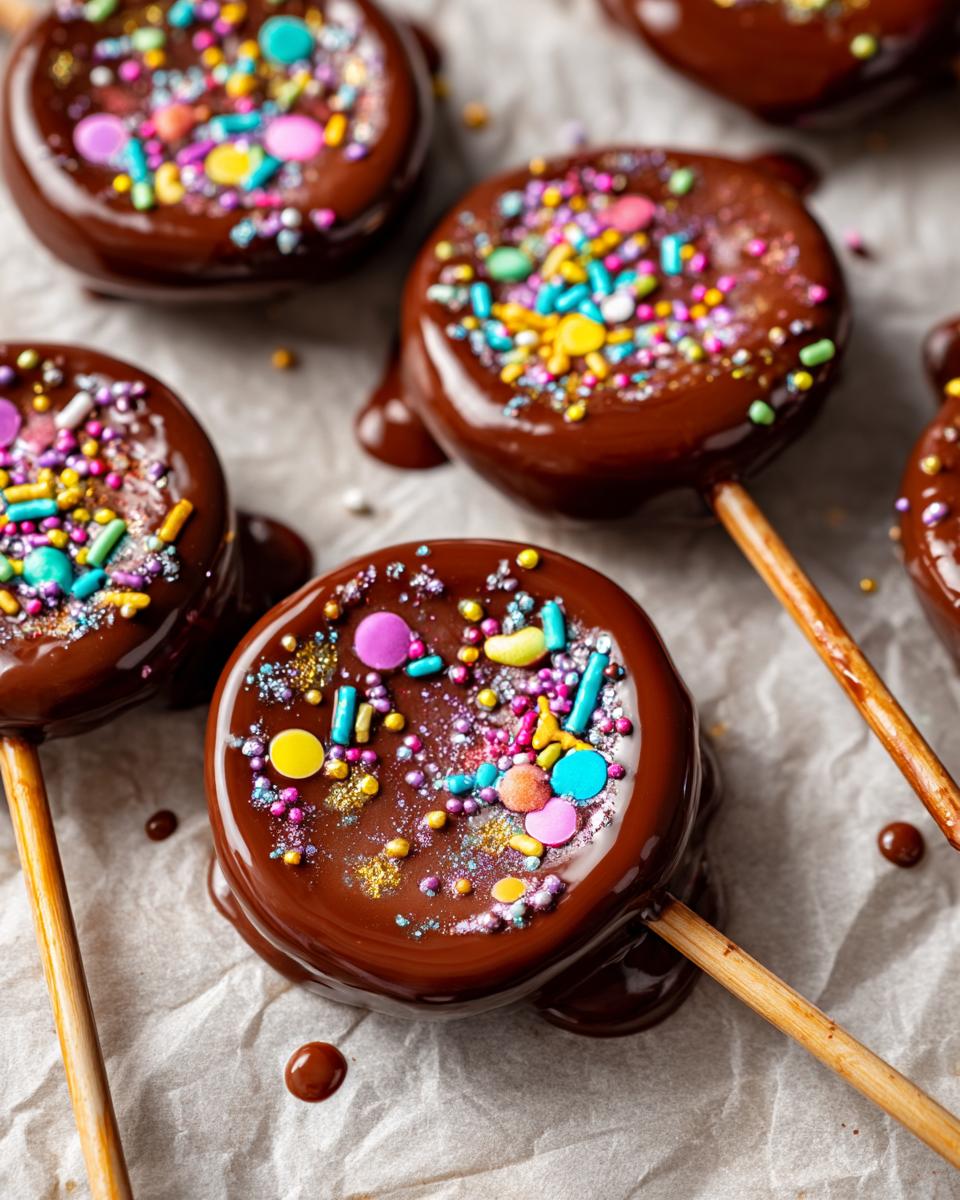
Now the fun begins! Spoon the chocolate onto your parchment in 3-inch circles – they’ll spread a bit, so leave room. Then gently press a lollipop stick about halfway into each circle, giving it a little twist to really anchor it. If it starts setting too fast (happens in warm kitchens), pop the tray in the fridge for 30 seconds. No stress if they’re not perfectly round – irregular shapes just mean more « artisanal » charm!
Step 4: Decorate Your Easter Chocolate Lollipops
This is where kids (and kids-at-heart) shine! While the chocolate’s still glossy and wet, shower on those sprinkles and glitter like you’re frosting the world’s tiniest cakes. Go wild – make some solid with sprinkles, others with just delicate sparkles, maybe a « Happy Easter » written in tiny candies. The wet chocolate acts like glue, so you’ve got about 2 minutes before decorations won’t stick anymore. Tip: Hold sprinkles high when sprinkling – it distributes them more evenly!
Step 5: Let Them Harden
The hardest part – waiting! Let them set at room temperature if you’ve got 15-20 minutes. In a rush? The fridge speeds it up to about 10 minutes (and feels like Christmas morning when you open the door to your creations). You’ll know they’re ready when they lift cleanly off the parchment – that satisfying little « pop » sound never gets old.
Tips for Perfect Easter Chocolate Lollipops
Over the years (and many, many lollipops later), I’ve picked up some foolproof tricks to make these treats shine every time. First – quality chocolate matters! Cheap chips can get grainy when melted. I splurge on the good stuff – it melts smoother and tastes richer. Work quick but calm once the chocolate’s melted – it starts setting fast, especially if your kitchen’s warm. Got kids helping? Prep decorations in small bowls beforehand – little hands get excited and tend to dump entire shakers! My secret? Hold the lollipop stick and gently twirl it while sprinkling for even coverage. Oh, and lick the bowl – that’s half the fun!
Variations for Easter Chocolate Lollipops
Oh, the places you can go with these lollipops! I’ve experimented with so many versions over the years – here are my favorite twists. Try white chocolate for that perfect pastel Easter look, or mix in some crushed pastel candy eggs for a fun crunch. My personal obsession? Drizzling melted chocolate in zig-zags over contrasting colors – it looks fancy but takes seconds! For extra magic, roll the edges in crushed freeze-dried strawberries or toasted coconut. Your imagination’s the limit!
Storage and Serving Suggestions
Pop these Easter chocolate lollipops in an airtight container with parchment between layers – they’ll keep their sparkle for up to a week (though let’s be honest, they’ll disappear long before then). I always serve them at room temperature for that perfect chocolatey snap when you bite in. Pro tip: Hide a few extra in the back of the cupboard – you’ll thank me later when the kids find the first batch!
Nutritional Information for Easter Chocolate Lollipops
Now, I’m not pretending these are health food – but who cares when they’re this fun? Each Easter chocolate lollipop clocks in at about 120 calories, with 7g of fat (4g saturated) and 15g of carbs from all that sweet, sweet chocolate goodness. You’ll get small amounts of calcium and iron too – bonus! Just remember these numbers can change depending on your exact ingredients – like if you go wild with the sprinkles (always encouraged) or switch to dark chocolate (extra antioxidants!). But hey, it’s Easter – let’s focus on the joy, not the math!
Frequently Asked Questions
After making these Easter chocolate lollipops countless times (and fielding all my nieces’ and nephews’ questions), I’ve heard just about every query imaginable! Here are the most common ones – with all the answers I’ve picked up through trial and, yes, occasional chocolatey errors.
Can I use white chocolate instead of regular chocolate?
Absolutely! White chocolate makes gorgeous pastel-colored lollipops that look especially Easter-y. Just keep in mind it melts a bit faster, so watch it like a hawk in the microwave. I like adding a drop of food coloring to white chocolate for extra festive fun – pink, mint green, you name it!
How long do Easter chocolate lollipops last?
Stored properly in an airtight container, they’ll stay perfect for about a week (if they last that long!). I like keeping mine in a cool pantry – the fridge can sometimes cause condensation that makes the sprinkles bleed. Pro tip: Layer them with parchment paper to prevent sticking!
Why add vegetable oil to the chocolate?
That little tablespoon makes all the difference! It gives the melted chocolate that perfect smooth, glossy finish and helps it set with just the right snap. Without it, your lollipops might turn out too thick or brittle. Think of it as chocolate’s best friend!
Can kids help decorate these?
Oh goodness yes – that’s half the magic! Little hands love sprinkling decorations. I set up « decorating stations » with small bowls of toppings so kids can customize their own lollipops. Just be ready for some creative (and very colorful) results! Messy hands mean happy memories.
What if my chocolate gets too thick while melting?
No panic needed! Just microwave for another 5-10 seconds and stir vigorously. If it’s still stubborn, add a tiny bit more oil (1/2 teaspoon at a time). Chocolate can be moody sometimes, but it always comes around with a little patience and elbow grease!
Easter Chocolate Lollipops
Ingrédients
Equipment
Method
- Line a baking sheet with parchment paper.
- Melt the chocolate chips and vegetable oil in a microwave-safe bowl in 30-second intervals, stirring between each, until smooth.
- Spoon the melted chocolate onto the parchment paper in small circles. Insert a lollipop stick into each circle.
- Decorate with sprinkles and edible glitter while the chocolate is still wet.
- Let the lollipops harden at room temperature or in the refrigerator for 15 minutes.