Is there anything more joyful than Easter treats? These adorable Easter egg cake pops have become my family’s favorite holiday tradition – and trust me, once you try them, they’ll be yours too! I remember the first time my niece and I made them together, giggling as we shaped the cake mixture into little eggs and covered them in pastel colors. They’re the perfect festive dessert for Easter brunches, egg hunts, or just because. The best part? Even beginner bakers can whip these up in no time. Let me show you how to make these irresistible cake pops that’ll have everyone asking for seconds!

Why You’ll Love These Easter Egg Cake Pops
Oh my goodness, where do I even start? These little treats are absolute showstoppers every Easter! Here’s why they’ve become my go-to dessert:
- So easy even kids can help – My niece calls them « cake lollipops » and loves rolling the mixture into egg shapes
- Endless decorating possibilities – Go pastel for Easter or use any colors you like (I’m partial to mint green with gold sprinkles)
- Perfect party food – They look fancy but take way less effort than decorating a whole cake
- Great for gifting – Wrap them in cellophane with ribbon for adorable Easter favors
- Use up leftover cake – Got extra cake from another recipe? This is the perfect way to repurpose it!
Honestly, the hardest part is not eating them all yourself while you’re decorating – not that I’d know anything about that…
Ingredients for Easter Egg Cake Pops
Okay, let’s gather our supplies! The beauty of these cake pops is how simple the ingredients are – you probably have most of them already. I’ll walk you through everything you need, divided into three easy categories. Pro tip: measure everything out before you start – it makes the process so much smoother when you’re not digging through cabinets mid-recipe!
For the Cake Pops
Here’s what forms the base of our adorable Easter treats:
- 1 box cake mix – Plus whatever ingredients it calls for (usually eggs, oil, water). I love using vanilla or lemon for spring flavors!
- 1 cup frosting – Any flavor works, but cream cheese frosting is my secret weapon for extra richness
- 24 lollipop sticks – You can find these at any craft store or baking aisle
Don’t have box mix? No worries! About 3 cups of any crumbled homemade cake works perfectly too.
For the Coating
This is what gives our cake pops that gorgeous glossy finish:
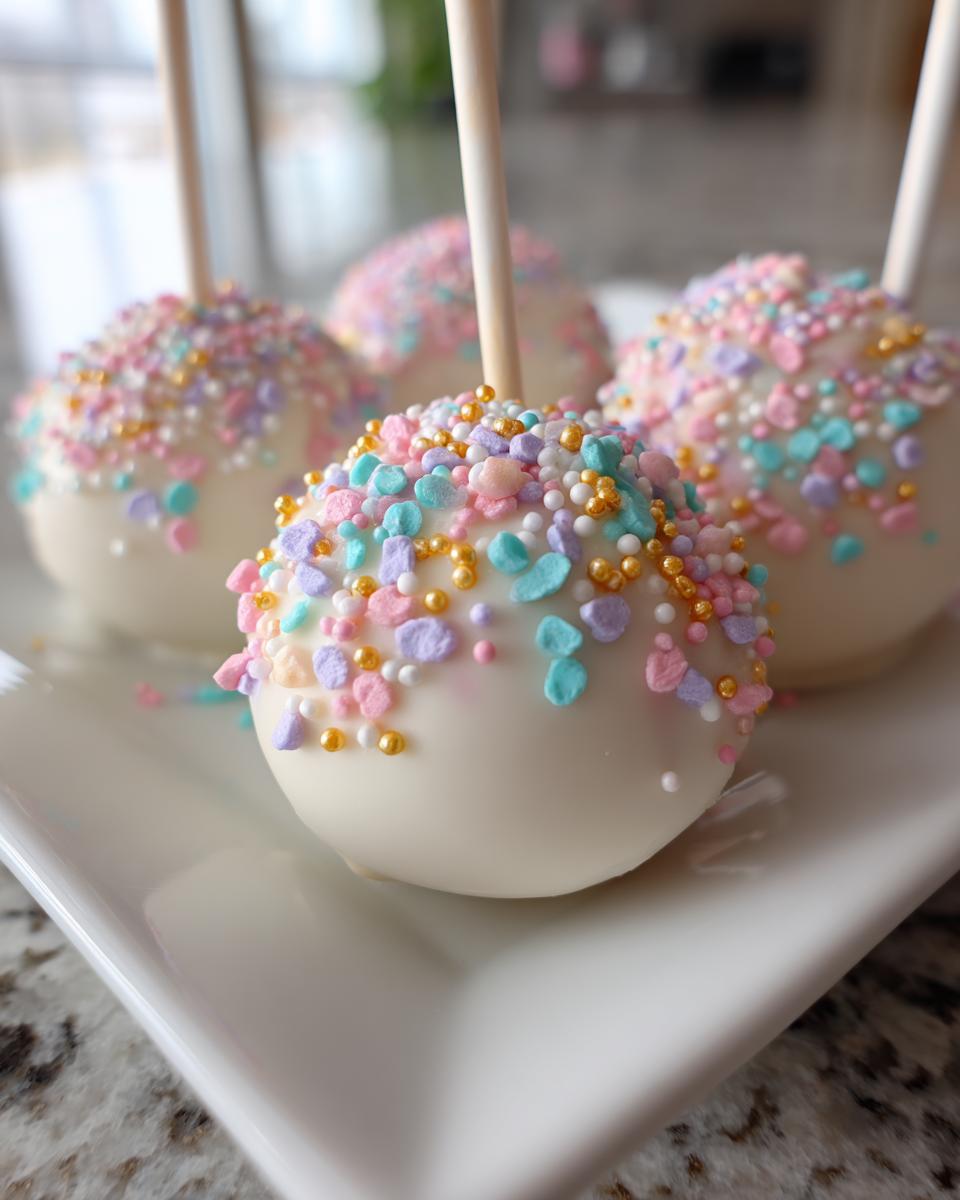
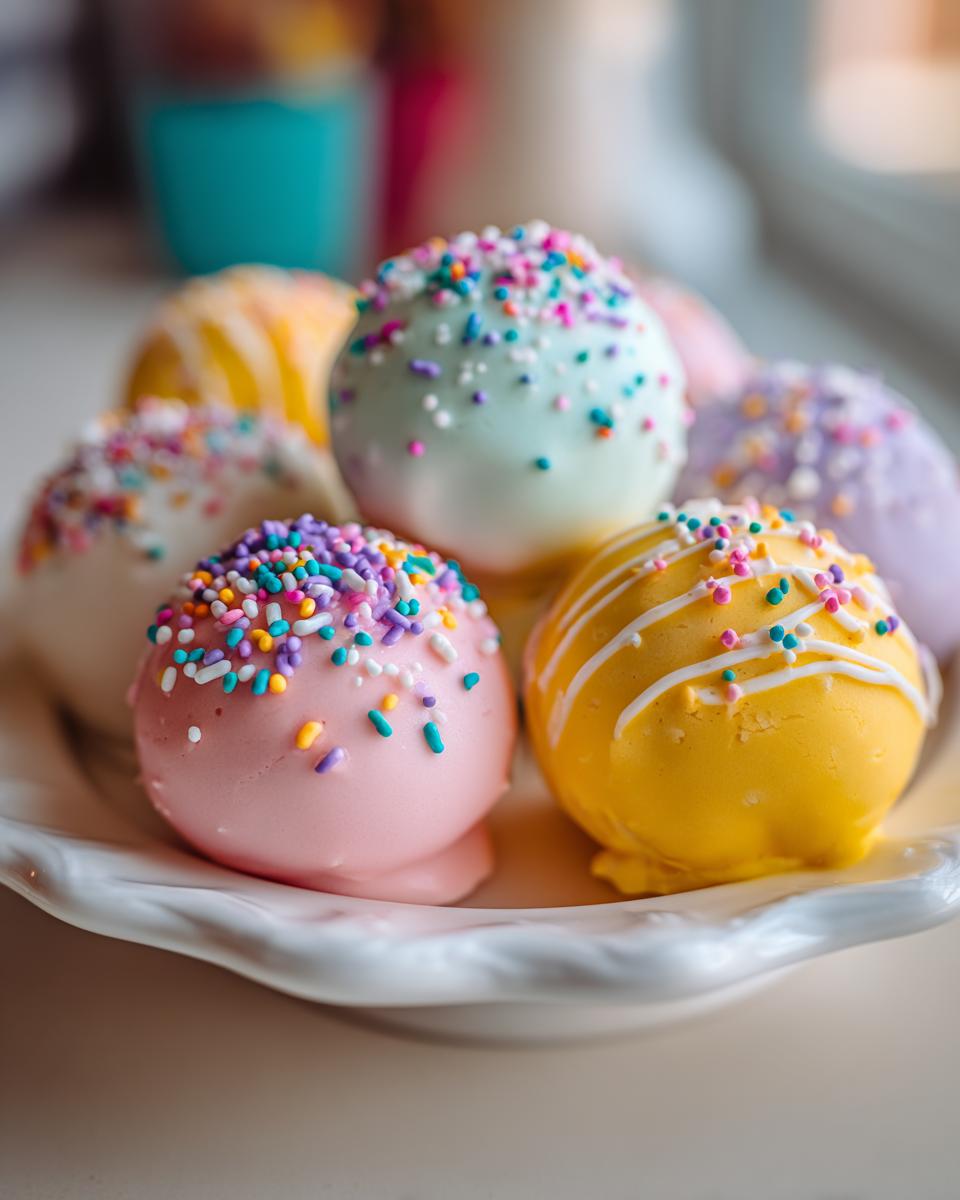
- 2 cups candy melts – Pastel colors scream Easter! I stock up on pink, yellow, blue and lavender
- 1 tbsp vegetable oil – This little trick makes the coating perfectly smooth and dippable
The oil is key – it prevents the candy coating from getting too thick and clumpy when melted. Trust me, I learned this the hard way!
For Decoration
Now for the fun part – making them pretty!
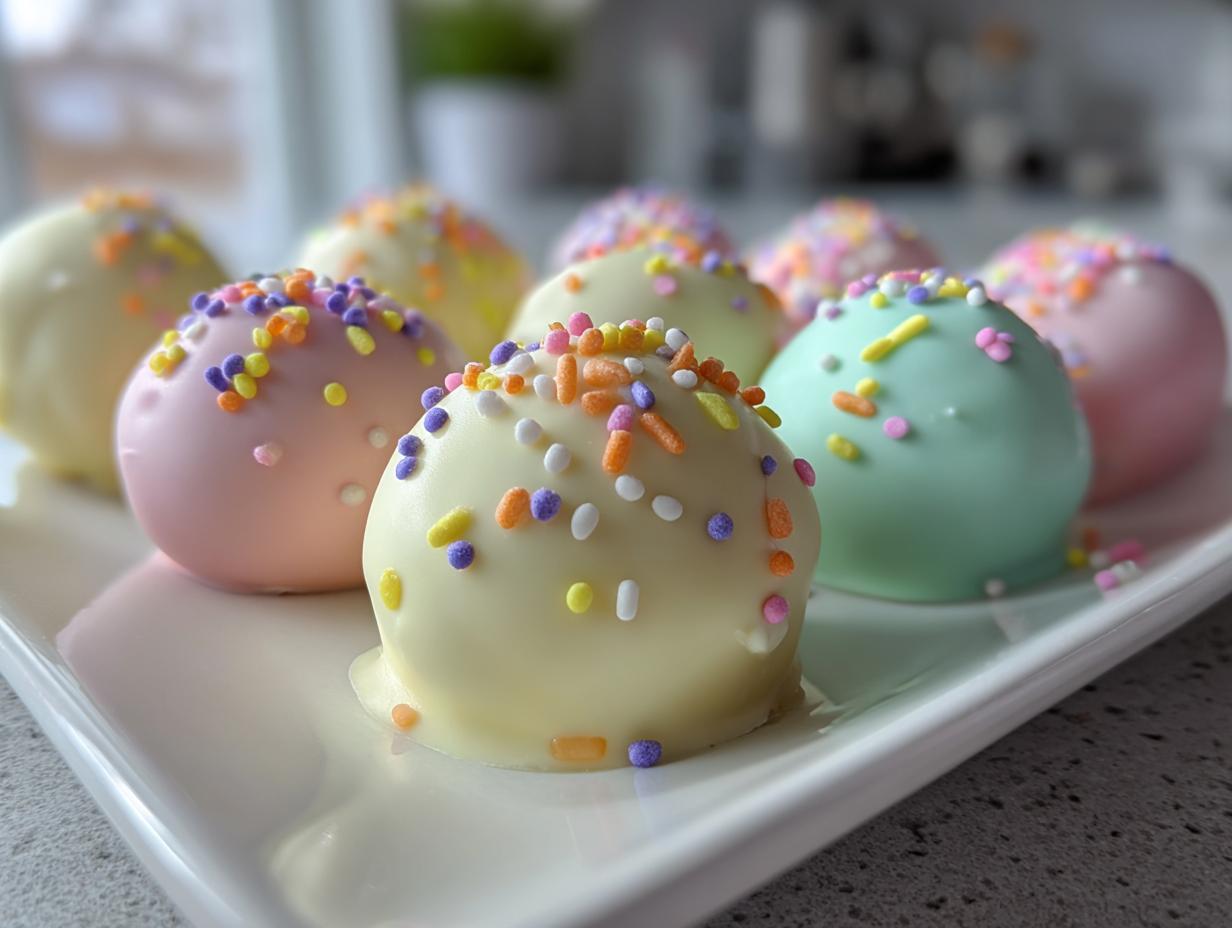
- Easter-themed sprinkles – Think pastel jimmies, tiny flowers, or even mini chocolate eggs
- Edible glitter or luster dust – For extra sparkle (optional but so festive!)
This is where you can really get creative – last year I did some with little edible pearl « dots » that looked just like decorated Easter eggs!
Equipment Needed for Easter Egg Cake Pops
You won’t need any fancy gadgets for these adorable treats – just a few basic kitchen tools! Here’s what I always have ready when making my Easter egg cake pops:
- Large mixing bowl – For crumbling that cake and mixing in the frosting (my favorite part – so satisfying!)
- Baking sheet – Any standard sheet pan works perfectly
- Parchment paper – Lifesaver for preventing sticking during chilling
- Lollipop sticks – The 4-inch ones work best in my experience
- Styrofoam block – For drying the pops upright (a tall glass with rice works in a pinch!)
That’s it! See? I told you this was easy. The most specialized thing you’ll need are those lollipop sticks, and even those are super affordable at craft stores.
How to Make Easter Egg Cake Pops
Alright, let’s get to the fun part – making these adorable Easter treats! I promise it’s easier than it looks. Just follow these simple steps, and you’ll have picture-perfect cake pops in no time. The key is taking it slow and enjoying the process – I always put on some cheerful music while I work!
Step 1: Bake and Prepare the Cake
First things first – bake your cake according to the package directions. I know it’s tempting to rush this part, but trust me, letting it cool completely makes all the difference! A warm cake will turn into mush when you mix in the frosting. I usually bake mine the night before and let it sit overnight – perfect for morning cake pop making!
Step 2: Mix Cake and Frosting
Now for the messy fun! Crumble your cooled cake into fine crumbs in a large bowl. Add the frosting gradually – you want just enough so the mixture holds together when you squeeze it, but not so much it becomes sticky. I test mine by rolling a small ball – if it holds its shape without crumbling, you’re golden!
Step 3: Shape and Chill the Cake Pops
Time to get creative! Roll tablespoon-sized portions between your palms to form egg shapes. Line them up on a parchment-lined baking sheet – this prevents sticking later. Pop them in the fridge for at least 30 minutes. This chilling step is crucial – it firms them up so they won’t fall apart when we dip them!
Step 4: Melt Candy Coating
While your cake pops chill, melt the candy melts with vegetable oil in 30-second bursts in the microwave, stirring between each. Be patient – overheating makes the coating seize up (learned that the hard way!). You want it smooth like pancake batter – if it’s too thick, add a tiny bit more oil.
Step 5: Assemble and Decorate Easter Egg Cake Pops
Here comes the magic! Dip each lollipop stick about 1/2 inch into the melted candy, then gently push it into a cake pop – this « glues » it in place. Now dip each pop fully, letting excess coating drip off. Quickly add sprinkles before the coating sets – I keep mine in small bowls for easy access. Stand them upright in a styrofoam block to dry. Voila! You’ve just made Easter magic!

Tips for Perfect Easter Egg Cake Pops
After making hundreds (okay, maybe thousands) of these adorable Easter treats, I’ve learned all the tricks for cake pop success! Here are my absolute must-know tips:
- Chill, chill, chill! – I can’t stress this enough. Those cake balls need to be fridge-cold before dipping, or they’ll fall right off the sticks. Ask me how I know…
- Tap gently – After dipping, give your wrist a little flick to remove excess coating. This prevents those dreaded candy drips at the bottom.
- Work quickly with sprinkles – The coating sets FAST, so have all your decorations ready to go before you start dipping.
- Styrofoam is your best friend – Poke holes in a block to hold pops upright while drying. No styrofoam? A colander works in a pinch!
- Keep candy melts warm – I keep mine over a bowl of warm water between dips to maintain that perfect smooth consistency.
The biggest secret? Don’t stress! Even « imperfect » cake pops taste amazing – and kids will love them no matter what!
Storage and Serving Suggestions
Now that you’ve made these adorable Easter egg cake pops, let’s talk about keeping them fresh and serving them up in style! I always store mine in an airtight container in the fridge – they’ll stay delicious for up to 3 days this way. Just be sure to let them come to room temperature for about 15 minutes before serving so the coating isn’t too hard.
These pops are perfect for Easter brunches – stick them in a pretty vase filled with Easter grass for a stunning centerpiece. They also make fantastic party favors – wrap each one in cellophane with a cute ribbon. My personal favorite? Arranging them in an egg carton for a fun, thematic presentation that always gets compliments!
Easter Egg Cake Pops Variations
Oh, the possibilities are endless with these little cuties! Once you’ve mastered the basic version, try these fun twists – I’ve tested them all!
- Chocolate lovers: Use dark chocolate cake with cream cheese frosting and white candy coating for a decadent twist
- Sprinkle overload: Mix sprinkles right into the cake mixture before shaping for surprise bursts of color inside
- Lemon zest: Add a teaspoon of lemon zest to vanilla cake mix for a fresh spring flavor
- Coconut dream: Roll finished pops in toasted coconut flakes for tropical Easter vibes
- Ombre effect: Dip pops halfway in one color, then drizzle with a second shade while wet
Easter Egg Cake Pops FAQs
I get so many questions about these adorable cake pops every Easter season! Here are the answers to the ones I hear most often – hopefully they’ll help you avoid the little mishaps I’ve had over the years (we don’t need to talk about The Great Sprinkles Incident of 2018…).
Can I use homemade cake instead of box mix?
Absolutely! About 3 cups of any crumbled homemade cake works beautifully. My grandma’s vanilla pound cake makes the richest, most decadent cake pops you’ve ever tasted. Just be sure it’s completely cooled before crumbling – warm cake turns into cement when mixed with frosting!
Help! My cake pop mixture is too crumbly – how do I fix it?
Been there! Just add a tiny bit more frosting, one teaspoon at a time, until the mixture holds together when squeezed. If it gets too sticky (hello, frosting fingers!), add some crushed graham crackers or extra cake crumbs to balance it out.
Can I freeze Easter egg cake pops?
Yes! They freeze beautifully for up to a month. Just store them in a single layer in an airtight container with parchment between layers. Thaw overnight in the fridge – never at room temperature or the coating will « sweat. »
Why do my cake pops keep falling off the sticks?
The two most common culprits: not chilling them long enough before dipping (at least 30 minutes!), or forgetting to « glue » the stick in with melted candy first. Also, don’t dip them while the coating is too hot – let it cool slightly so it’s not scalding the cake.
What if I don’t have candy melts?
No worries! Melted chocolate chips mixed with a teaspoon of coconut oil works almost as well. The coating will set a bit softer though, so handle them gently when serving.
Nutritional Information
Just a quick note – all nutritional info is estimated and can vary based on your specific ingredients and brands. These little treats are meant for celebrating, not counting calories! But if you’re curious, one pop typically has about 150 calories. Now go enjoy your festive creation without worry!

Easter Egg Cake Pops
Ingrédients
Equipment
Method
- Bake the cake according to the package instructions. Let it cool completely.
- Crumble the cake into fine crumbs in a large bowl. Mix in the frosting until the mixture holds together.
- Shape the mixture into small egg shapes. Place them on a parchment-lined baking sheet and chill for 30 minutes.
- Melt the candy melts with vegetable oil in a microwave-safe bowl, stirring until smooth.
- Dip the tip of a lollipop stick into the melted candy, then insert it into a cake pop. Repeat for all pops.
- Dip each cake pop into the melted candy, tapping off excess. Decorate with sprinkles while wet.
- Let the cake pops set upright in a styrofoam block or cake pop stand. Chill for another 30 minutes before serving.