There’s something about lobster tails that instantly turns dinner into an occasion. I remember the first time I cooked them—I was so nervous I’d mess up this « fancy » ingredient, but guess what? It turned out to be one of the simplest, most impressive dishes I’d ever made. That moment changed everything for me. Now, whenever I want to celebrate—an anniversary, a promotion, or just making it through a tough week—these succulent lobster tails are my go-to. In just 20 minutes, with a few simple ingredients, you can create a restaurant-worthy meal that feels like pure luxury. Trust me, once you try this method, you’ll be making lobster tails way more often than just special occasions!
Why You’ll Love These Lobster Tails
Oh, where do I start with these beauties? First off, they’re embarrassingly easy to make—I’m talking 20 minutes from fridge to plate, no joke. The garlic butter alone is reason enough, but when it soaks into that sweet, tender meat? Wow. Plus, lobster tails just scream « special occasion » without all the fuss. My favorite part? Watching my guests’ faces light up when I bring these to the table. It’s like I spent hours cooking, when really, I barely broke a sweat.
Ingredients for Perfect Lobster Tails
Listen, I’ve learned the hard way—great lobster tails start with a few simple, quality ingredients. Don’t overcomplicate it! Here’s all you’ll need to make your taste buds dance:
- 2 lobster tails (6-8 oz each) – Big enough to feel fancy, small enough to cook evenly
- 2 tbsp butter, melted – Real butter only, my friends! Margarine just won’t cut it here
- 1 tsp lemon juice – A bright squeeze makes all the difference
- 1/4 tsp salt – Just a pinch to wake up the flavors
- 1/4 tsp black pepper – Freshly cracked if you’ve got it
- 1 tbsp fresh parsley, chopped – The green confetti that makes everything prettier
See? Nothing crazy or hard-to-find. I always double the butter mixture though—because who doesn’t want extra garlic butter for dipping? Just saying…
Equipment Needed for Lobster Tails
Okay, don’t panic—you won’t need fancy gadgets for this! Just grab these three trusty tools from your kitchen (honestly, you probably have them already):
- Kitchen shears – Those sturdy scissors that live in your drawer? Perfect for neatly snipping those lobster shells like a pro
- Baking sheet – Any old sheet pan will do, though I swear by my rimmed one to catch any buttery drips
- Basting brush – The tiny paintbrush of the culinary world, ideal for slathering on that golden butter goodness
That’s it! No special equipment required—just like grandma didn’t need anything fancy to make magic happen in the kitchen.
How to Cook Lobster Tails
Alright, let’s get cooking! I promise this isn’t as intimidating as it looks. The first time I made lobster tails, I was convinced I’d ruin them—but turns out, it’s one of those « looks fancy but secretly easy » dishes. Here’s exactly how I do it, step by step, with all the little tricks I’ve picked up along the way.
Preparing the Lobster Tails
First things first—don’t be scared of those shells! Grab your kitchen shears (clean ones, please) and flip the lobster tails upside down. You’ll see that softer underside—that’s where we’re cutting. Start at the top where the meat begins and snip straight down to the tail fin, but stop right before you reach it. Here’s my pro tip: use one hand to gently pull the shell apart as you cut—it helps keep everything neat.
Now for the fun part—carefully lift that gorgeous meat up and out of the shell, like you’re giving it a little pillow to rest on. Keep it attached at the base—that’s crucial! Think of it like a meaty blanket folded over the shell. Pat it dry with a paper towel (this helps the butter stick better) and place them on your baking sheet. See? You’re basically a lobster surgeon now.
Baking the Lobster Tails
Preheat that oven to 425°F—no cheating here, the right temp makes all the difference. While it heats up, mix your melted butter, lemon juice, salt, and pepper. Oh, that smell already! Use your basting brush to paint that golden goodness all over the lobster meat—get it in every nook and cranny.
Into the oven they go for 10-12 minutes. Here’s how I check for doneness: the meat should be opaque (no translucent bits) and firm to the touch, but still juicy. If you’ve got a meat thermometer, aim for 140°F at the thickest part. Watch them closely after 8 minutes—overcooked lobster is a tragedy we want to avoid!
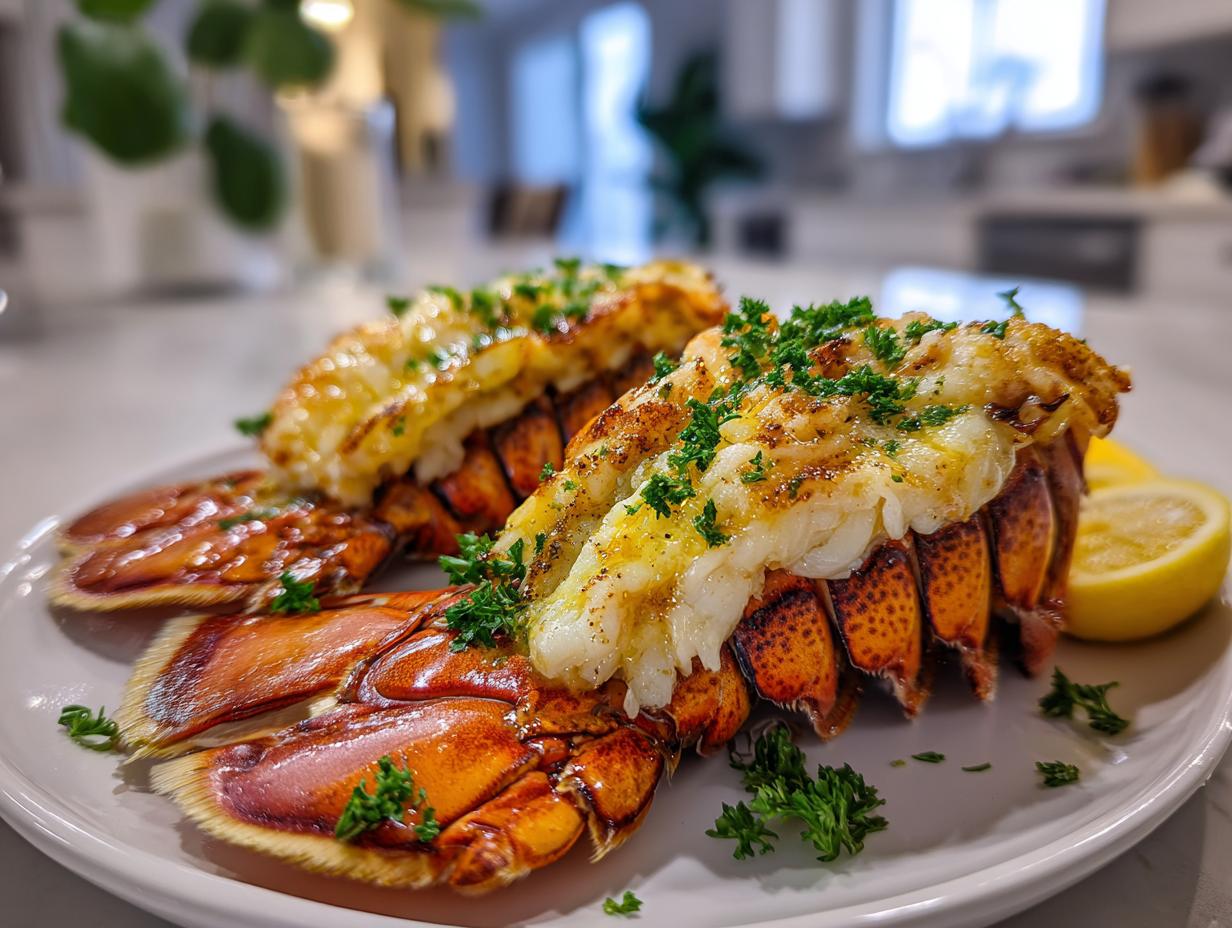
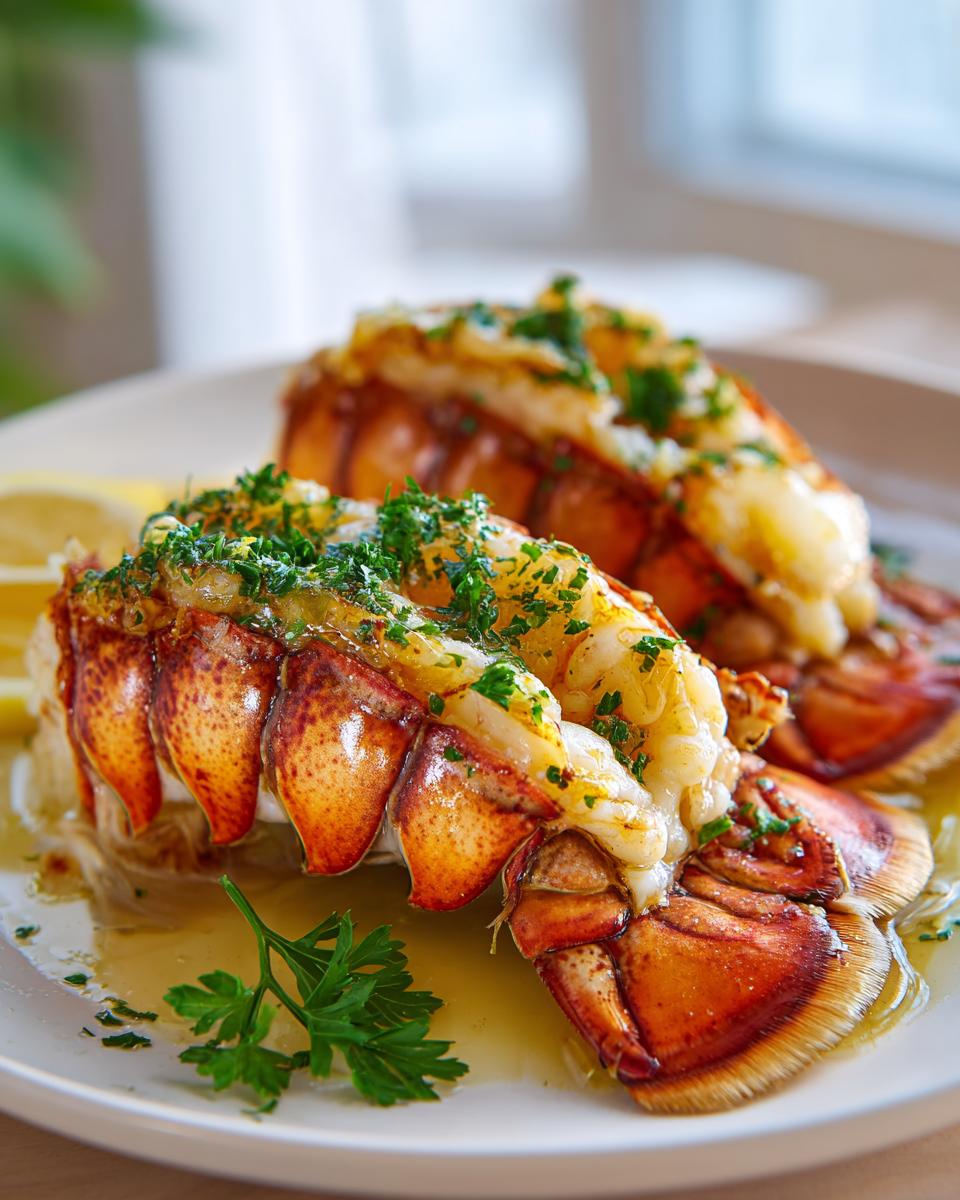
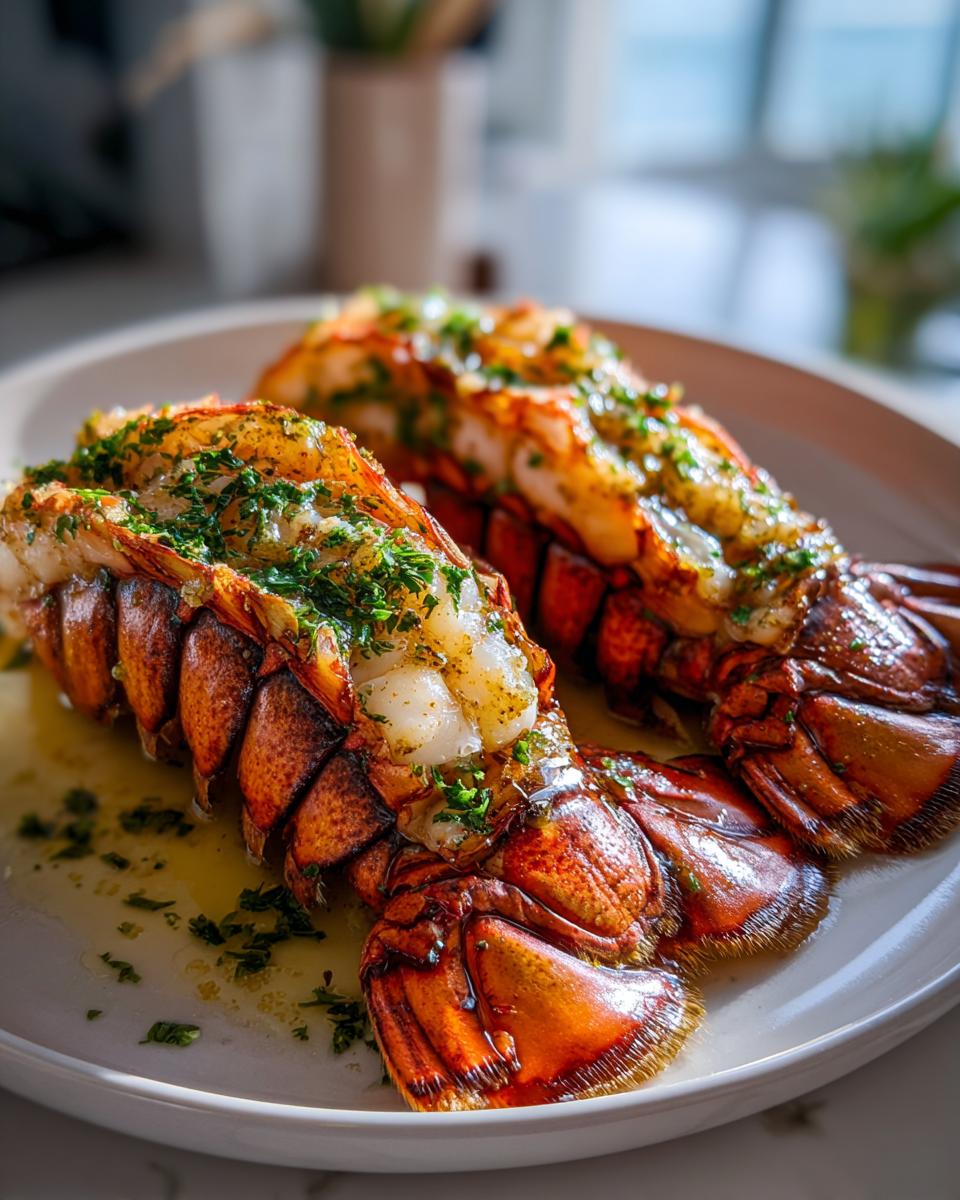
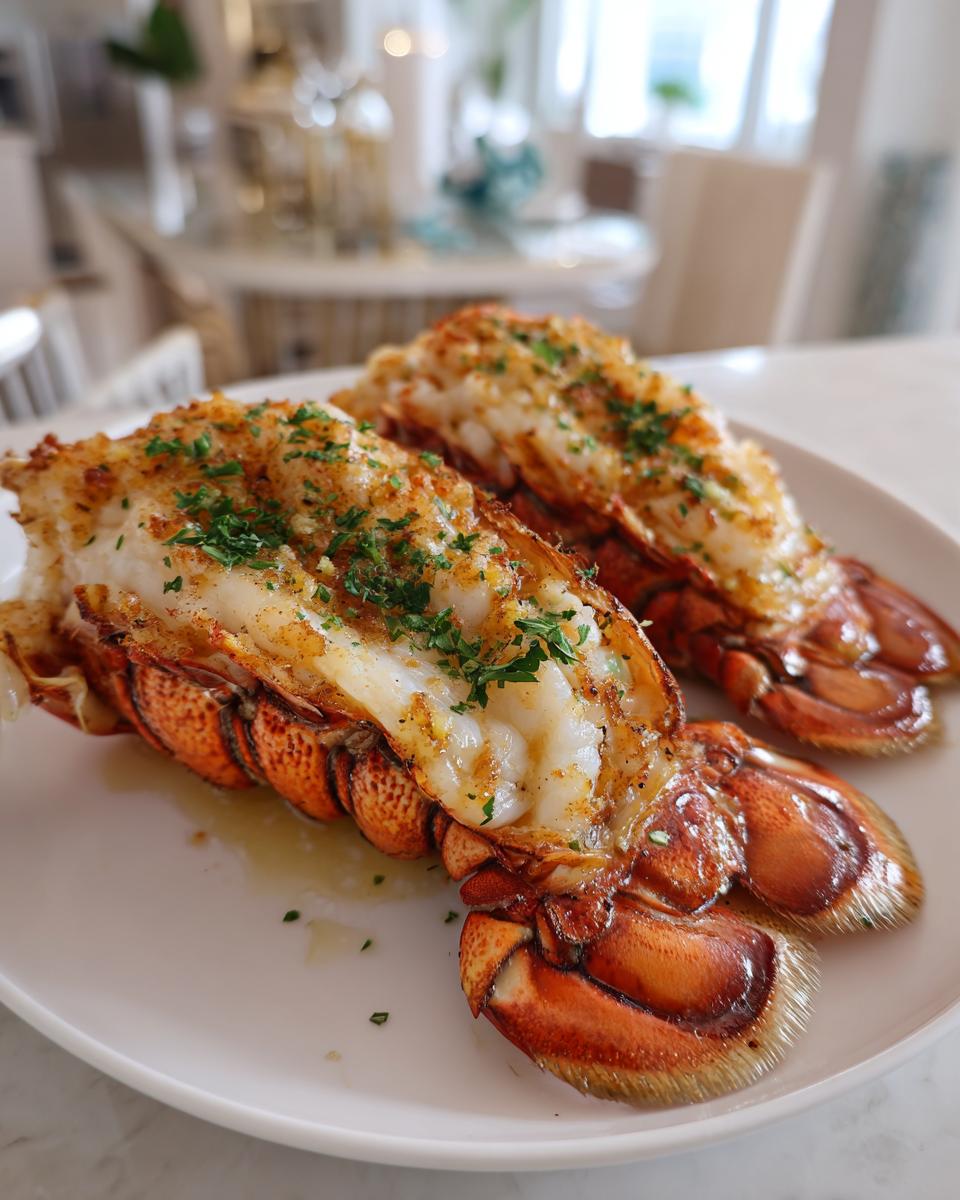
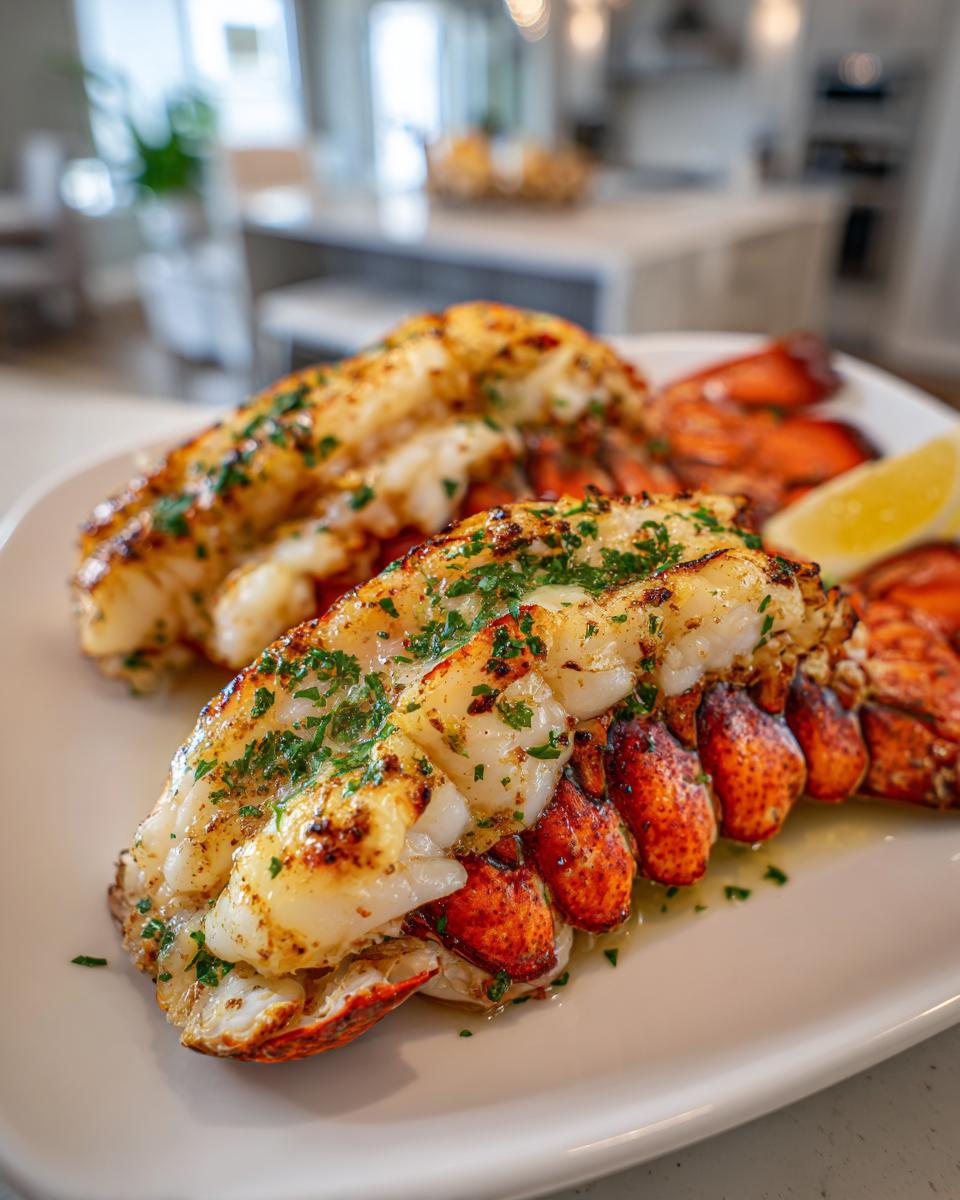
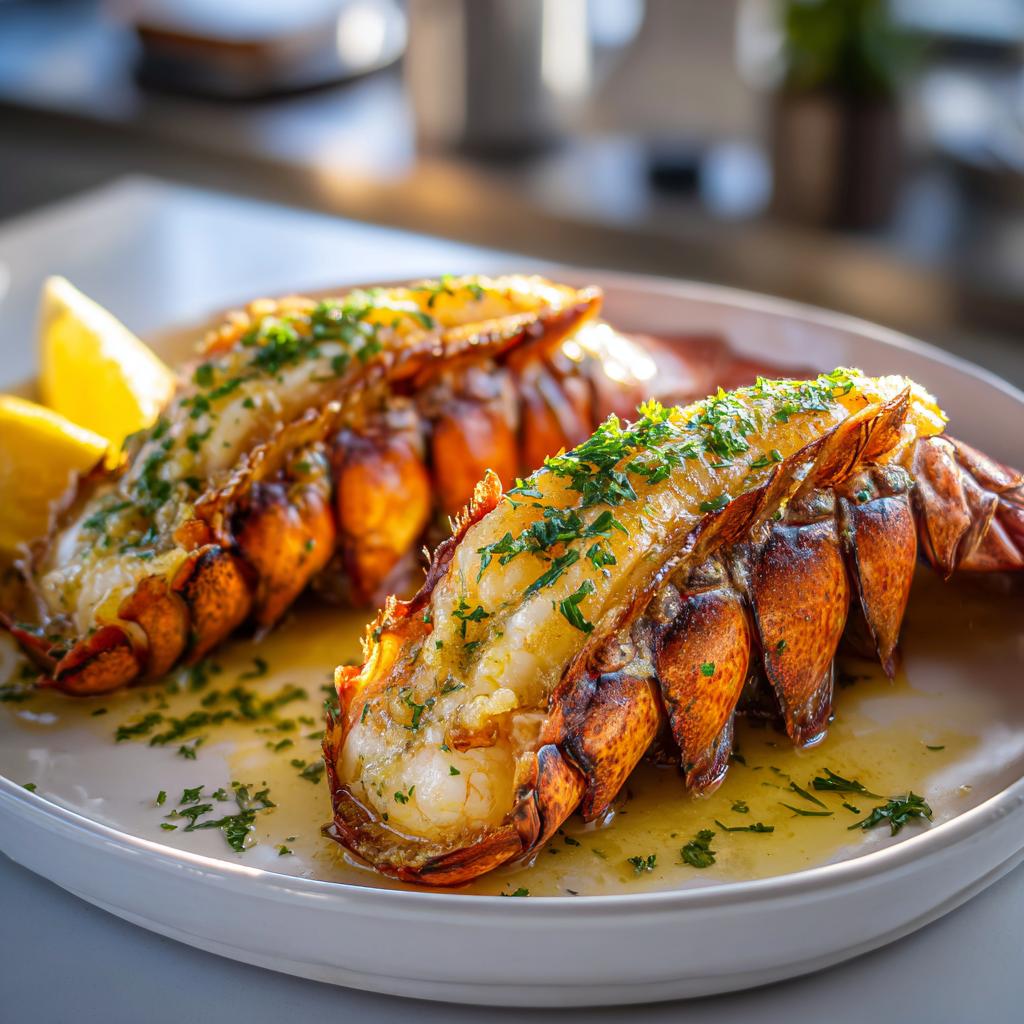
When they come out, sprinkle that fresh parsley on top for a pop of color. The shells will be bright red, the meat pearly white—just like a fancy seafood restaurant, but in your own kitchen. Now try not to eat them straight off the baking sheet (I’ve failed at this many times).
Tips for Perfect Lobster Tails
After making these lobster tails more times than I can count (okay fine, I keep count—it’s my favorite excuse to celebrate!), I’ve picked up some foolproof tricks. First, timing is everything—set a timer for 8 minutes and start checking. That butter mixture? Baste halfway through cooking for extra flavor. And here’s my secret: let them rest for 2 minutes after baking—the carryover cooking makes them just perfect. Oh, and always serve with extra lemon wedges and that glorious butter for dipping. Trust me, your guests will be licking their fingers!
Serving Suggestions for Lobster Tails
Oh honey, let’s talk about making these lobster tails the star of the show! I always serve them with extra melted butter (duh) and plenty of lemon wedges for that bright zing. My go-to sides? Garlic butter roasted asparagus or some creamy mashed potatoes to soak up all that delicious butter. For special occasions, I’ll throw in some crusty bread—because someone’s gotta mop up that golden goodness left on the plate, right?
Nutritional Information for Lobster Tails
Now, I’m no nutritionist, but here’s the scoop on these lobster tails—they’re packed with protein and surprisingly light! Keep in mind these numbers can vary based on your exact ingredients (especially if you go wild with the butter like I sometimes do). This is just a general guide to help you enjoy your indulgence guilt-free!
FAQ About Lobster Tails
I get so many questions about lobster tails—and trust me, I asked all these myself when I first started cooking them! Here are the answers I wish I’d known sooner:
Can I grill lobster tails instead of baking them?
Absolutely! Grilling gives lobster tails this amazing smoky flavor. Just prepare them the same way (butterfly the shells and lift the meat), then place them meat-side down on a medium-high grill for about 5 minutes. Flip them, brush with more butter, and grill another 3-4 minutes. Watch them closely—they cook faster on the grill!
How do I store leftover lobster tails?
If you somehow have leftovers (rare in my house!), let them cool completely, then store in an airtight container in the fridge for up to 2 days. Reheat gently—I like to wrap them in foil with a splash of water and warm at 300°F for about 10 minutes. But honestly? They’re best fresh, so I usually just make what we’ll eat that night.
What size lobster tails are best?
For this recipe, I recommend 6-8 ounce tails—big enough to feel special, but small enough to cook evenly. The giant ones look impressive, but they’re trickier to cook without drying out. Pro tip: If you’re serving multiple courses, 4-5 ounce tails work great too. Just reduce the cooking time by a minute or two.
How do I know when the lobster tails are done?
The meat should be opaque white (no translucent bits) and firm to the touch, but still juicy. If you’ve got a thermometer, aim for 140°F at the thickest part. Watch for the shells turning bright red too—that’s your visual cue they’re getting close. Remember, they’ll keep cooking a bit after you take them out, so err on the side of underdone!
Can I prepare lobster tails ahead of time?
You can butterfly them and keep them covered in the fridge for a few hours before cooking—just don’t add the butter until right before they go in the oven. The shells help protect the meat from drying out. I’ve even frozen prepared tails (before cooking) for up to a month when I find a good sale—thaw overnight in the fridge before using.
Lobster Tails
Ingrédients
Equipment
Method
- Preheat the oven to 425°F (220°C).
- Use kitchen shears to cut the top shell of each lobster tail lengthwise, stopping at the tail fin.
- Gently pull the meat upward, keeping it attached at the base, and rest it on top of the shell.
- Place the lobster tails on a baking sheet.
- Mix melted butter, lemon juice, salt, and pepper in a small bowl.
- Brush the mixture over the lobster meat.
- Bake for 10-12 minutes, or until the meat is opaque and firm.
- Sprinkle with chopped parsley before serving.