You know that moment on Thanksgiving morning when you realize you’ve got 12 side dishes to make, the turkey needs basting, and oh yeah – you completely forgot about dessert? Yeah, me too. That’s why I swear by make-ahead Thanksgiving desserts now. Last year, I nearly had a meltdown trying to bake pies while simultaneously mashing potatoes and entertaining relatives. Then I discovered the magic of preparing desserts days in advance. Game changer! Now I can actually enjoy Thanksgiving instead of spending it glued to the oven. These make-ahead recipes have saved my sanity more times than I can count.
Why You’ll Love These Make-Ahead Thanksgiving Desserts
Let me tell you why this recipe is my Thanksgiving lifesaver every single year:
- Stress-free prep: No last-minute baking disasters when Aunt Sue arrives early. The dessert’s already done and chilling in the fridge!
- Time-saving magic: You’ll have a whole extra hour on Thanksgiving morning to sip coffee instead of cursing at pie crust.
- Delicious results: The flavors actually get better after a day or two – the cream cheese filling becomes impossibly creamy.
Trust me, once you try making desserts ahead, you’ll never go back to that chaotic Thanksgiving Day baking marathon again. It’s like giving your future self the best gift!
Ingredients for Make-Ahead Thanksgiving Desserts
Okay, let’s gather everything you’ll need for this lifesaver of a dessert! I’ve learned the hard way that having all ingredients ready makes the process so much smoother. Pro tip: pull your cream cheese out of the fridge at least an hour before you start – cold cream cheese just won’t whip up properly, and we want this filling silky smooth!
For the Crust
The crust couldn’t be simpler – just three ingredients that come together in minutes:
- 1.5 cups graham cracker crumbs (about 12 full crackers if you’re crushing them yourself)
- 1/4 cup granulated sugar
- 1/2 cup unsalted butter, melted (I always use salted butter for that extra flavor punch)
For the Filling
Here’s what makes this dessert irresistible:
- 16 oz cream cheese, softened (this is two standard packages – don’t try to skimp!)
- 3/4 cup granulated sugar
- 2 large eggs (room temperature blends better)
- 1 tsp vanilla extract (splurge on the good stuff – it makes a difference)
See? Nothing fancy, just quality ingredients that work together beautifully. Now let’s get mixing!
Equipment You’ll Need for Make-Ahead Thanksgiving Desserts
Don’t worry – you won’t need any fancy gadgets for this! Here’s what I pull out of my kitchen when making this lifesaver dessert:
- Mixing bowls (one medium for the crust, one large for the filling)
- 9-inch baking dish (I use my trusty Pyrex pie plate with the little scalloped edges)
- Electric mixer (hand mixer works great, but stand mixer is even better if you’ve got one)
That’s it! See? I told you this was simple. You probably have everything already in your kitchen – no last-minute store runs required!
How to Make Make-Ahead Thanksgiving Desserts
Alright, let’s dive into the good stuff – turning those simple ingredients into your new favorite Thanksgiving lifesaver! Follow these steps and you’ll have dessert done days before the big meal. I’ve made this so many times I could probably do it in my sleep (and honestly, some years I’ve come close!). Here’s how we’ll tackle it:
Step 1: Prepare the Crust
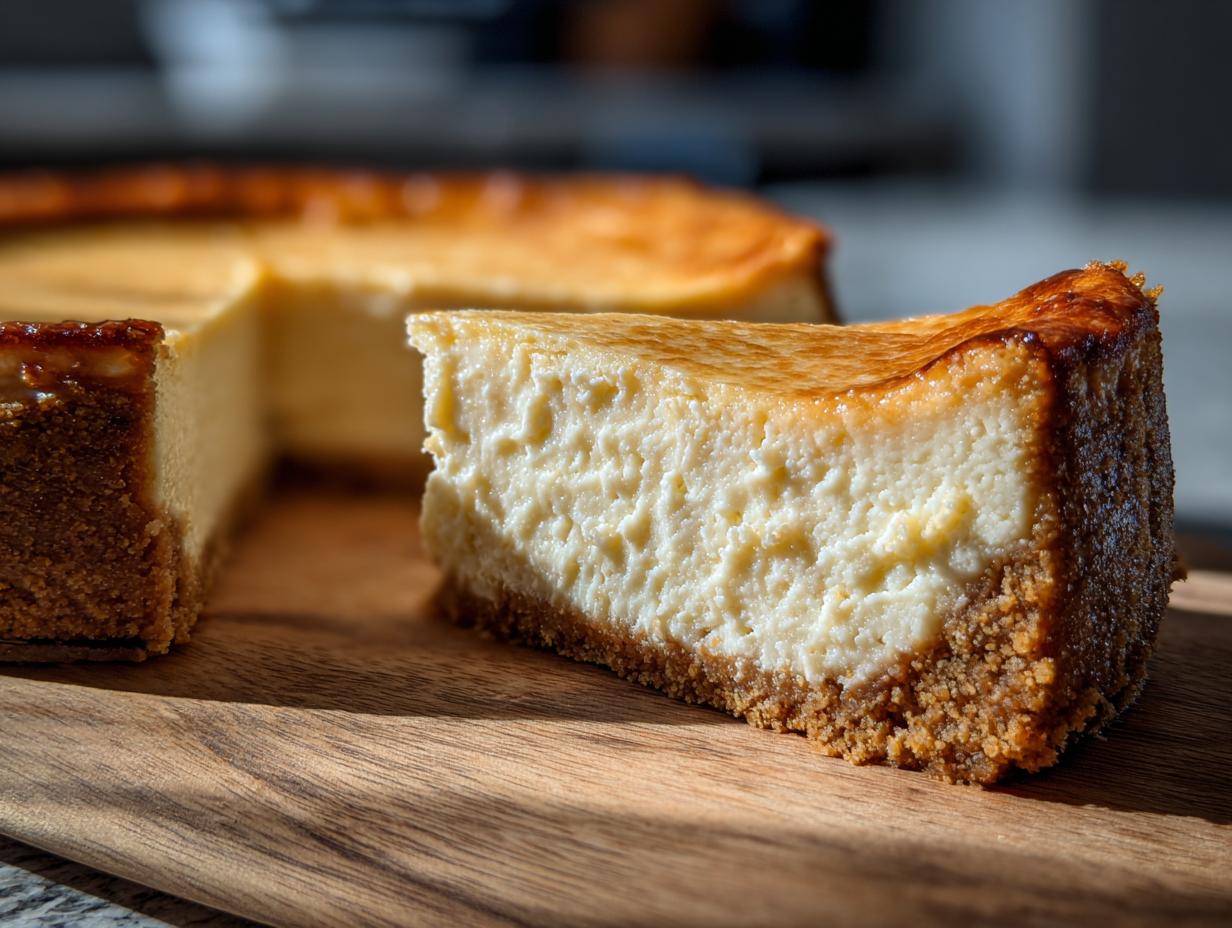
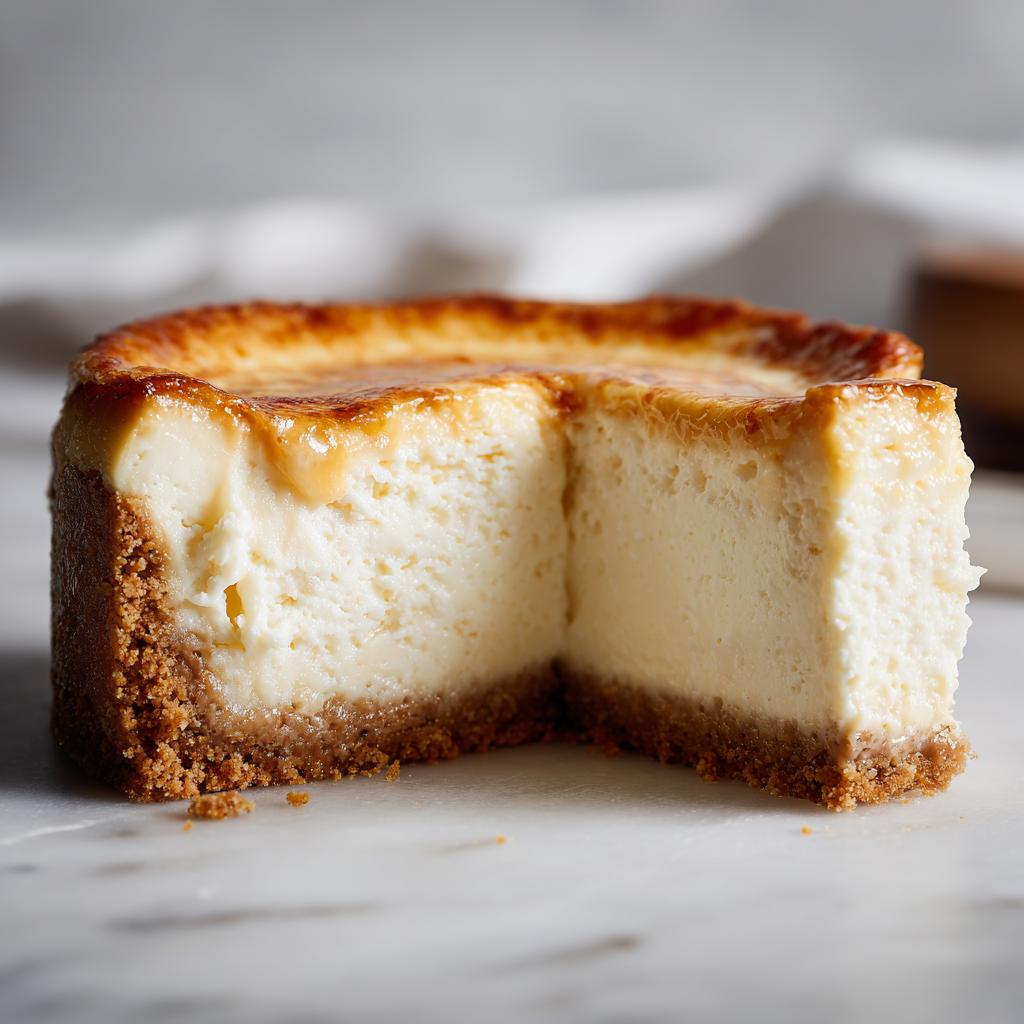
First things first – preheat your oven to 325°F. While it’s heating up, grab that medium bowl and toss in your graham cracker crumbs and sugar. Pour in the melted butter and mix until it looks like wet sand – you’ll know it’s perfect when you can squeeze a handful and it holds together. Pour this magical mixture into your baking dish and press it firmly across the bottom and slightly up the sides. I use the bottom of a measuring cup to get it nice and even. Pop it in the oven for 10 minutes just to set – no need to brown!

Step 2: Make the Filling
Now for the creamy dreamy part! In your large bowl, beat the softened cream cheese until it’s completely smooth – scrape down those sides a couple times because nobody likes lumpy filling. Gradually add the sugar and keep beating until fluffy. Crack in the eggs one at a time, letting each fully incorporate before adding the next. Finally, mix in that vanilla extract. Important: don’t whip too much air into it – just mix until combined. Air bubbles can cause cracks in your perfect dessert!
Step 3: Bake and Cool
Carefully pour the filling over your slightly cooled crust. Gently shake the dish to level it out – no bubbles allowed! Bake for about 45 minutes until the edges are set but the center still has a slight jiggle (like jello, not pudding). Turn off the oven and crack the door open, letting it cool slowly for an hour – this prevents cracks! Then move it to the counter to cool completely before refrigerating. This beauty needs at least 4 hours chill time (overnight is even better!), so plan accordingly!
Tips for Perfect Make-Ahead Thanksgiving Desserts
After making this dessert every Thanksgiving for the past decade (and occasionally having to troubleshoot mishaps), I’ve picked up some foolproof tricks that’ll guarantee dessert perfection:
First – and I can’t stress this enough – your cream cheese must be properly softened. Take it out at least an hour before baking, preferably longer if your kitchen is cool. I learned this the hard way when I tried to rush the process once – let’s just say my poor mixer nearly flew across the counter! Cold cream cheese leaves lumps that no amount of mixing can fix.
For doneness, watch for that perfect jiggle in the center (about the size of a quarter when you gently shake the pan). If you wait until it looks completely set, you’ll end up with an overly dense texture. Trust me on this – it keeps setting as it cools.
The slow cooling is absolutely crucial if you want that picture-perfect top. That one time I got impatient and didn’t do the oven-crack method? Yeah, we ended up with a dessert that looked like the Grand Canyon with all its cracks. Still tasted amazing though!
One last pro tip: always make this the night before Thanksgiving at the latest. The flavors need time to marry, and that 4-hour minimum chill time isn’t just a suggestion. Your future Thanksgiving self will thank you when dessert is perfect and ready to go while everyone else is scrambling!
Storage and Serving Suggestions for Make-Ahead Thanksgiving Desserts
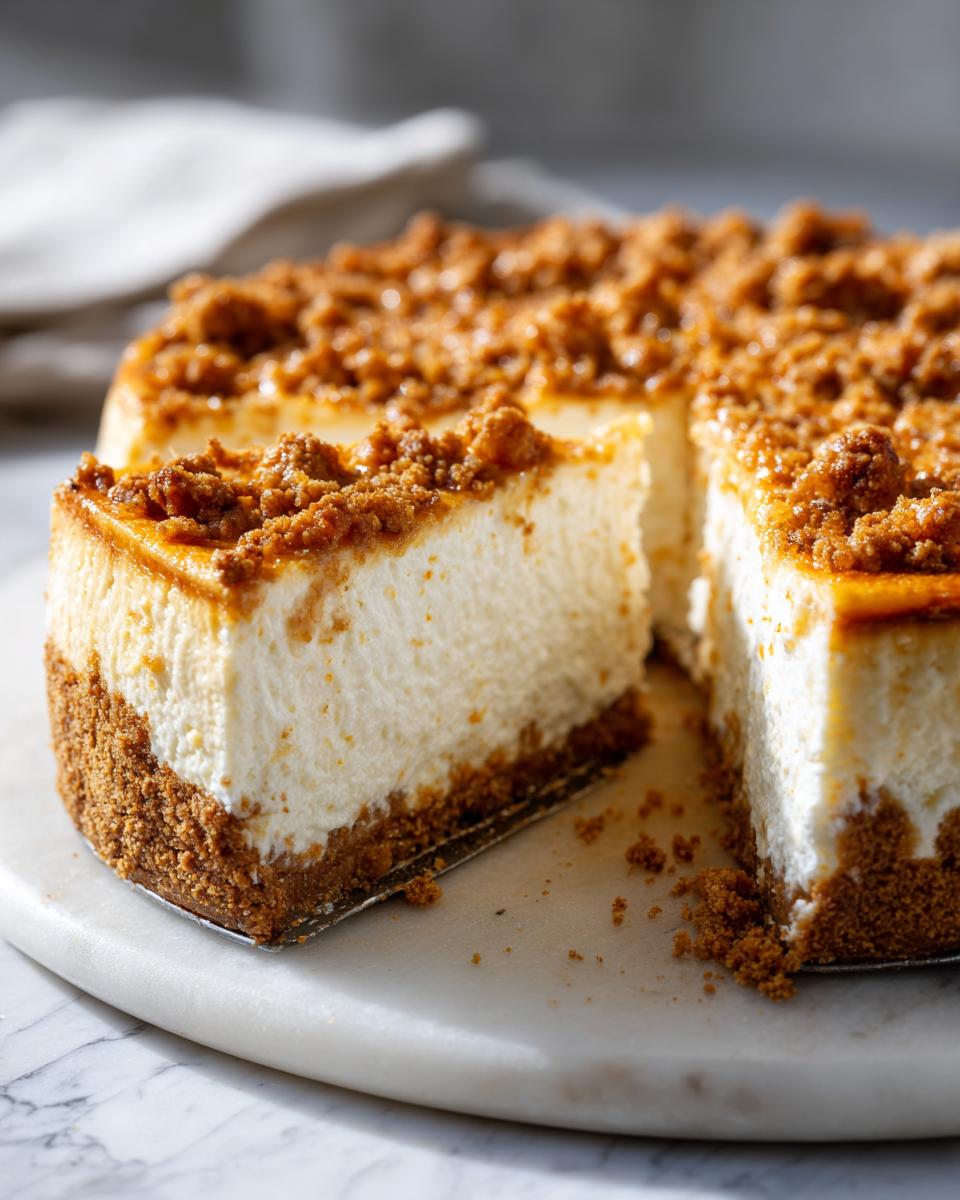
Here’s the best part about this dessert – it actually gets better with time! Once cooled completely, cover it tightly with plastic wrap (press it right against the surface to prevent any weird fridge smells from seeping in) and pop it in the refrigerator. It’ll keep beautifully for up to 2 days – perfect for getting ahead of Thanksgiving madness!
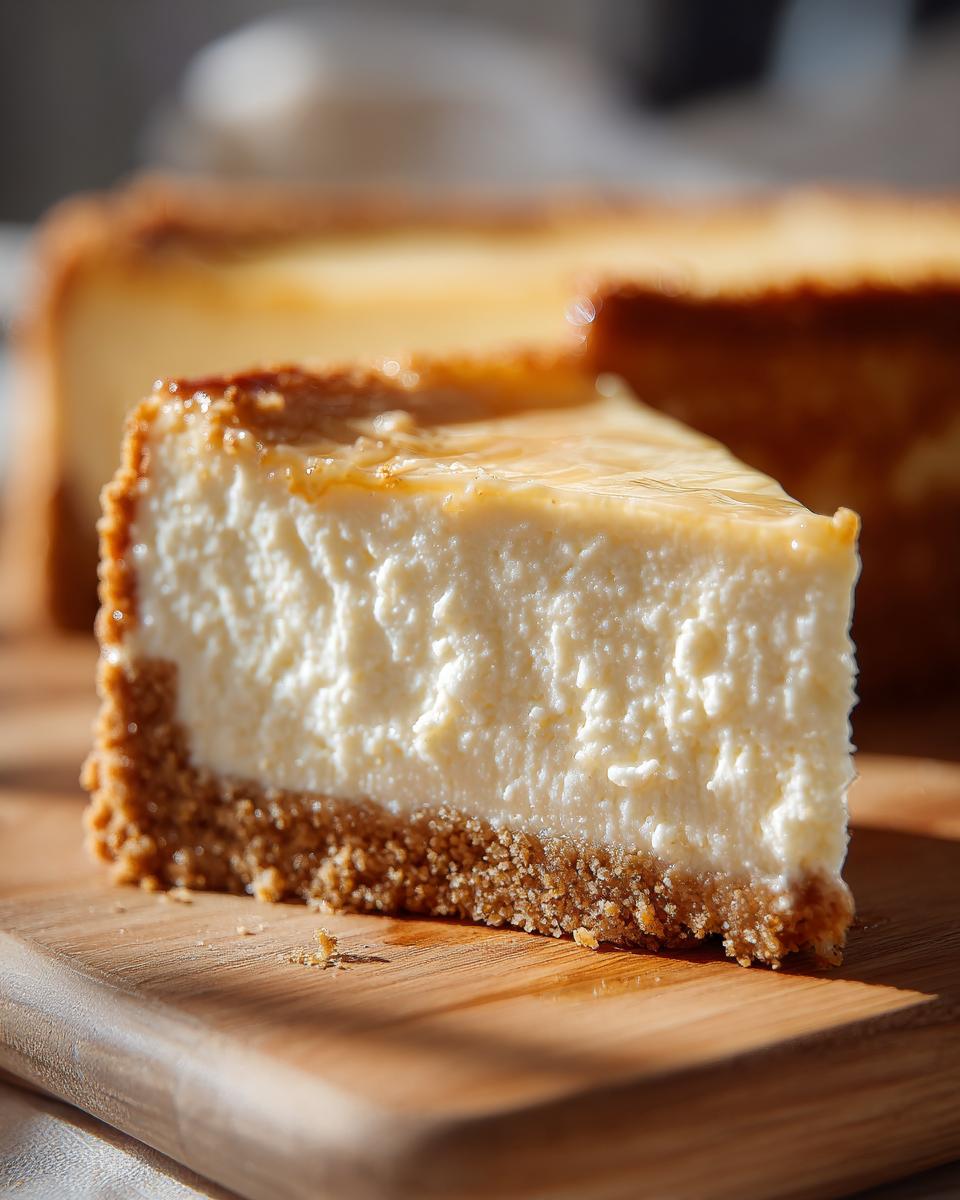
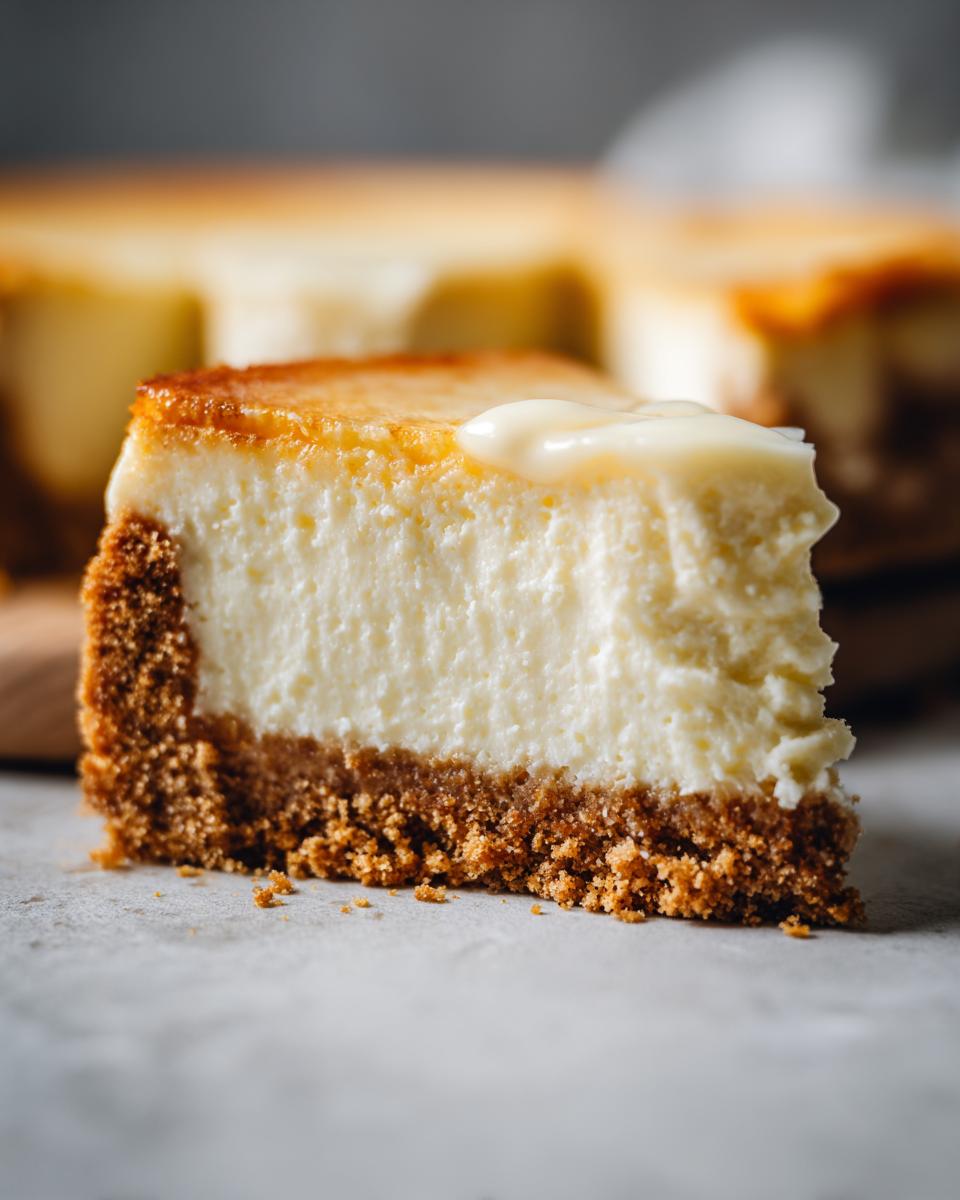
When it’s showtime, I like to let it sit at room temperature for about 15 minutes before serving. That slight chill-off makes the texture absolutely perfect – creamy but not cold. Slice it with a sharp knife dipped in hot water for clean cuts (wiping between each slice). Top with fresh whipped cream or berries if you’re feeling fancy, but honestly? It’s spectacular just as is!
Nutritional Information for Make-Ahead Thanksgiving Desserts
Okay, let’s talk numbers – but remember, these are just estimates! Your exact counts might vary depending on your ingredients (like if you use full-fat vs reduced-fat cream cheese). Here’s the scoop for one generous slice:
- 350 calories (worth every single one!)
- 25g fat (15g saturated – it’s a holiday, live a little!)
- 30g carbs (including 25g sugar – it’s dessert after all)
- 5g protein (who knew cheesecake could be kinda sorta nutritious?)
Now, I’m no nutritionist – these numbers come from my trusty calculator and lots of label-reading. If you’re watching specific dietary needs, definitely double-check with your own ingredients. But let’s be real – on Thanksgiving, we’re all about that « treat yourself » mentality!
Frequently Asked Questions About Make-Ahead Thanksgiving Desserts
Can I freeze this dessert?
Absolutely! Wrap individual slices tightly in plastic wrap, then foil, and freeze for up to a month. Thaw overnight in the fridge when you’re ready to serve. The texture stays surprisingly creamy – I actually froze some last year for a Friendsgiving and everyone swore it was freshly made!
How far in advance can I make it?
Sweet spot is 1-2 days before Thanksgiving. It gives the flavors time to develop without the crust getting soggy. I once made it three days ahead, and while still delicious, the crust had lost some of its crispness. If you must prep earlier, bake and freeze it!
Can I use a different crust?
Of course! The graham cracker crust is classic, but crushed gingersnaps or vanilla wafers make awesome alternatives. My cousin swears by chocolate cookie crumbs for a decadent twist. Just keep the same butter ratio – that’s what makes the crust hold together like magic.
Why does my filling crack?
Don’t stress – cracks happen! Usually it’s from overmixing (adding too much air) or cooling too quickly. That’s why we do the « oven crack » method. But here’s a secret: no one will notice once it’s topped with berries or whipped cream! My family actually calls the cracks « flavor pockets » now.
Can I make it dairy-free?
I’ve had good results with vegan cream cheese alternatives for dairy-free guests. The texture is slightly different but still yummy. For the crust, coconut oil works instead of butter. Just know it’ll have a subtle coconut flavor that some people (like me!) actually love!
Make-Ahead Thanksgiving Desserts to Save Your Sanity
Ingrédients
Equipment
Method
- Preheat oven to 325°F (165°C).
- Mix graham cracker crumbs, sugar, and melted butter in a bowl. Press into the bottom of a baking dish.
- Beat cream cheese and sugar until smooth. Add eggs one at a time, then vanilla.
- Pour filling over crust. Bake for 45 minutes or until set.
- Cool completely, then refrigerate for at least 4 hours before serving.