You know those mornings when you’re scrambling to pack lunch while simultaneously brushing your teeth and answering work emails? That was me every single weekday until I discovered the magic of mason jar taco salads. I swear, this little jar changed my lunch game completely! It’s my secret weapon for busy weeks – just grab and go when I’m running out the door. The best part? All those fresh, crunchy veggies stay perfectly crisp, and the tangy dressing coats everything just right when you give it a good shake. Trust me, once you try this mason jar taco salad, you’ll never go back to sad desk lunches again.
Why You’ll Love This Mason Jar Taco Salad
Listen, I’m not exaggerating when I say this taco salad in a jar is life-changing. Here’s why it’s been my go-to lunch for three summers straight:
- Grab-and-go perfection: I toss it in my bag without worrying about spills – the lid locks tight! Perfect for picnics, work, or eating in the car (not that I’ve done that… okay, maybe once).
- Stays crazy fresh: The magic layering means your lettuce stays crisp for days, unlike sad, soggy takeout salads. That first crunchy bite always makes me do a little happy dance.
- Your rules, your salad: More beans? Extra cheese? Skip the onions? I’ve made this about a hundred different ways and it’s delicious every single time.
- Faster than drive-thru: I prep five jars on Sunday while my coffee brews. Boom – lunches for the whole week that actually taste homemade!
Seriously, it’s the kind of recipe that makes you feel like you’ve got your life together – even when you totally don’t!
Ingredients for Mason Jar Taco Salad
Okay, let’s talk ingredients! The beauty of this mason jar taco salad is how simple everything is – just fresh, flavorful stuff you probably already have in your kitchen. I like to divide everything into two groups because, let’s be honest, that dressing is what makes this salad sing!
For the Salad
- 1/4 cup black beans (rinsed and drained – trust me, you don’t want that canned liquid!)
- 1/4 cup corn kernels (I use frozen corn straight from the bag – no thawing needed!)
- 1/4 cup cherry tomatoes, halved (the little pop of sweetness is everything)
- 1/4 cup diced bell pepper (any color works, but I’m partial to red for extra crunch)
- 2 tbsp finely chopped red onion (soak in cold water for 5 minutes if you want to tame the bite)
- 1/4 cup shredded lettuce (iceberg stays crispest, but romaine works too)
- 1/4 cup shredded cheddar cheese (or go wild with pepper jack!)
- 1 tbsp chopped fresh cilantro (don’t skip this – it’s the flavor booster!)
For the Dressing
- 2 tbsp sour cream (Greek yogurt works in a pinch)
- 1 tbsp fresh lime juice (bottled works, but fresh is SO much better)
- 1/2 tsp taco seasoning (I use my homemade blend, but store-bought is fine)
See? Nothing fancy, just good ingredients layered up right. The best part is you can eyeball most of this – I certainly do when I’m in a hurry!
How to Make Mason Jar Taco Salad
Alright, let’s get to the fun part – building your mason jar masterpiece! I’ve made this so many times I could probably do it in my sleep, but don’t worry – it’s seriously foolproof. Just follow these simple steps and you’ll have the crispiest, most flavorful taco salad ready to grab whenever hunger strikes.
Preparing the Dressing
First things first – that tangy dressing! Grab a small bowl and whisk together 2 tablespoons of sour cream, 1 tablespoon of fresh lime juice, and 1/2 teaspoon of taco seasoning. I like to use a fork to really blend it smooth – you want all those spices evenly distributed. Taste it (because who can resist?) and add an extra squeeze of lime if you like it zingier!
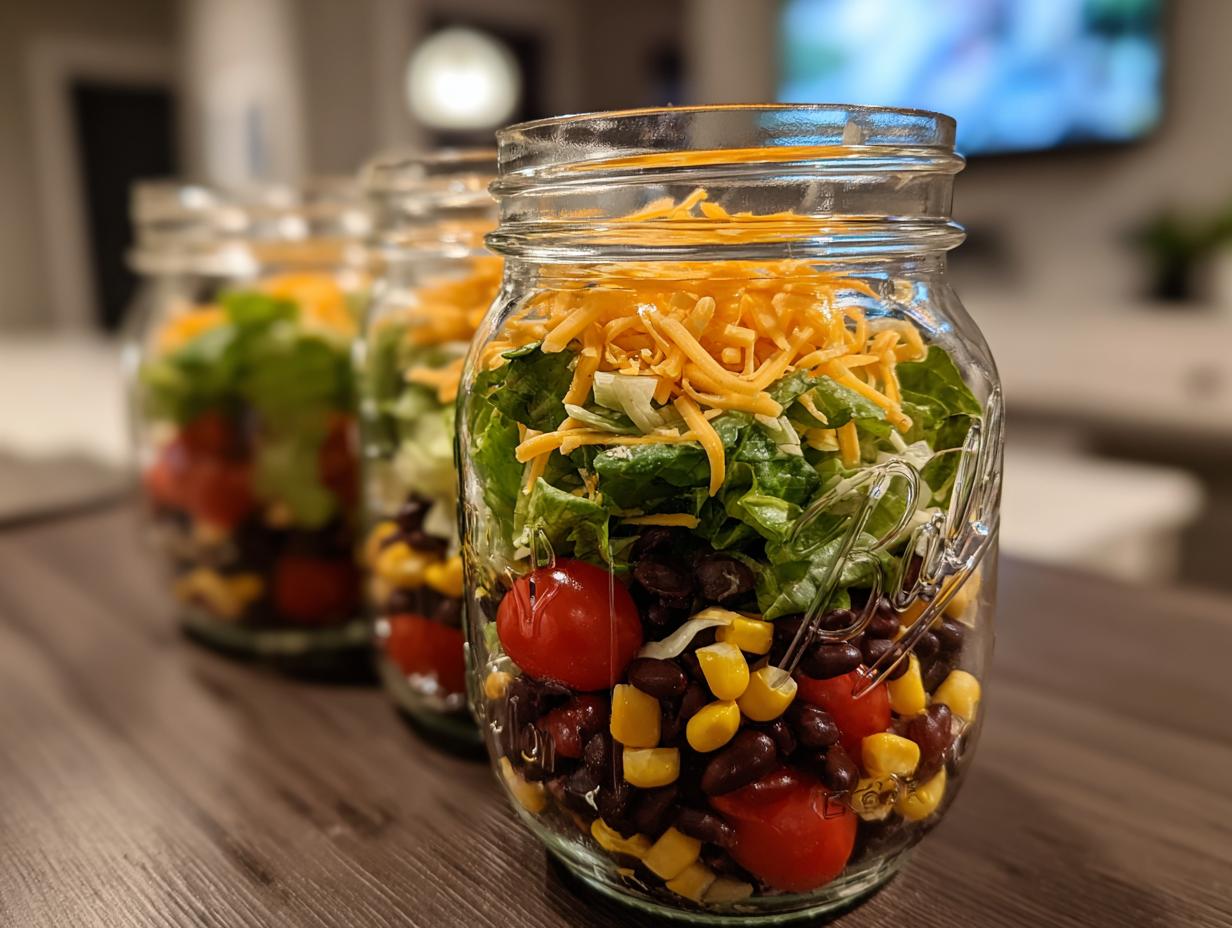
Layering the Mason Jar Taco Salad
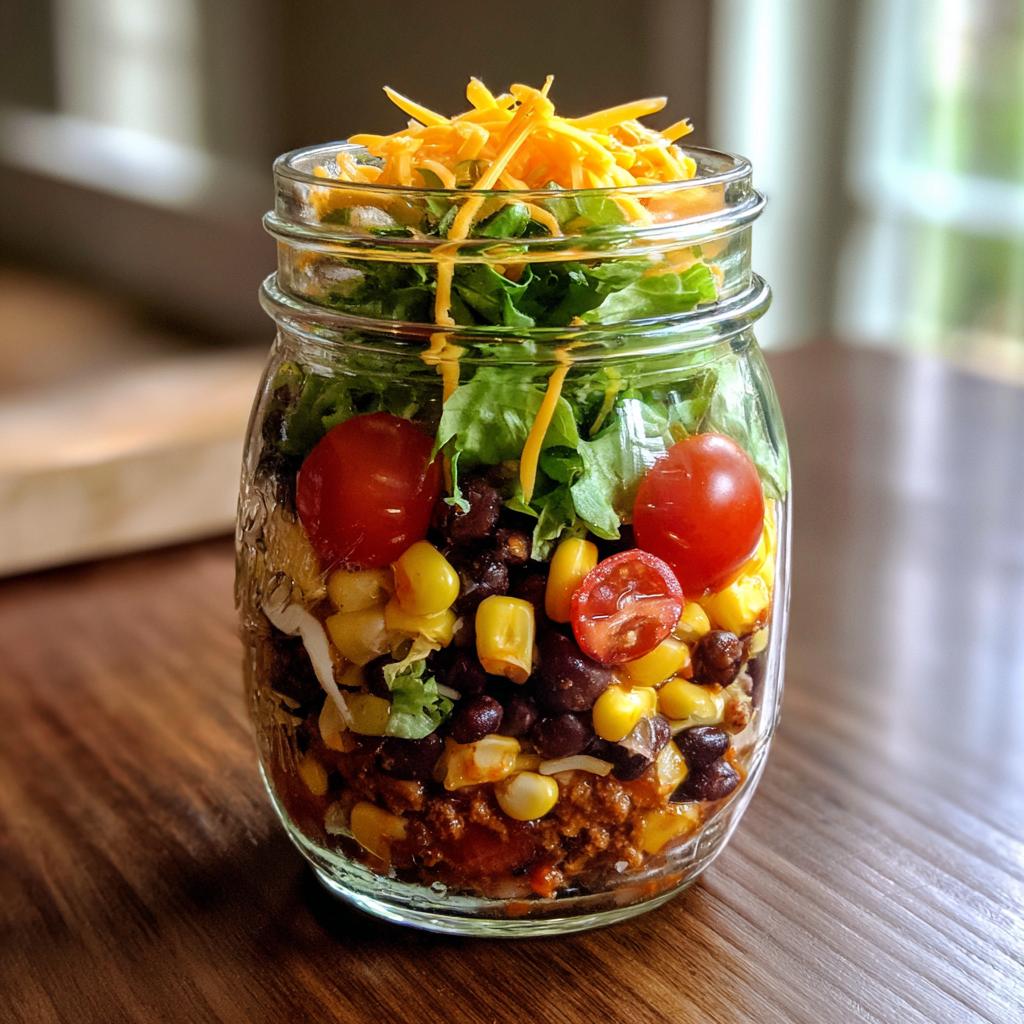
Here’s where the magic happens! Start with your dressing at the very bottom – this keeps everything above it nice and dry. Then pile in your ingredients in this exact order: black beans, corn, tomatoes, bell pepper, red onion, lettuce, cheese, and finally cilantro on top. Pro tip: gently press down each layer with the back of a spoon to fit more goodness in your jar. The tight packing keeps everything from shifting around and makes that perfect « plop » when you dump it out to eat!
Once assembled, screw the lid on tight and pop it in the fridge. These beauties will stay fresh for up to 2 days – though mine never last that long! When you’re ready to eat, just shake the jar like crazy to coat everything with dressing, then either eat straight from the jar or dump it into a bowl. Either way, prepare for flavor fireworks!

Tips for the Best Mason Jar Taco Salad
After making these mason jar taco salads every week for months, I’ve picked up some tricks that take them from good to « oh-my-gosh-I-need-another-bite » amazing. Here are my can’t-live-without tips:
- Pat your veggies dry: I learned this the hard way after a soggy lettuce situation. Give those tomatoes and peppers a quick towel pat – your future crunchy salad will thank you!
- Protein power: Toss in some cooked chicken, ground beef, or even leftover taco meat between the beans and corn layer. It keeps well and makes the salad extra filling.
- Prep party: Chop all your veggies at once and store them in separate containers. Then assembling jars takes about 2 minutes flat – ideal for sleepy Monday mornings!
- Lid trick: Put a small square of parchment under the lid to prevent the metal from reacting with acidic ingredients. No weird metallic taste!
These little hacks make such a difference. Now if only I could figure out how to stop my coworkers from begging to « just try a bite » every time I bring one!
Mason Jar Taco Salad Variations
One of my favorite things about this mason jar taco salad is how easily you can switch it up! Honestly, I don’t think I’ve ever made it exactly the same way twice. Here are some of my go-to twists when I’m feeling adventurous:
- Creamy swap: Out of sour cream? Greek yogurt works beautifully in the dressing – it’s tangier but just as luscious. Sometimes I do half sour cream, half yogurt for the best of both worlds!
- Cheese please: While cheddar is classic, I love using crumbled queso fresco or pepper jack when I want a little kick. Feta even works for a Mediterranean spin!
- Avocado magic: Add a few chunks of avocado right before eating (it browns if stored). Or blend some into the dressing for ultra-creaminess without the dairy!
The possibilities are endless – that’s why this salad never gets old! What variations will you try first?
Nutritional Information for Mason Jar Taco Salad
Let’s talk numbers – but don’t worry, this isn’t math class! Here’s what you’re getting in each glorious jar of mason jar taco salad (and why I feel so good about eating it all week long):
- 320 calories – Just enough to keep you full without that mid-afternoon slump
- 35g carbs – Mostly from all those fantastic veggies and beans
- 12g protein – Between the cheese and black beans, it’s got staying power
- 15g fat (7g saturated) – Thanks to that creamy dressing and cheddar
- 8g fiber – Your gut will love all these plant-based goodies!
Now remember, these numbers are estimates based on my exact ingredients. Your counts might dance around a bit depending on your cheese choices or if you add extra goodies (no judgment here!). But one thing’s for sure – it’s way better for you than that drive-thru lunch you were eyeing!
FAQs About Mason Jar Taco Salad
I get asked about my mason jar taco salad all the time – here are the questions that pop up most often with my real-life tested answers!
Can I make mason jar taco salads ahead of time?
Absolutely! That’s the whole beauty of them. I prep 4-5 on Sunday nights and they stay perfectly crisp until Wednesday. Just hold off adding any avocado or really delicate greens until you’re ready to eat.
How long do these salads actually last in the fridge?
In my experience, 2 days is the sweet spot for peak freshness. The lettuce might start wilting by day 3, though the beans and corn are still good. Pro tip: mark your jars with washi tape so you remember which ones to eat first!
Can I add meat to my mason jar taco salad?
Oh heck yes! Cooked chicken, ground beef, or even shrimp work great. Just add about 1/4 cup between the beans and corn layer. If using ground meat, pat it dry first so extra grease doesn’t make everything soggy. Leftover taco meat is perfect!
Mason Jar Taco Salad
Ingrédients
Method
- In a small bowl, mix sour cream, lime juice, and taco seasoning to make the dressing.
- Layer the ingredients in a mason jar in this order: dressing, black beans, corn, cherry tomatoes, bell pepper, red onion, lettuce, cheese, and cilantro.
- Seal the jar and refrigerate until ready to eat. Shake well before serving.