
There’s something magical about a perfectly made ham and cheese sandwich – that golden crunch, the melty cheese, the crisp lettuce. It takes me right back to childhood summers when my mom would let me assemble my own lunch. This classic combo remains one of my go-to sandwich recipes when I need something quick, satisfying, and packed with flavor in just minutes. Whether it’s a rushed lunch break or a lazy weekend snack, this sandwich never disappoints.

Why You’ll Love This Sandwich Recipe
Listen, I make this ham and cheese sandwich at least twice a week – and here’s why you will too:
- It’s lightning fast – Seriously, you’ll be eating in under 7 minutes flat. Perfect for those « I forgot to pack lunch » emergencies.
- Foolproof deliciousness – The combo of melty cheese, salty ham, and crisp veggies? Absolute perfection every single time.
- Your sandwich, your rules – Swap the cheese, add pickles, throw in some avocado – it’s endlessly customizable.
- That satisfying crunch – When toasted just right, the bread gets this golden crispness that makes it irresistible.
Honestly, this sandwich has saved me from countless hangry moments. It’s the little black dress of sandwich recipes – simple, reliable, and always hits the spot.
Ingredients for Your Classic Ham and Cheese Sandwich
Okay, let’s talk ingredients – and I mean the good stuff! Here’s what you’ll need for one seriously satisfying sandwich (but trust me, you’ll probably want to make two). I’ll tell you exactly what works best, honed from years of sandwich-making experiments in my kitchen:
- 2 slices of bread – I usually go for white or whole wheat, whatever’s fresh. Just don’t use the heel piece – that’s sandwich sacrilege in my book!
- 2 slices of ham – The good stuff, please! I splurge on the thick-cut honey baked kind when I can.
- 1 slice of cheese – Cheddar’s classic, but Swiss makes it fancy. And yes, one slice is plenty – you want balance here.
- 1 leaf of lettuce – Iceberg for crunch or butter lettuce for tenderness. Just make sure it’s crisp – no sad, wilted greens!
- 2 slices of tomato – Ripe but firm, about 1/4 inch thick. Nobody wants watery sandwich syndrome.
- 1 tsp mayonnaise – My secret? Spread it to the edges so every bite has that creamy goodness.
- 1 tsp mustard – Dijon adds zing, but plain yellow works too. Adjust to your taste – I won’t judge!
See? Nothing fancy, but when you combine these simple ingredients with a little love, magic happens. Now let’s get building!
How to Make the Perfect Ham and Cheese Sandwich
Alright, let’s get down to business! Making this sandwich is practically muscle memory for me now – I could do it with my eyes closed (though I don’t recommend that with hot pans involved). Here’s my foolproof method for sandwich perfection:
Step 1: Spread the Condiments
Grab your bread slices and let’s get saucy! Spread mayonnaise on one slice – edge to edge, please – and mustard on the other. Don’t skimp, but don’t drown it either. You want just enough to make every bite flavorful without the bread getting soggy.
Step 2: Layer the Ingredients
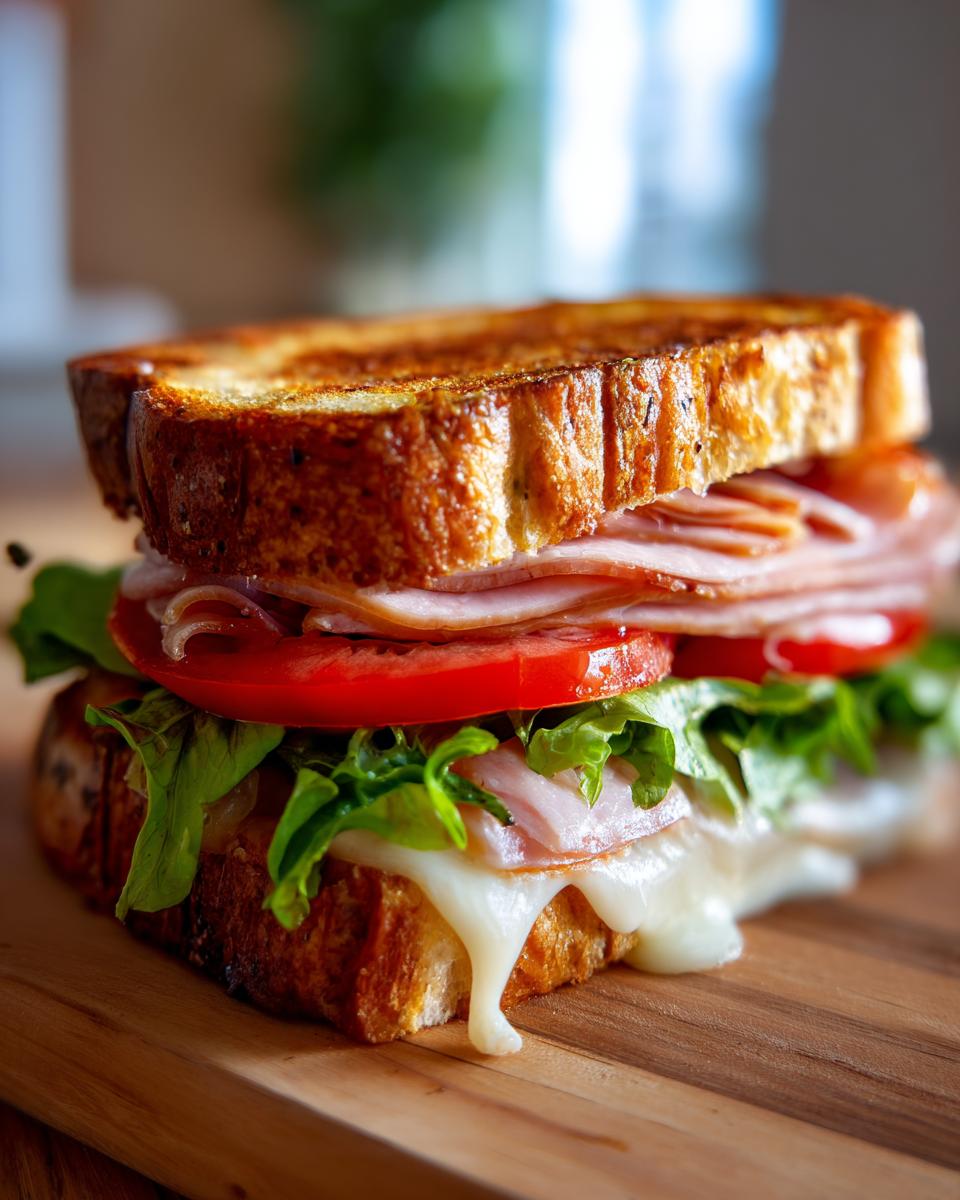
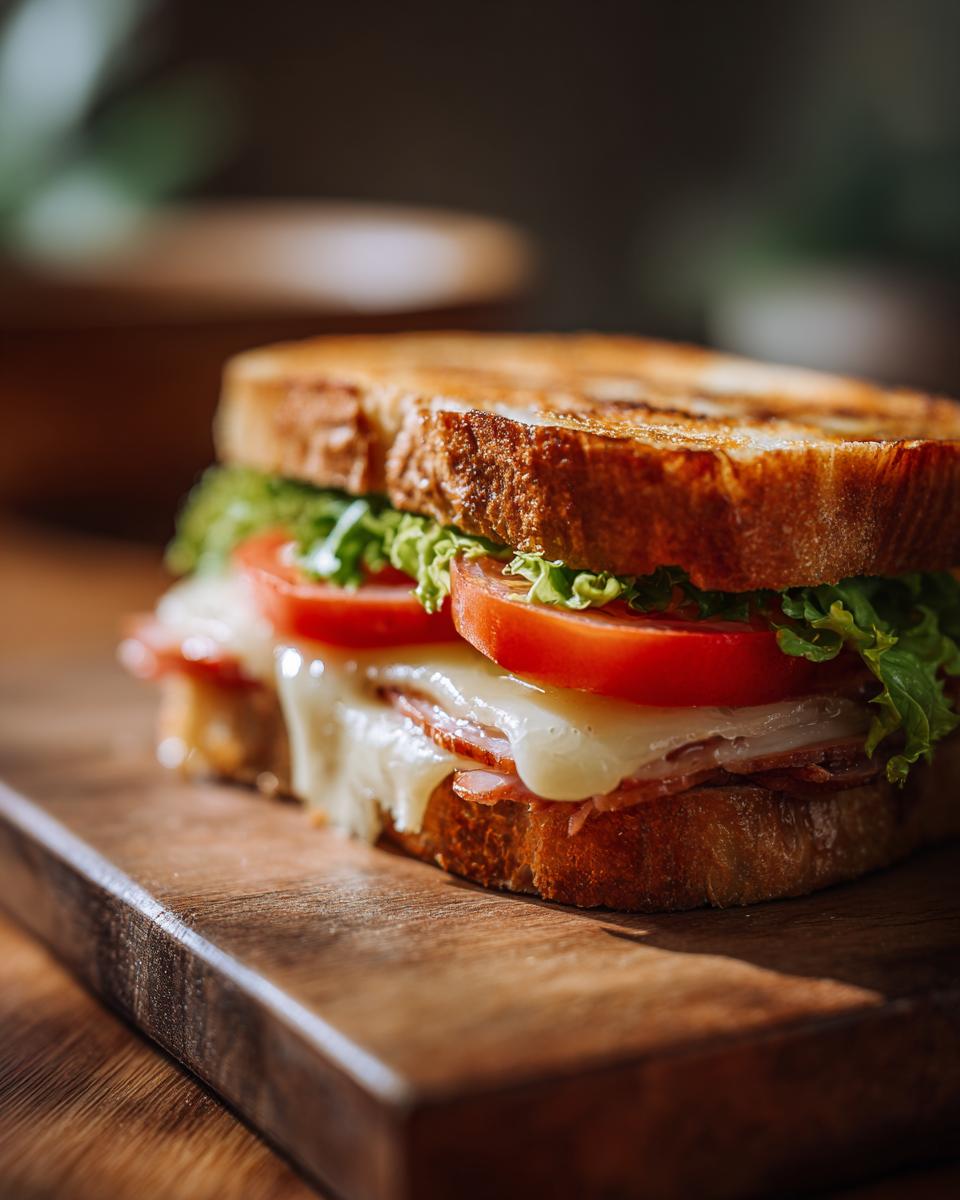
Now the fun part! On the mayo side, layer your ham first – fold those slices so you get nice texture in every bite. Next comes the cheese (I let mine hang slightly over the edge for maximum meltage). Top with lettuce and tomato, arranging them so they’ll cover the whole sandwich. This isn’t just pretty – it means every bite has all the flavors!
Step 3: Toast and Serve
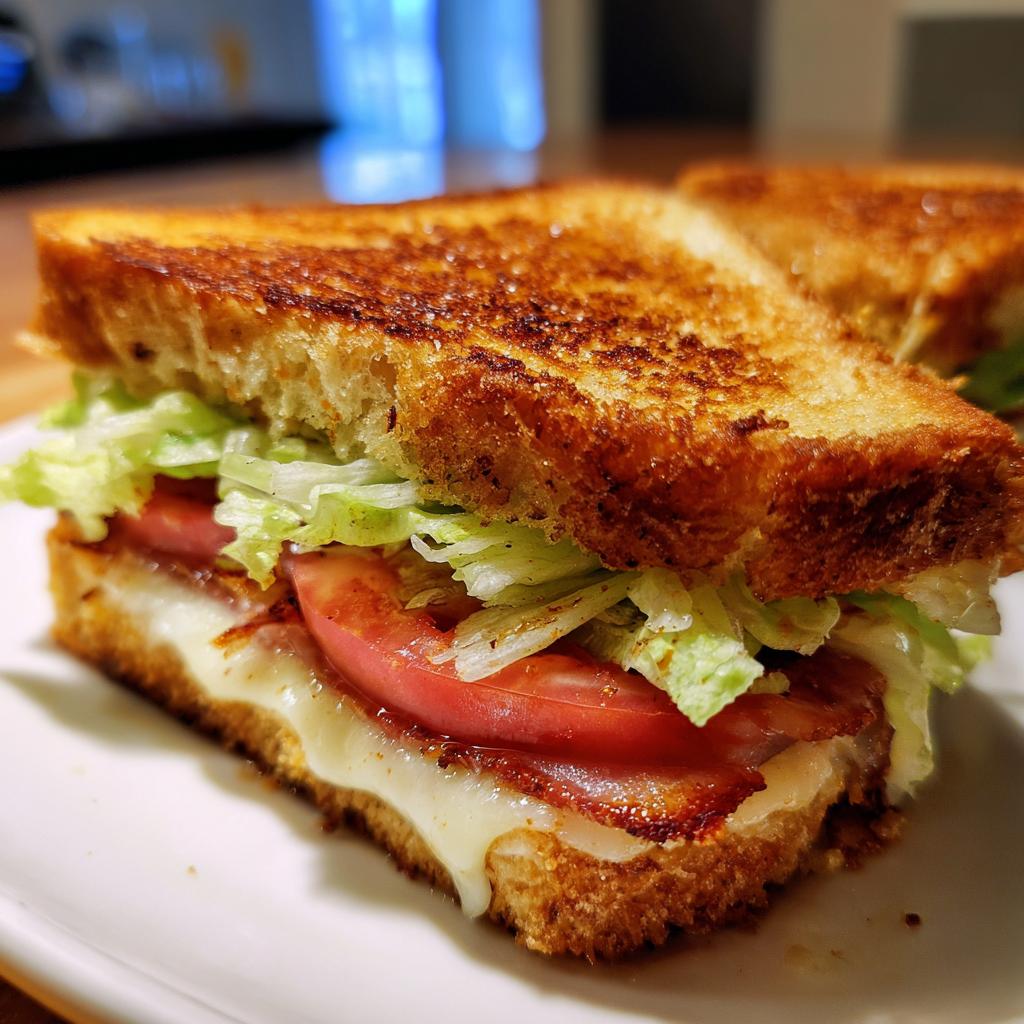
Sandwich assembly complete? Time for the magic! Pop it in your panini press or skillet over medium heat for about 2 minutes per side. You’ll know it’s ready when the cheese starts oozing out the sides and the bread turns golden brown. Let it rest for 30 seconds before cutting – trust me, this prevents all the fillings from escaping! Slice diagonally (because triangles taste better, obviously) and serve immediately while it’s gloriously melty.
Tips for the Best Sandwich Recipes
After years of sandwich-making trial and error (and many, many lunches), I’ve picked up some tricks that take this ham and cheese from good to « oh wow! » Here are my can’t-live-without tips:
- Let your cheese hang over – Leave about 1/4 inch sticking out beyond the bread. When it melts, you’ll get those crispy, cheesy edges that make life worth living.
- Toast your bread first – Just 30 seconds per side before assembling. This creates a moisture barrier so your sandwich stays crisp even with juicy tomatoes.
- The pickle trick – Tuck a couple pickle slices under the cheese slice. The acidity cuts through the richness perfectly.
- Press it right – If using a skillet, place another pan on top to weigh it down. You’ll get that perfect panini-style compression without squishing all the fillings out.
Oh! And one more thing – always make two. Because once you taste that first perfect bite, you’ll immediately regret not having another ready to go!
Variations to Try with Your Sandwich
Oh, the possibilities! Once you’ve mastered the classic ham and cheese, it’s time to play. Here are my favorite ways to mix it up when I’m feeling adventurous (or just raiding the fridge for inspiration):
- The Fancy French – Swap cheddar for brie, add sliced apple, and drizzle with honey. Trust me, this combo will make you feel like you’re lunching in Paris!
- The Breakfast Club – Fry an egg sunny-side up and tuck it under the cheese. The runny yolk turns this into the most satisfying breakfast sandwich ever.
- The California Dream – Add creamy avocado slices and sprouts for that fresh crunch. Bonus points if you use sourdough bread!
The beauty of sandwich recipes is how easily you can make them your own. Don’t be afraid to experiment – some of my best creations started as happy accidents!
Serving Suggestions for Your Sandwich
Listen, a perfect sandwich deserves perfect company! Here’s my go-to lineup when serving this ham and cheese masterpiece:
- Classic combo – Potato chips (the ruffled kind for max crunch!) and a crisp dill pickle spear. The salty crunch pairs perfectly with that melty cheese.
- Lighter option – A simple side salad with lemon vinaigrette. The bright acidity cuts through the richness beautifully.
- Soup duo – Tomato soup for dipping, obviously. Nothing beats dunking those crispy sandwich corners into creamy tomato goodness!

But honestly? Sometimes I just grab an apple and call it a day. The beauty is in the simplicity!
Nutritional Information
Okay, let’s talk numbers – but don’t worry, I won’t make this boring! Here’s the nutritional breakdown for this glorious ham and cheese sandwich (based on my standard ingredients):
- Calories: About 450 – perfect fuel for your afternoon
- Protein: 25g – thanks to that delicious ham and cheese combo
- Carbs: 35g – just enough to satisfy without weighing you down
- Fat: 22g – because flavor matters!
Remember, these are estimates – your exact numbers might vary depending on your bread thickness or how generous you are with the mayo (no judgment here!). But one thing’s certain: every bite is worth it!
Frequently Asked Questions
Can I use different types of bread for this sandwich?
Absolutely! While I love classic white or wheat, this sandwich shines with sourdough, rye, or even a crusty baguette. Just keep in mind – thicker breads might need extra toasting time to get that perfect golden crunch. My personal favorite? Ciabatta – those air pockets catch all the melty cheese goodness!
How do I store leftovers?
Honestly, this sandwich is best eaten fresh (that crispy bread texture is everything!). But if you must store it, wrap tightly in foil and refrigerate for up to 24 hours. Reheat in a toaster oven or skillet to bring back some crunch. Pro tip: Store the components separately and assemble fresh if you can!
Can I make this sandwich ahead for lunch?
Here’s my lunch-packing secret: Assemble everything except the tomato and lettuce. Wrap tightly and refrigerate overnight. In the morning, add the fresh veggies and toast at work if possible. The mayo acts as a moisture barrier so the bread doesn’t get soggy. Works like a charm!
What’s the best cheese to use?
While cheddar and Swiss are classics, don’t be afraid to experiment! Pepper jack adds a nice kick, provolone melts beautifully, and gruyère makes it fancy. My rule? Choose a cheese that melts well and complements the ham’s saltiness. Just avoid pre-shredded cheeses – they don’t melt as smoothly!
Can I make this without a panini press?
Of course! A heavy skillet works perfectly – just press down with another pan or spatula while cooking. No weights? No problem! I’ve used cans of beans or my teakettle in a pinch. The key is medium heat and patience – about 2 minutes per side should do the trick.
Classic Ham and Cheese Sandwich
Ingrédients
Equipment
Method
- Spread mayonnaise on one slice of bread and mustard on the other.
- Layer ham, cheese, lettuce, and tomato on one slice of bread.
- Top with the second slice of bread.
- Toast in a panini press or skillet until cheese melts and bread is golden.
- Cut in half and serve immediately.